Subway tile is the design equivalent of a clean white T-shirt: it goes with everything, looks classy in photos, and somehow survives every trend cycle. Best part? You can get that “custom kitchen” vibe on a very un-custom budgetwithout selling a kidney or learning Latin tile terminology.
In this guide, we’ll break down how to choose easy inexpensive subway tile, where the real costs hide, which layouts look high-end, and how to install a subway tile backsplash (or bathroom wall) in a way that won’t haunt you every time the sunlight hits the grout lines.
Why subway tile is the MVP of “looks expensive, costs… surprisingly little”
Subway tile became popular for a reason: it’s simple, durable, and forgiving. The classic shape (often 3×6) works in modern, farmhouse, traditional, and “I don’t know my style but I do know I hate my current backsplash” homes.
The “inexpensive” part comes from how widely available it is. Because subway tile is mass-produced and sold everywhere, you can often find budget-friendly ceramic options for a fraction of what specialty tiles costespecially if you stick to standard sizes and finishes.
How inexpensive can it really be? A realistic budget breakdown
Let’s do the honest math. Most people focus on tile price per square foot, then get surprised by the “supporting cast”: mortar, grout, tools, trim, and the random extra trip to the store because you underestimated how many spacers fit in a human hand.
Typical budget categories (backsplash-sized project)
- Tile: Often the cheapest line item if you choose standard ceramic subway tile.
- Adhesive: Thinset mortar (common) or mastic (often used for backsplashes).
- Grout: Sanded vs. unsanded depends on joint width (more on that soon).
- Spacers + leveling help: Keeps rows straight and prevents “tile slump.”
- Trim/edge finish: Optional, but it makes your work look intentional instead of “it ends… here… because.”
- Tools: Notched trowel, float, sponge, bucket, and a cutter (or rental).
- Sealant/caulk: Especially at corners and changes of plane.
Example: a small kitchen backsplash
Imagine a 30 sq. ft. backsplash (pretty common behind a range + a stretch of counter). With standard tile, your tile might be shockingly affordable. Add 10% overage for cuts and “oops,” and you’re still usually in the “this is cheaper than a weekend getaway” zone.
Where budgets expand is tools and finishing supplies. If you already own a cutter or can borrow one, you’ll save a lot. If you need to buy everything from scratch, plan for the project to cost more than just the tilestill often dramatically less than hiring it out.
Picking budget subway tile like a pro (without becoming a tile snob)
1) Material: ceramic vs. porcelain vs. “why is this tile the price of a used car?”
For most budget kitchen backsplash projects, ceramic subway tile is the sweet spot: easy to cut, widely available, and typically cheaper than porcelain. Porcelain can be denser and more water-resistant, but it often costs more and can be tougher to cut cleanly.
If you’re tiling a shower wall or a high-moisture zone, you’ll want to be pickier about materials and installation methods. For a standard kitchen backsplash (not a steam room), basic ceramic is usually perfectly practical.
2) Finish: glossy vs. matte (aka “how much do you enjoy wiping fingerprints?”)
Glossy white subway tile is popular because it bounces light and feels fresh. It can also show smudges, especially behind the coffee station. Matte finishes hide fingerprints better but can show grout haze if you rush cleanup. Either can be greatjust decide what kind of maintenance annoyance you prefer. (We all have a brand.)
3) Size and edge style: keep it standard to keep it cheap
Standard sizes like 3×6 (and close cousins like 2×8 or 4×12) tend to be less expensive and easier to source. Specialty shapeshandmade edges, ultra-irregular textures, rare colorsare where budgets go to do cartwheels.
4) Don’t ignore tile “variation”
Even inexpensive tile can look high-end if you plan for variation. Some budget tiles have slight differences in tone. That can read as charming and dimensionalunless you accidentally cluster all the darker tiles in one corner like a tile thunderstorm. Mix from multiple boxes as you install to keep it even.
Budget-friendly layouts that don’t look budget
The same inexpensive tile can look “builder basic” or “designer intentional” depending on the pattern. Layout is your free upgrade.
Classic running bond (offset brick pattern)
This is the standard subway tile look. It’s popular because it works, it hides tiny imperfections, and it’s easy for beginners. If you want timeless, start here.
Stacked (straight grid)
A straight stack instantly modernizes subway tile. It can look crisp and contemporary, but it also shows crooked walls faster. If your wall is wavy (many are), you’ll need careful layout and maybe a little emotional resilience.
Vertical stack
Turn the tile vertical to make ceilings feel taller. It’s a subtle trick that looks fresh without getting complicated. Also: fewer people do it, so it feels more custom while still using the same affordable tile.
Herringbone (pretty, but not always “easy”)
Herringbone can look stunning, but it usually means more cuts, more measuring, and more chances to mutter “how is this not symmetrical?” If you’re doing your first DIY backsplash and want “easy,” consider saving herringbone for your second projectwhen confidence is higher and patience is stocked.
Grout color: the cheapest way to change the whole vibe
Grout can make the tile look seamless and calm (matching grout) or graphic and bold (contrasting grout). If you want a more timeless look, lean tonal. If you want drama, contrast can deliverbut it also highlights every line and every tiny misalignment. Choose your adventure.
DIY install, simplified: a weekend subway tile plan that actually works
There are a lot of ways to tile. Some are “professional best practice,” and some are “it’s midnight and I just want the wall covered.” Here’s a beginner-friendly approach that balances ease, cost, and results.
Step 1: Measure, then buy with a little overage
Measure the square footage, then add 10% extra for cuts, outlets, and mistakes. If your layout is complicated (lots of corners, windows, or herringbone), bump that overage higher.
Step 2: Prep the wall like you mean it
- Remove outlet covers and turn off power to outlets you’ll work around.
- Clean the wallgrease and dust are not “bonding agents,” no matter how optimistic you are.
- Patch and sand obvious damage so tiles sit flat.
Step 3: Plan your layout (this is where “cheap” becomes “chef’s kiss”)
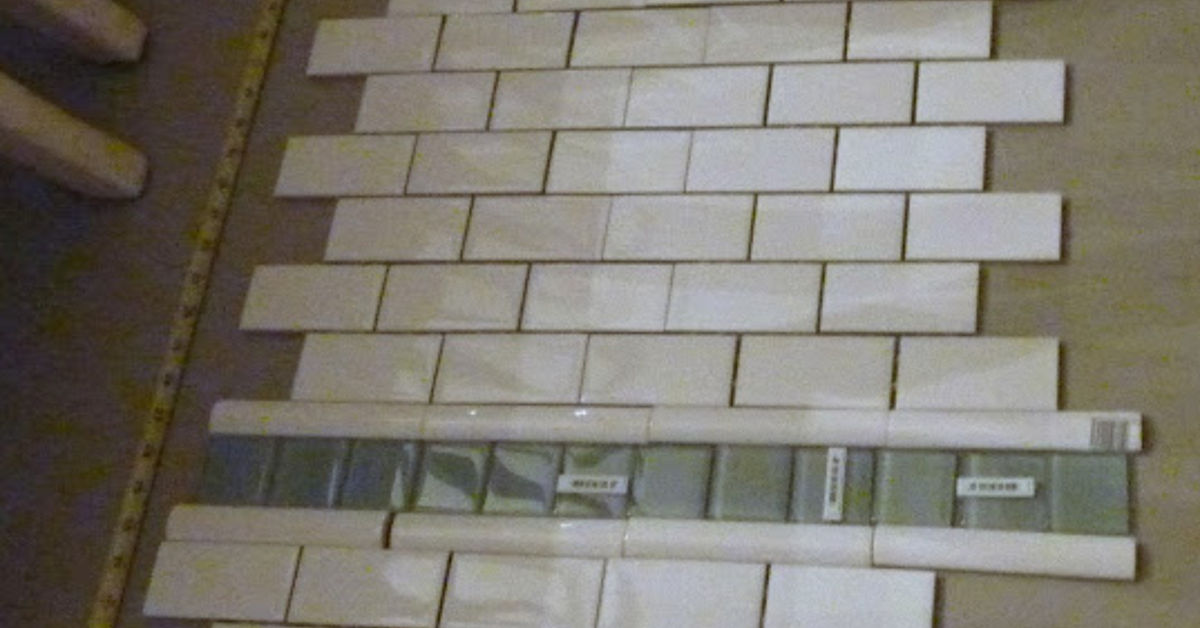
Dry-lay a row or two (on the counter or floor) to see where cuts land. Aim to avoid tiny slivers at the ends. Centering the layout often looks bestespecially behind a focal point like a stove.
Step 4: Use a level reference line (because walls are liars)
Many DIYers use a ledger board or a straight reference line to keep the first row perfectly level. If the first row is off, every row above it becomes a staircase to regret.
Step 5: Apply adhesive in small sections
Whether you use thinset mortar or mastic, work in manageable areas so it doesn’t skin over before tile goes up. Use the recommended trowel notch size for your tile and wall condition. Press tile in firmly with a slight wiggle to get good coverage.
Step 6: Spacers are your friends (and they prevent tile “slide”)
Backsplash tile is installed vertically, and tiles can slide downward until the adhesive firms up. Spacers help keep grout lines consistent and keep the tile from drifting while you work.
Step 7: Cut cleanly around outlets and edges
For straight cuts, a manual tile cutter is often enough for ceramic subway tile. For tricky cuts (outlets, notches, corners), a wet saw rental can make the job cleaner and faster. The key is patience: measure twice, cut once, then measure again because you don’t trust yourself anymore.
Step 8: Choose the right grout (tiny detail, huge payoff)
Grout choice depends heavily on grout line size: narrow joints (often 1/16″ to 1/8″) typically use unsanded grout, while wider joints (often 1/8″ and up) commonly use sanded grout. Check your tile manufacturer’s guidance and match grout type to joint width to reduce cracking and shrinkage issues.
Step 9: Grout, wipe, repeat (gently)
Push grout into joints with a rubber float, then wipe diagonally with a damp sponge. Don’t over-wash and pull grout out of the lines. You’re aiming for clean tile faces and full jointslike frosting a cake, but less delicious.
Step 10: Caulk changes of plane (corners and transitions)
At inside corners, where tile meets tile, and where tile meets countertop, use an appropriate caulk or silicone rather than grout. Those areas move slightly over time, and flexible sealant helps prevent cracking.
Easy ways to save money without making it look cheap
Use affordable tilethen spend attention (not cash) on the finish
Clean cuts, consistent spacing, and a neat edge treatment look more “expensive” than fancy tile installed sloppily. If you want one upgrade that shows, consider a simple metal edge trim and a grout color that complements your counters.
Choose a forgiving grout line
Super-tight grout lines can look sleek, but they’re less forgiving if tiles aren’t perfectly consistent. A slightly wider grout line can help hide minor tile size variationespecially common in budget tilewhile still looking polished.
Keep the pattern simple if it’s your first time
A classic running bond with well-chosen grout can look high-end and timeless. Fancy patterns can be amazing, but they can also multiply cuts and wastemeaning your “inexpensive” plan becomes “why is my cart total doing that?”
Maintenance: keep it looking new for cheap
- Regular cleaning: Mild soap and water are usually enough for glazed ceramic tile.
- Grout care: Cement-based grouts can be porous and may stain more easily than tile, so clean spills promptly.
- Sealing (if recommended): Some grouts benefit from sealingfollow product instructions for timing and reapplication.
- Skip harsh abrasives: They can dull some finishes and wear grout faster.
Common mistakes that turn “budget-friendly” into “budget redo”
- Skipping layout planning: Leads to awkward slivers and off-center focal areas.
- Starting crooked: If the first row isn’t level, everything above it will broadcast that fact loudly.
- Wrong grout type: Using the wrong grout for the joint width can increase cracking or poor performance.
- Grouting corners: Corners and transitions often need flexible sealant, not grout.
- Over-washing grout: You can weaken joints by scrubbing too early or too aggressively.
Real-world experiences: what people learn after installing easy inexpensive subway tile
If you read enough DIY recaps, you start noticing the same “aha” moments popping upregardless of whether the installer is a brave first-timer or someone who owns three levels and calls them by name. Here are the most common experiences people report after tackling an easy inexpensive subway tile project, plus a few practical lessons you can steal for free (the best price).
1) The wall is rarely as flat as you think. On day one, many DIYers assume the tile will magically create a perfectly straight surface. Then the first row goes up and suddenly you’re learning about “bows,” “humps,” and “why is that corner doing that?” The fix usually isn’t expensiveit’s strategic. People often find that using a level reference line (and taking extra time to adjust the first row) solves most of the drama. A tiny shim here, a slightly thicker mortar bed there, and the rest of the field tile behaves. The emotional takeaway: the first row is not the time to rush. It’s the time to become weirdly patient.
2) Spacers aren’t optional, they’re sanity. Subway tile looks simple, which tricks beginners into thinking they can “eyeball it.” That’s a trap. Real-life stories tend to go like this: “I started eyeballing… then I bought spacers… then my lines stopped looking like they were drawn by a squirrel.” On a vertical surface, spacers also help prevent tile from sliding while the adhesive cures. People who use spacers early usually finish faster because they spend less time correcting drift later.
3) Cutting around outlets is the boss level. Even when everything else feels easy, outlets and switches can slow a project down. DIYers often say the cuts aren’t hard in a technical sensethey’re just picky. Measuring carefully, marking clearly, and doing test fits can save you from that classic moment where a tile is cut beautifully… for the wrong side. The most repeated advice is simple: label tiles, keep them in order, and don’t try to cut five at once when you’re tired. Tiling while exhausted is how you create “modern art” openings that no cover plate can hide.
4) Grout changes everythingespecially your confidence. People frequently describe the “ugly phase” between tile installation and grout as mildly terrifying. The tile looks stark, the gaps look huge, and you start wondering if you’ve ruined your kitchen. Then grout goes in and suddenly it looks finished. Many DIYers say choosing a grout color that’s close to the tile color helps make minor alignment imperfections disappear, while contrasting grout makes the pattern pop but highlights every line. In other words, grout is both a design tool and a truth serum. Choose accordingly.
5) The cheapest tile can still look premium if the finish details are clean. This is the most encouraging lesson: lots of people use basic ceramic subway tile and end up with results that look legitimately custom. The difference isn’t usually the tile priceit’s the execution: straight lines, consistent spacing, neat caulk at corners, and a clean edge termination. Even a simple metal trim can make a budget backsplash look “done,” not “stopped.” A common post-project reflection is, “I’m glad I didn’t splurge on fancy tile, because the install quality is what I notice every day.”
6) Budget projects are won with planning, not perfection. The best DIY experiences tend to include a little buffer: extra tile for mistakes, extra time for drying, and a willingness to redo one row if it’s off. People who plan a realistic weekend scheduleprep day, tile day, grout dayoften enjoy the process more. People who try to do it all in one marathon session often finish… but also swear off tile forever. The tile doesn’t care about your timeline. It cares about the cure time.
Bottom line: “easy” doesn’t mean “mindless.” But it can absolutely mean “doable.” With inexpensive subway tile, the materials can be budget-friendly, and the results can look high-endespecially when you borrow the lessons others learned the hard way.
Conclusion
If you want a classic look that’s genuinely achievable on a budget, subway tile is still one of the smartest plays. Keep the tile simple, be intentional about layout, pick the right grout for your joint width, and treat corners like the moving, flexing places they are. Do that, and your DIY tile backsplash can look polished, practical, and “how did you afford this?”even if the answer is: “I didn’t. I just measured twice and used spacers like a responsible adult.”