If you’ve ever watched a bodybuilder “hollow out” their midsection and thought, “Is that legal?” you’ve seen a stomach vacuum. Despite the name, it doesn’t involve a household appliance or yelling “where’s the filter?” It’s a deep-core exercise that teaches you how to recruit your transverse abdominis (TVA), the corset-like muscle that wraps around your abdomen and helps support your spine and pelvis.
Done well, the stomach vacuum exercise improves core control and posture and can be a smart accessory for training, rehab-style core work, or bodybuilding posing. Done badly, it becomes “aggressive sucking-in,” a move that mostly trains breath-holding and the ability to look uncomfortable while standing in line at Target. Let’s get the first version.
What the stomach vacuum is (and what it isn’t)
The stomach vacuum is an isometric contractionyou create tension without moving your trunk. You exhale, then gently draw your lower abdomen inward (navel toward spine) to engage the TVA and deep-core helpers (including the diaphragm and pelvic floor). The goal is control, not maximal strain.
It’s not a belly-fat “hack”
Vacuum training may improve muscle tone and posture, which can change how your waistline appears. But it doesn’t spot-reduce fat. If your goal is a leaner midsection, pair core training with a nutrition plan, full-body strength work, daily movement, and good sleep.
It’s also not the same as bracing
For heavy lifting, coaches often cue abdominal bracinga firm, 360-degree “cylinder” of tension around your trunk. The vacuum (also called abdominal hollowing or the abdominal drawing-in maneuver) is more selective and subtle. Think of the vacuum as learning fine motor control; bracing is turning on the whole “core team” when the load gets serious.
Why people do it: realistic benefits
- Better deep-core awareness: The TVA is hard to “find.” The vacuum gives you a simple way to practice recruiting it.
- Improved trunk support: Deep-core control can contribute to better spinal and pelvic stability during everyday movement and exercise.
- Posture polish: When your rib cage and pelvis stack more neatly, you tend to look and feel taller and more aligned.
- Breath-core coordination: Learning to keep tension while breathing is a skill that carries over to training and daily life.
You’ll see stomach vacuums used in physical therapy-style core retraining, in bodybuilding (as a posing skill and midsection control drill), and in breathwork-focused practices. The “why” varies, but the “how” stays the same: gentle control, clean breathing, consistent practice.
Safety first: who should be careful
For most healthy adults, stomach vacuums are low-impact. Still, it’s a breath-and-pressure exercise, so use common sense and get medical guidance if needed.
Check with a clinician first if you have:
- Pregnancy, or you’re early postpartum and unsure what’s appropriate for healing
- Known hernias (inguinal, umbilical, hiatal) or significant pelvic organ prolapse concerns
- Uncontrolled high blood pressure, serious heart disease, glaucoma, or conditions where breath-holding/pressure spikes are a problem
- Recent abdominal surgery, or persistent abdominal/pelvic pain
- Stomach/intestinal ulcers or other conditions aggravated by abdominal pressure
Stop immediately if you feel dizzy, lightheaded, sharp pain, or strong pelvic pressure. Most beginners should not chase long breath holds. The win is “I can breathe and stay controlled,” not “I can turn beet-red for 45 seconds.”
Also: don’t do this right after a big meal unless you enjoy feeling like your lunch is filing a formal complaint.
How to do the stomach vacuum exercise (step-by-step)
The easiest way to learn is usually lying on your back, because gravity isn’t fighting you as much. Your mission: pull the lower belly in without crunching, rib-flaring, or clenching everything else.
Beginner version: Supine (lying on your back)
- Set up: Lie on your back with knees bent and feet flat, hip-width apart. Relax your shoulders and neck. Find a comfortable neutral pelvis (not aggressively tucked, not over-arched).
- Inhale: Breathe in through your nose. Let your ribs expand softly. Your belly can moveno need to “hold it in.”
- Exhale fully: Breathe out through pursed lips, slowly emptying your lungs.
- Draw in gently: At the end of the exhale, pull your lower abdomen inward as if you’re “zipping up” tight jeans. Think: navel toward spine, lower abs tightening like a belt.
- Hold and breathe: Hold 5–10 seconds while taking small, quiet breaths. If breathing makes you lose the position, reduce intensity.
- Release: Relax fully, inhale normally, and reset.
Beginner prescription: 4–6 reps of 5–10 seconds. Rest 10–20 seconds between reps. Do 2–4 sets, 3–5 days per week.
Fast self-check (so you don’t accidentally train “neck vacuum”)
- You feel a gentle, deep tension in the lower absnot a hard crunch at the top of the six-pack.
- Your shoulders stay down, jaw unclenched, and glutes aren’t doing a full audition.
- You can still breathe quietly. If you can’t, the contraction is too intense (or you’re holding your breath).
Progressions: hands-and-knees, kneeling, and standing
Once you can hold a clean 10–15 seconds while breathing, progress the position. More gravity challenge usually = more difficulty.
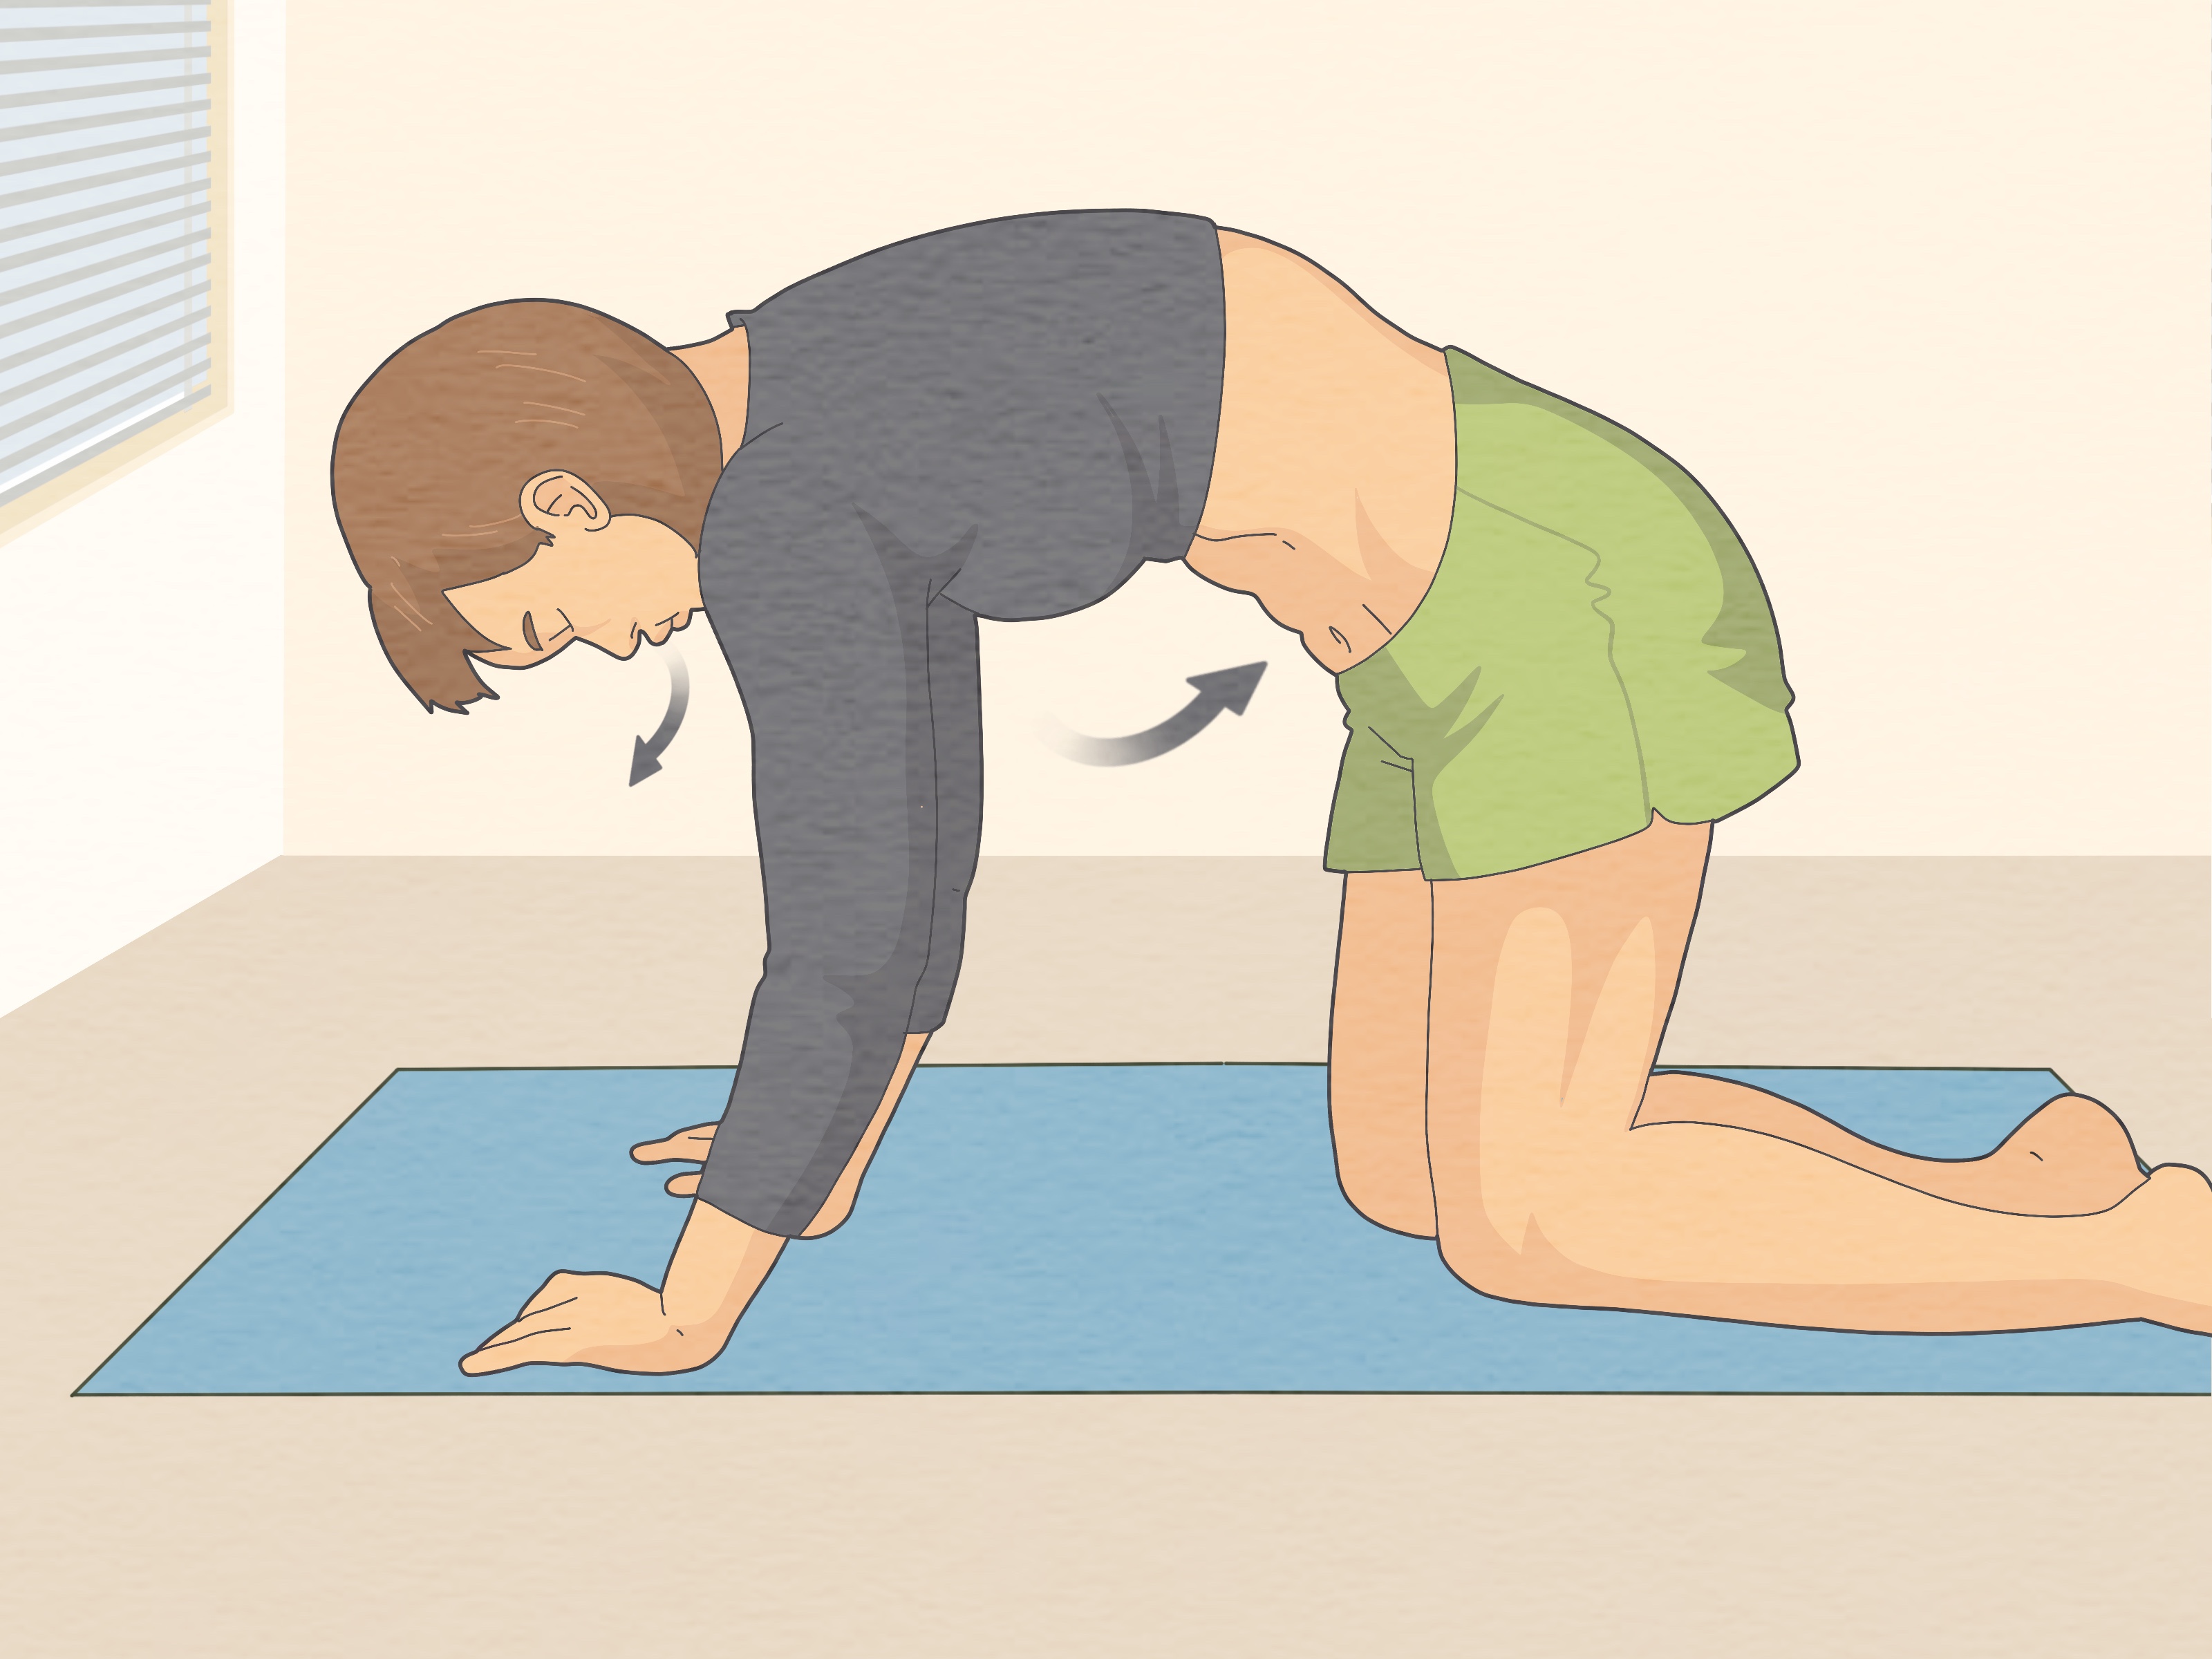
1) Quadruped (hands and knees)
- Get into tabletop: hands under shoulders, knees under hips.
- Keep a long, neutral spine (no dramatic sagging or rounding).
- Exhale, then draw your abdomen up and in toward your spine.
- Hold 5–15 seconds while breathing softly, then release.
2) Tall kneeling
- Kneel tall with ribs stacked over hips.
- Exhale, draw the lower belly inward, and keep your chest relaxed.
- Hold 10–20 seconds with small breaths.
3) Standing stomach vacuum
- Stand tall with feet hip-width, knees soft.
- Hands on hips or lower ribs to monitor rib flare.
- Exhale fully, then draw the lower abdomen inward.
- Hold 10–20 seconds while breathing lightly. Release and repeat.
Standing cue that works: imagine your ribs are a lid and your pelvis is a bowlstack the lid over the bowl before you vacuum. If you feel your ribs pop up, reset and go easier.
Common mistakes (and quick fixes)
1) Breath-holding like it’s a dare
Some advanced techniques involve breath retention, but beginners should prioritize breathing. Shorten the hold and lighten the effort.
2) Crunching instead of drawing in
If your upper abs dominate and your ribs slam down, you’re doing a mini crunch. Fix it by aiming the sensation lowerbelow the belly buttonand reducing intensity.
3) Over-tucking the pelvis
A hard posterior pelvic tilt can make the move feel “off” and shift tension elsewhere. Aim for neutral: comfortable, not forced.
4) “Doming” or “coning” along the midline
If a ridge forms down the center of your abdomen, regress and keep the contraction gentle. This can show up with diastasis recti or poor pressure management. If it persists, a physical therapist can help you customize deep-core work safely.
5) Making the vacuum your whole core plan
The vacuum is a skill-builder, not a complete program. Pair it with balanced core training: dead bugs, bird dogs, side planks, carries, and hip hinges.
How to program it (without hating your life)
Option A: 5-minute deep-core primer (before workouts)
- Supine vacuum: 5 reps × 10 seconds (breathe softly)
- Quadruped vacuum: 4 reps × 10 seconds
- Standing vacuum: 3 reps × 10–15 seconds
Option B: Micro-sessions (for desk life)
Do 2–3 reps once or twice a day in a seated or standing position. Treat it like brushing your teeth: small, consistent, and not emotionally dramatic.
Option C: Bodybuilding posing practice
Practice in the mirror after a warm-up. Keep your face relaxed, ribs controlled, and holds short enough that you don’t turn into a statue. A vacuum pose is supposed to look effortlesseven when it isn’t.
Vacuum vs. yoga “uddiyana bandha”
Yoga’s uddiyana bandha involves drawing the abdomen inward and upward and often uses breath retention and “locks.” It’s related in spirit but typically more advanced and comes with clearer contraindications (like pregnancy and high blood pressure). If your interest comes from yoga breathwork, learn from a qualified instructor and don’t force long holds.
FAQ
How long should I hold a stomach vacuum?
Beginners: 5–10 seconds while breathing. Intermediate: 10–20 seconds. If you go longer, keep effort low and avoid straining.
Can I do stomach vacuums every day?
Often, yesif intensity is low and your body feels good. If you feel sore, pressured, or fatigued, reduce volume or take rest days.
Will the stomach vacuum shrink my waist?
It can improve posture and deep-core control, which can change your silhouette. But meaningful waist-size changes usually come from overall body composition, not a single exercise.
Is it good for back pain?
Deep-core retraining can be helpful for some people, but back pain is complex. If pain is persistent or severe, get professional guidance instead of collecting random exercises like Pokémon.
Experiences and “what to expect” (extra 500-ish words)
The stomach vacuum has a totally normal “awkward beginner era.” In the first few sessions, many people can’t feel the TVA at all. Instead, they feel their neck tighten, their shoulders creep up, or their face scrunch like they’re trying to read microscopic fine print. That’s your body recruiting whatever is loud and obvious. The fix is simple: go gentler. A vacuum should feel like a quiet tightening under the belly button, not a max-effort suction. If you’re straining, cut your hold time in half, ease the pull-in, and focus on breathing quietly. One helpful trick is fingertip feedback: place two fingers just inside your front hip bones. On a gentle draw-in, you should feel a subtle firming under your fingers. If you can’t feel it yet, that’s not failureit’s just day one of learning a new skill.
Week one is often less about “abs” and more about learning the exhale. Many of us rarely empty our lungs completely, so “slowly exhale all the way” can feel surprisingly challenging. Pursed lips (like you’re cooling hot soup) help you control the pace. When you finish the exhale and keep your ribs from popping up, the lower abdomen tends to draw in more naturally. A common “aha” moment is realizing the vacuum isn’t something you force firstit’s something you layer on after a calm, complete exhale. People who practice first thing in the morning (or between meals) often find it easier simply because the belly feels less “full” and the breath is less restricted. If you ever feel lightheaded, sit down, breathe normally, and shorten the next roundno hero points for dizziness.
The next milestone is breathing during the hold. The move can feel easy until you try to take tiny breaths without losing the draw-in. When you get it right, people often describe a deep “belt” sensationsubtle fatigue behind the belly buttonrather than a surface-level crunch burn. If your hip flexors cramp, your low back tenses, or your glutes clamp down like you’re bracing for a max deadlift, reset. Soften your legs, return to neutral pelvis, and reduce the effort by about 30%. Try the “whisper test”: during the hold, you should be able to whisper a short sentence like “I can breathe” without losing control. If you can’t, the contraction is too intense. And if standing makes everything harder, that’s normalgo back to supine or hands-and-knees until breathing stays smooth.
After a couple of weeks, many people notice carryover into other training and daily movement. Dead bugs feel less wobbly. Side planks feel more organized. Even squats or carries can feel steadier because you’ve practiced creating tension while staying calm enough to breathe. Some also notice a posture side effect: standing feels more “stacked,” and sitting feels less collapsed. The best progress marker usually isn’t a mirror selfieit’s control. You can find the contraction quickly, maintain it while breathing, then relax without feeling like you’re “stuck” in a brace. It’s also common to notice better awareness in everyday moments (standing up from a chair, lifting a grocery bag, setting up for a workout) because your brain now recognizes what “deep core on” feels like.
Consistency is the secret sauce. People who stick with stomach vacuums rarely schedule a long “vacuum workout.” They attach 2–3 reps to an existing habit: after brushing teeth, while coffee brews, during a warm-up, or right before a shower. This turns it into skill practice instead of a willpower battle. The most common bad experience comes from doing too much too soonlong holds, hard breath-holding, and repeated reps until you get lightheaded. Keep sessions short (2–5 minutes), keep effort moderate, and progress slowly. If you ever notice pelvic pressure, pain, or worsening symptoms of an existing condition, pause and get professional guidance. Bonus: because vacuums demand slow breathing and attention, some people find them unexpectedly calminglike a mini breathing drill that also happens to train your core. Not bad for an exercise that looks like you’re trying to zip up jeans from 2009.
Conclusion
The stomach vacuum exercise is a simple, equipment-free way to train your deep coreespecially the transverse abdominisand improve how you coordinate breath, posture, and trunk tension. Start lying down, keep the effort gentle, and prioritize clean breathing over heroic hold times. Progress to hands-and-knees and standing as control improves, and use vacuums as a skill-builder alongside a balanced strength program.