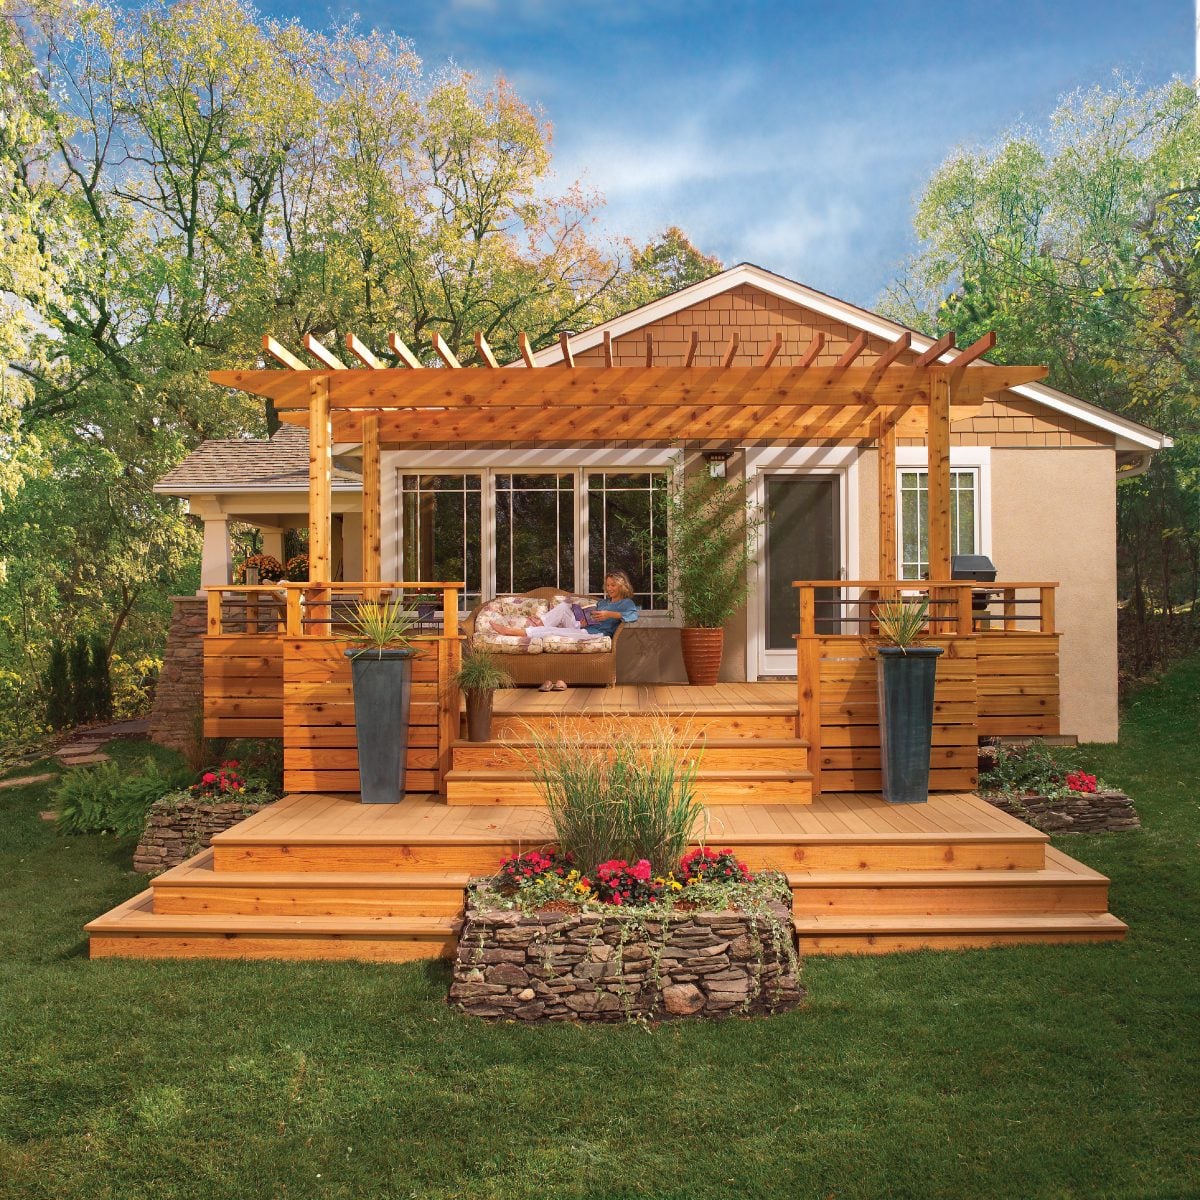
A small deck does not have to feel like the outdoor equivalent of an economy airplane seat. With thoughtful planning, a compact platform can include comfortable seating, hidden storage, privacy screening, planters, lighting, and enough room for dinner without forcing guests to hold their plates under their chins.
The secret is not squeezing random features into every available inch. It is designing the structure and the custom details together. A built-in bench needs framing support. A picture-frame border requires extra blocking. Low-voltage lights need wiring routes before the decking goes down. When those decisions are made early, a modest deck can feel polished, spacious, and surprisingly luxurious.
This guide explains how to build a small deck loaded with custom features while keeping safety, durability, and efficient use of space at the center of the project.
Begin With a Small-Deck Strategy
Before buying lumber, decide what the deck must accomplish. A 10-by-12-foot deck can serve as a dining area, conversation space, grilling station, or quiet garden retreat, but it may struggle to perform all four jobs simultaneously. Even lumber has limits, emotionally and structurally.
Write down the three activities that matter most. For example:
- Seating four to six people
- Providing privacy from a neighboring property
- Creating storage for cushions and gardening supplies
Those priorities immediately suggest useful features: an L-shaped storage bench, a narrow privacy screen, and a compact movable table. They also prevent you from wasting valuable floor area on decorative elements that look charming online but become shin-bruising obstacles in real life.
Try a 10-by-12-Foot Layout
A practical small-deck layout might place an L-shaped bench along two outside edges, leaving the center open for a table or lounge chairs. A built-in planter can anchor one bench end, while a vertical screen behind the longer section creates privacy without consuming much floor space.
Keep the main walking path at least comfortably wide enough for people to pass without turning sideways. Locate the grill away from siding, railings, overhanging branches, and combustible furnishings according to the appliance manufacturer’s clearance instructions. Position stairs where they create a natural route into the yard rather than slicing through the main seating zone.
Check Permits, Setbacks, Utilities, and Local Codes
Deck requirements vary by state, municipality, soil conditions, snow load, wind exposure, deck height, and connection method. Contact the local building department before finalizing the design. Ask about permits, property-line setbacks, footing depth, inspections, stair dimensions, guard requirements, and whether a freestanding deck is preferable for your house.
Model-code references and prescriptive deck guides are valuable planning tools, but local amendments control the actual project. The American Wood Council’s deck construction guide and the International Residential Code address structural components such as footings, beams, joists, ledgers, guards, and connections. Home-improvement planning guides also recommend confirming permits, inspections, footing depth, and neighborhood restrictions before construction begins.
Before digging, contact the appropriate utility-location service. Buried electric, gas, communication, irrigation, and drainage lines do not appreciate surprise introductions to an auger.
Choose Materials That Match Your Budget and Maintenance Tolerance
Pressure-Treated Wood
Pressure-treated lumber remains a popular choice for deck framing because it is widely available and relatively economical. It is treated to resist decay and insect damage, but not every board is rated for every location. Use material with the correct treatment designation for above-ground framing, ground contact, or other exposure conditions.
Modern residential treated lumber commonly uses copper-based preservatives such as alkaline copper quaternary or copper azole. Because these treatments can affect metal hardware, use fasteners and connectors approved for the lumber, moisture exposure, and local environment. Do not assume that any shiny screw is a structural deck screw merely because it looks confident.
Wood Decking
Pressure-treated decking offers a lower initial price and can be stained in many colors. Cedar and redwood provide natural beauty and good workability but generally cost more. Wood requires periodic cleaning and refinishing, and boards may shrink, check, cup, or develop splinters as they weather.
Composite or PVC Decking
Composite and PVC deck boards cost more initially but reduce routine refinishing. They also provide consistent color, hidden-fastener options, and coordinated fascia or railing components. However, each product has specific requirements for joist spacing, end gaps, edge gaps, stair-stringer spacing, ventilation, and approved fasteners.
For many composite installations, joists are spaced no more than 16 inches on center. Diagonal layouts frequently require 12-inch spacing, while picture-frame borders and inlays need additional blocking. Always follow the instructions for the exact product rather than treating one manufacturer’s guide as a universal permission slip.
Design the Structure Before the Decorative Features
The deck frame must carry the platform, people, furniture, snow where applicable, and any permanent features. Heavy planters, masonry counters, outdoor kitchens, spas, roofs, and oversized storage structures can introduce concentrated loads that require engineering or additional support.
Create a dimensioned plan showing the house, ledger or freestanding beam, footings, posts, beams, joists, stairs, guards, bench posts, screen supports, and decking direction. Add blocking locations for railing posts, border boards, benches, planters, and any area where deck boards change direction.
A custom feature should attach to structural framing, not merely to deck boards. Decking is a walking surface, not a magical structural foundation.
Step 1: Establish the Deck Height and Layout
Determine the finished deck elevation by measuring from the door threshold. Allow enough space to prevent water, snow, leaves, and debris from building up against the doorway or siding. Your local code official or designer can help confirm the correct relationship among the threshold, flashing, framing, and finished decking.
Use batter boards and mason’s line to mark the deck perimeter. Check the rectangle by comparing diagonal measurements. When both diagonals match, the layout is square. A 3-4-5 triangle can also verify a right angle.
Mark footing centers based on the approved beam spans and tributary loads. Do not position footings solely where digging appears easiest. The soil does not negotiate with the framing plan.
Step 2: Install Footings, Posts, and Beams
Footing size and depth depend on loads, soil-bearing capacity, frost conditions, post height, and local requirements. Footings may use poured concrete, approved precast systems, helical piles, or another locally accepted method. They must rest on suitable soil and extend to the required depth.
After the concrete cures, install approved post bases that keep wood posts separated from standing water. Set the posts plumb, brace them temporarily, and install the beam using the specified post caps, bolts, or connection hardware.
Structural connectors must be installed with the fastener types, diameters, lengths, quantities, and corrosion resistance specified by the connector manufacturer. Filling a joist hanger with random drywall screws is not improvisation; it is a future inspection photograph. Simpson Strong-Tie’s deck guide emphasizes a continuous connection path among ledgers, joists, beams, posts, and footings.
Step 3: Attach and Flash the Ledgeror Build Freestanding
A ledger-supported deck must be positively connected to suitable structural framing in the house. It cannot be safely supported by siding, brick or stone veneer, a nonstructural cantilever, or nails alone. The International Residential Code specifies structural requirements for deck ledgers, while deck-safety organizations repeatedly identify poor ledger connections and missing flashing as major concerns.
Remove siding as required, inspect the house framing, install the approved water-resistive barrier details, and flash the ledger so water is directed overnot behindthe assembly. Proper flashing protects the ledger, wall sheathing, band joist, and other house components from hidden decay. Different siding and wall systems require different flashing details, so copy the detail approved for your exact assembly.
A freestanding deck avoids relying on the house for structural support. This can be useful when the home has masonry veneer, difficult flashing conditions, a cantilevered floor, or uncertain framing. Freestanding construction still requires correct footing placement, lateral stability, and code-compliant separation from the building.
Step 4: Install Joists, Blocking, and Water Protection
Set joists crown-side up and space them according to the structural plan and decking manufacturer’s instructions. Attach them with approved joist hangers or bearing connections. Install rim boards, lateral bracing, and blocking as required to prevent joists from rolling and the frame from racking.
Add extra framing now for every custom feature:
- Double or additional joists beneath picture-frame borders
- Solid blocking for guard and stair posts
- Support beneath built-in bench legs
- Framing around planter boxes or access panels
- Backing for privacy-screen posts
- Routes for lighting cable and future maintenance
Some decking manufacturers recommend joist tape over horizontal framing surfaces. This tape helps limit water penetration around fasteners and in the narrow gaps where moisture and debris tend to linger. It is not a substitute for correct flashing or drainage, but it can add protection to the substructure.
Step 5: Install the Decking and a Picture-Frame Border
A picture-frame border is one of the best upgrades for a small deck. Perimeter boards conceal cut ends and make the platform look intentionally finished. Contrasting colors can visually define the edges, while a matching border creates a quieter, more seamless appearance.
Dry-lay several boards before fastening anything. Confirm the final board width, border position, stair opening, post locations, and gap at the house. Adjust the starting board slightly if doing so prevents an awkwardly narrow strip at the opposite edge.
Use the board spacing and approved fasteners specified by the decking manufacturer. Composite and PVC products expand and contract with temperature, so end gaps may vary with installation conditions. Picture framing also requires dedicated support and carefully planned joints. TimberTech, for example, provides product-specific border, overhang, blocking, and fastening guidance.
Step 6: Build Secure Stairs and Railings
Stairs deserve careful layout because small errors multiply. Measure the total rise from the finished deck surface to the finished landing. Divide that measurement into equal risers that comply with local code, then calculate the tread depth and stringer geometry.
Use straight, suitable stringer material and avoid excessive notching. Provide the number and spacing of stringers required by the tread material. Some composite stair boards need closer stringer spacing than wood treads, so consult the product instructions before cutting.
Guard posts must connect to the structural frame with approved hardware and blocking. Do not rely on surface decking or a few screws driven into the rim board. Confirm guard height, opening limitations, handrail shape, stair lighting, and landing dimensions with the local building department.
Add Custom Features Without Sacrificing Floor Space
1. An L-Shaped Storage Bench
A built-in perimeter bench can seat more people than several freestanding chairs while keeping the middle of the deck open. An L-shaped design also creates a natural conversation area.
Build the bench as a separate framed structure connected to reinforced deck framing. Use hinged or removable seat panels for storage, but include drainage gaps and ventilation. Outdoor cushions should be dry before being stored; otherwise, the storage compartment becomes a boutique mold incubator.
Where a guard is required, do not assume a bench can replace it. A bench near a guard may also create a climbable condition, especially for children. Review the arrangement with the building official or a qualified designer.
2. A Narrow Drink Rail or Fold-Down Table
A drink rail mounted along a privacy screen or approved railing system provides space for cups, plates, and small planters without occupying the floor. A fold-down table can serve as a dining surface, laptop station, or food-preparation shelf and then disappear when not needed.
Use exterior-rated hardware and support the table from structural framing. Round exposed corners to reduce injuries in tight spaces. Keep serving surfaces away from grill heat and grease.
3. Integrated Planters
Planters soften the hard lines of a deck and can define the boundary between seating and circulation. A tall planter with a trellis can provide greenery and privacy in one compact feature, an approach recommended in several small-space deck design guides.
Use removable pots or waterproof liners rather than filling a wooden box directly with soil. Include drainage holes and direct runoff away from framing. Wet soil is extremely heavy, so large planters should sit over appropriately designed support rather than at the unsupported end of a cantilever.
4. A Vertical Privacy Screen
A screen made from horizontal slats, vertical battens, lattice, metal panels, or a trellis can make a small deck feel like an outdoor room. Space the elements to preserve airflow and filtered light. A completely solid wall may catch significant wind and require stronger posts, deeper footings, or engineering.
Attach the screen posts to dedicated framing or footings. Never fasten a tall privacy panel only to deck boards. For flexible privacy, a movable planter screen may be a useful alternative where permitted.
5. Low-Voltage Lighting
Lighting improves atmosphere and makes steps, edges, and changes in elevation easier to see. Useful options include recessed stair lights, post-cap lights, under-bench strips, and small fixtures aimed downward from a privacy screen.
Plan cable routes before installing decking. Leave accessible connections and use equipment rated for wet or damp outdoor locations. Line-voltage electrical work should comply with applicable codes and may require a licensed electrician. Outdoor receptacles and equipment exposed to moisture should have appropriate weather protection and ground-fault circuit-interrupter protection.
6. Contrasting Fascia and Skirting
Fascia covers exposed rim framing and gives the deck a cleaner profile. Skirting can hide the area underneath, but it should preserve ventilation and provide access for inspections, pest control, and repairs.
On a low deck, removable slatted panels are often more practical than permanently sealing the perimeter. A dark fascia can visually slim the deck, while a matching fascia produces a unified appearance.
Control Costs With Smart Feature Choices
Custom does not automatically mean expensive. The best value usually comes from features that perform more than one job. A planter can support a privacy screen. A bench can provide seating, storage, and a visual boundary. A wide top rail can function as a drink ledge when the railing manufacturer and local code permit it.
Create separate budget categories for:
- Plans, permits, and professional design
- Footings and concrete
- Framing lumber and structural hardware
- Decking, fascia, and fasteners
- Stairs, guards, and handrails
- Benches, planters, and privacy features
- Lighting and electrical work
- Waste, delivery, tools, and contingency
Order extra decking for cuts, defects, color selection, and future repairs. The amount depends on the layout and board pattern. Diagonal boards, decorative inlays, and mitered borders typically generate more waste than a straightforward parallel installation.
Protect the Finished Deck
Keep soil, mulch, leaves, and stored materials away from structural wood. Make sure water can drain through deck-board gaps and away from footings. Clean debris from the space near the house, where moisture can collect around the first deck board and ledger flashing.
Inspect the deck at least annually and after severe weather. Look for loose guards, moving stairs, cracked posts, decayed wood, corroded fasteners, failed flashing, standing water, and changes around footings. NADRA’s consumer guidance highlights ledgers, connections, flashing, guards, stairs, lighting, and corrosion as important inspection areas.
Wood surfaces may need cleaning and refinishing according to the stain or coating manufacturer’s schedule. Composite and PVC products generally need less maintenance but still benefit from routine washing and prompt removal of leaves, grease, and organic debris.
Experience-Based Lessons From Feature-Packed Small Decks
Builders who work on compact decks quickly learn that the smallest projects often demand the most planning. On a large platform, moving a post or bench a few inches may not matter. On a 100-square-foot deck, three misplaced inches can interfere with a chair, narrow the stairs, or leave a table permanently blocking the door.
One of the most useful habits is mocking up the layout before construction. Mark the proposed deck with stakes, string, painter’s tape, or cardboard. Place actual chairs inside the outline. Open the back door. Pull a chair away from the pretend table. Walk from the house to the stairs while carrying an imaginary tray of burgers. It may look silly to the neighbors, but it is less silly than rebuilding a bench because nobody can reach the yard without climbing over Aunt Linda.
Another common lesson is that custom features should be planned before the frame is complete. DIY builders sometimes finish the joists and then announce that the deck would look excellent with a diagonal inlay, wraparound bench, and six railing lights. Each new idea demands blocking, wiring access, or additional support. Retrofitting those details from below is possible, but it is slower and often produces less elegant results.
Experienced carpenters also treat water management as part of the design rather than a final accessory. Decorative trim can create pockets that trap wet leaves. Planter boxes can leak onto joists. Benches can hide areas that are difficult to clean. Good projects include drainage gaps, sloped caps, removable panels, protected framing, and enough access to inspect what is happening behind the attractive surfaces.
Material movement is another source of education. Fresh pressure-treated lumber can shrink as it dries. Composite boards can change length with temperature. Wood fascia, decking, and framing do not always move at the same rate. Carefully following product-specific spacing and fastening instructions reduces buckling, open joints, pulled fasteners, and mysterious noises that make homeowners wonder whether the deck has developed opinions.
Small decks also benefit from restraint. A privacy screen, bench, planter, pergola, fire feature, outdoor kitchen, hot tub, and movie wall may each sound appealing, but combining all of them can turn a relaxing retreat into an outdoor storage unit. The strongest designs choose two or three signature features and execute them well.
Finally, builders repeatedly discover that the structural work takes priority over the visible work. Perfect miter joints cannot compensate for an improperly fastened ledger, undersized footing, weak guard post, or incorrect stair geometry. Spend time and money on the foundation, framing, connectors, flashing, and inspections first. Once the platform is strong, dry, and code-compliant, the decorative features can do their job: making a small deck feel like the best room the house forgot to put indoors.
Conclusion
To build a small deck loaded with custom features, begin with a clear purpose and a realistic layout. Design the footings, ledger or freestanding support, beams, joists, stairs, and guards according to approved plans and local requirements. Add structural blocking for benches, borders, screens, planters, and lighting before installing the deck boards.
Use multifunctional features to make the limited area work harder. A storage bench can replace several chairs and a bulky deck box. A planter can support a privacy screen. A picture-frame border can protect the visual edges while making an inexpensive rectangular deck look custom-built.
Most importantly, keep structural safety and water management ahead of decoration. A beautiful deck should remain solid, comfortable, and easy to maintain long after the first cookoutand long after somebody inevitably spills barbecue sauce on the new cushions.
Note: This article provides general educational guidance. Deck loads, spans, footings, connections, stairs, guards, electrical systems, permits, and inspection requirements must be verified with the local building department, applicable product instructions, and qualified professionals before construction.