If your Halloween decorating style falls somewhere between “tastefully spooky” and “my neighbors should be mildly concerned,” a creepy DIY skull topiary is your kind of project. It has height, drama, texture, and just enough theatrical chaos to make your front porch, entryway, or mantel look like it belongs in a stylish haunted manor. In other words, it is the kind of Halloween decor that says, “Yes, I decorate for spooky season, and yes, I am willing to hot-glue bones for ambiance.”
The beauty of a skull topiary is that it looks expensive and elaborate, but it is surprisingly doable with craft-store supplies, a few hardware basics, and a little patience. Most versions use lightweight plastic skulls, a frame or support structure, some kind of planter or urn, and moody finishing details like moss, faux florals, black branches, or LED lights. The result can be gothic, playful, glam, creepy, or somewhere delightfully in between.
In this guide, you will learn how to make a creepy DIY skull topiary for Halloween from start to finish, including the best materials to use, how to build a sturdy frame, how to style it so it looks intentional instead of accidental, and what mistakes to avoid. Whether you want a porch statement piece or an indoor Halloween centerpiece with serious personality, this project delivers the kind of spooky curb appeal that makes trick-or-treaters stop and stare.
Why a Skull Topiary Works So Well for Halloween
A topiary has built-in elegance. Traditionally, it is all about shape, height, and structure. A skull topiary takes that polished silhouette and gives it a wonderfully sinister twist. Instead of clipped greenery, you get stacked skulls, creeping moss, dramatic branches, and shadowy floral elements. It feels a little haunted, a little theatrical, and a lot more elevated than tossing a few plastic decorations on the porch and hoping for the best.
It also works in almost any decorating style. If your home leans classic, use an urn planter, muted tones, and black-and-bone coloring. If you prefer a bolder look, add burgundy florals, metallic paint, or glowing lights. If you are decorating on a budget, dollar-store skulls and faux moss can still create a surprisingly chic result once everything is layered together.
What You Will Need
Core Materials
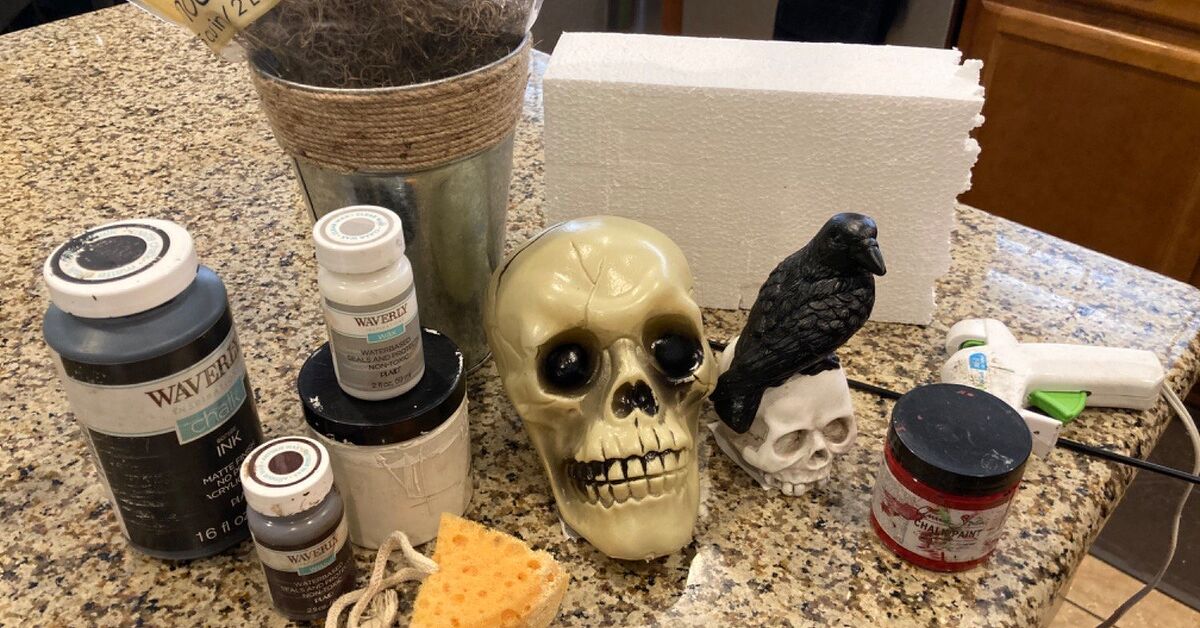
- 1 medium or large urn planter, flowerpot, or decorative container
- 1 tomato cage, wire cone frame, or sturdy center support such as a dowel or PVC pipe
- 5 to 12 lightweight plastic skulls, depending on the size of your topiary
- Zip ties, floral wire, or heavy-duty hot glue
- Floral foam, rigid foam, or another insert to stabilize the structure inside the pot
- Lightweight filler for the planter base, such as foam blocks, mulch, lava rock, or packing material
- Spanish moss, sheet moss, black moss, or faux moss for covering the base
Optional Styling Extras
- Black spray paint, bone-colored paint, or metallic paint
- Plastic primer if you plan to repaint glossy plastic skulls
- Faux black roses, eucalyptus, dried-look stems, or dark leaves
- Twigs, branches, mini pumpkins, ravens, spiders, or battery-operated fairy lights
- Clear protective spray if the piece will live outdoors
The exact supply list depends on your vision, but the general rule is simple: build the structure first, then make it beautiful. That is the secret behind a topiary that looks polished instead of precarious.
How to Choose the Best Skulls and Container
Before you build anything, make two important decisions: what kind of skulls you want and where the finished piece will live. Lightweight plastic skulls are the easiest option because they are affordable, easy to drill or glue, and much less likely to make the whole thing collapse under its own spooky ambition. Hollow skulls are especially useful for larger topiaries because they add volume without adding too much weight.
For the container, choose something with presence. A plain nursery pot can work if you plan to hide it inside a decorative urn, but for a more finished look, go straight for a black planter, faux stone urn, or weathered-look vessel. If the topiary is going outdoors, drainage matters. If your planter does not have drainage holes and you are using real plants or expect rain exposure, you will need to add holes or keep the whole display sheltered. If you are using only faux materials, you still want the base to be stable and not collect water like a swampy science experiment.
Step-by-Step: How to Make a Creepy DIY Skull Topiary
Step 1: Build the Base Inside the Planter
Start by filling the bottom of your planter with lightweight filler. This reduces the amount of foam or decorative material you need while helping the pot feel solid. Leave enough room at the top for your foam insert and moss covering. If your planter is very light and your topiary will be tall, add a bit of weight near the bottom with gravel or a few rocks, but do not overdo it. You want stability, not a Halloween hernia.
Next, fit floral foam or rigid foam snugly into the top portion of the planter. This is what will hold your center support in place. Press a tomato cage upside down into the foam if you want a fuller, cone-shaped structure. For a narrower design, insert a dowel or PVC pipe into the center and secure it firmly. Wiggle it a little to test stability. If it moves too much now, it will absolutely betray you later.
Step 2: Prep the Skulls
Lay out your skulls and decide whether you want to keep their factory finish or repaint them. Many store-bought skulls have a glossy, bright-white look that can feel more costume aisle than haunted estate. A light sanding, followed by plastic primer and a matte spray paint finish, can completely change the mood. Bone, ivory, aged gray, matte black, or weathered stone all work beautifully.
If you want an antique effect, lightly dry-brush darker paint into the eye sockets, nasal cavity, and cracks. Then wipe some away so the finish looks aged rather than muddy. This tiny step adds a lot of depth and makes the skulls look less like they were born five minutes ago under fluorescent retail lighting.
Step 3: Create the Main Skull Stack
Now the fun begins. If you are using a tomato cage or conical frame, attach the skulls around the outside using zip ties or floral wire threaded through openings in the skulls. Try alternating angles so the faces are not all staring straight ahead like a very unsettling choir. Some can tilt slightly to the left or right, and one near the top can angle downward for maximum haunted-drama points.
If you are building on a center pole, drill or cut openings in the skulls so they can slide onto the support. Stack them vertically, using glue or wire in between to keep them from spinning out of place. This method creates a cleaner column effect. A frame-based approach creates a fuller, more sculptural look. Both work, so choose the one that best matches your skill level and patience.
As you attach skulls, step back every few minutes and check the silhouette. A great topiary should look balanced from several angles, not just the one angle you stared at while panic-gluing. Fill large gaps with smaller skulls, moss, or florals later, but get the overall shape right first.
Step 4: Hide the Mechanics
Once the skulls are attached, cover visible foam, zip ties, and open frame areas with moss. Tuck Spanish moss between skulls, wrap black moss around the base, and use small pieces to soften harsh gaps. This is where the project goes from “assembled object” to “styled decor.” Moss adds texture, age, and that just-crawled-out-of-a-forgotten-garden look that Halloween loves.
You can also tuck in faux vines, gauzy black fabric, or thin branches to break up repetitive shapes. The skulls are the stars, but the filler details are what make the arrangement look lush and intentional rather than like a pile of heads on a gardening support. Which, admittedly, is exactly what it is. We just want it to look fancy.
Step 5: Add Florals and Creepy Accents
This is your styling moment. Dark florals and textured stems give the topiary a richer, more editorial look. Black roses, deep burgundy peonies, dusty eucalyptus, spiky greenery, twig sprays, and seed pods all work well. If you want a more natural haunted-garden vibe, use bare branches, dried-look foliage, and muted colors. If you want a glam Halloween look, add metallic leaves, velvet ribbon, or a few jeweled spiders.
Place larger floral elements near the base or in open pockets where the skull shapes need softening. Use branches to add height or asymmetry. Do not overfill every space. Leaving some exposed skull surfaces keeps the project dramatic and readable. Think “curated haunted elegance,” not “craft store exploded in October.”
Step 6: Finish the Planter
Cover the planter surface with moss, mini pumpkins, faux crows, bones, or dried leaves. This helps visually ground the topiary. If your pot looks too plain, spray-paint it matte black, stone gray, or aged bronze. You can even dry-brush lighter paint over raised details for an old-world effect. A beautiful planter base makes the whole project feel more custom and expensive.
If the display is going outside, use a clear protective topcoat designed for outdoor use once all painted parts are fully dry. Keep in mind that lightweight Halloween decor can shift in wind, so tuck the topiary into a protected porch corner or secure it extra well if your area gets breezy.
Best Design Styles for a Skull Topiary
Classic Gothic
Use black, bone, gray, and dark green. Add moss, bare twigs, and a black urn. This version feels moody, timeless, and slightly Victorian in the best possible way.
Haunted Garden
Mix skulls with faux hydrangeas, eucalyptus, dried stems, and muted pumpkins. This style feels softer and more layered, perfect for fall decorating that transitions from September into Halloween.
Glam Halloween
Paint the skulls matte black or metallic gold, then add dramatic florals, feathers, rhinestones, or moody ribbon. This is for decorators who believe spooky and fabulous should absolutely share a front porch.
Budget-Friendly Spooky Chic
Stick to dollar-store skulls, black spray paint, moss, and one dramatic floral bundle. Repetition and good placement can make inexpensive supplies look surprisingly polished.
Mistakes to Avoid
Using too much weight up top: Real stone, heavy ceramic, or oversized dense materials can make the project unstable. Lightweight skulls are your friend.
Skipping prep before painting: Plastic often needs cleaning, light sanding, and the right primer or paint for the best finish and adhesion.
Ignoring the base: A gorgeous top section on a sad, empty pot is like wearing a tuxedo with flip-flops. Finish the planter.
Overcrowding every inch: Give the eye room to rest. Negative space makes the skulls, florals, and textures stand out more.
Forgetting outdoor conditions: Sun, wind, and moisture can ruin a topiary fast. Choose materials and finishes that match where it will be displayed.
How to Display Your Finished Skull Topiary
A skull topiary looks fantastic flanking a front door, standing beside porch steps, or anchoring an entry table. For a dramatic exterior look, make two matching topiaries and place one on each side of your doorway. Indoors, one topiary can work as a mantel accent, a dramatic foyer piece, or even a dining-room statement if you scale it appropriately.
To build a full Halloween moment around it, pair your topiary with black lanterns, stacked pumpkins, ravens, candles, or layered doormats. The topiary provides height, so use lower elements around it for a balanced display. Lighting matters too. A nearby lantern or warm spotlight will make the skull contours pop at night and turn your project into the spooky centerpiece it deserves to be.
Final Thoughts
Learning how to make a creepy DIY skull topiary for Halloween is really about combining structure and style. Once you understand the basic build, you can customize the design to fit your budget, your space, and your personal flavor of spooky. Maybe you want something elegant and eerie. Maybe you want something bold, dramatic, and just a little ridiculous. Both are valid. Halloween is a wonderfully flexible holiday.
The best part is that a well-made skull topiary does not look like a throwaway decoration. It looks like a statement piece. It tells visitors that yes, you take Halloween seriously, but you also have taste, imagination, and probably a hot glue gun within arm’s reach at all times. Honestly, that is a powerful combination.
What It’s Actually Like to Make One: A Real-World DIY Experience
If you have never built a skull topiary before, let me tell you something reassuring right away: it usually looks weird before it looks wonderful. That is part of the process. In the beginning, you have a planter full of filler, a frame that resembles a renegade tomato cage, and several plastic skulls staring at you like they expect better. It is not elegant at first. It is a trust-the-process kind of craft.
The first time I worked on a project like this, the biggest surprise was how much the arrangement changed once the skulls were actually attached. On the table, the pieces felt random. On the frame, they suddenly started telling a story. One skull tilted forward looked dramatic. Another angled to the side looked mischievous. A third one near the base gave the whole thing a delightfully cursed energy. That was the moment the project stopped feeling like supplies and started feeling like decor.
Another real-life lesson is that the texture layer matters more than you think. Moss does a lot of heavy lifting. So do dark stems, bare twigs, and faux florals. Without them, the topiary can feel sparse or overly plastic. Once those soft and wispy materials go in, the entire piece starts looking richer and more believable. It gets that moody, old-Halloween-book-cover vibe that makes people ask where you bought it. That question, by the way, is deeply satisfying when the answer is, “I made it.”
There is also a funny emotional arc to the whole thing. At first, you are practical. You measure. You secure the frame. You test the balance like a responsible adult. Then somewhere around the point where you start dry-brushing shadow into eye sockets, you become a tiny bit theatrical. You are no longer just crafting. You are styling a haunted object. You start saying things like, “It needs more menace,” which is not a sentence most people use in everyday decorating.
What makes this project especially enjoyable is that it is forgiving. If one side looks too empty, add moss. If the skull color feels too bright, age it with darker paint. If the top section feels flat, tuck in branches. A skull topiary does not demand perfection. It rewards adjustment. In fact, a little asymmetry often makes it better. Too much perfection can make Halloween decor feel sterile, while a slightly wild look makes it feel alive, or perhaps delightfully undead.
And then there is the payoff. Once the topiary is in place on a porch or entry table, it instantly changes the atmosphere. It adds height, shadow, and drama in a way that smaller decorations simply cannot. During the day, it looks sculptural and stylish. At night, with low lighting or a lantern nearby, it becomes the star of the whole Halloween setup. The skulls catch the light, the moss deepens the shadows, and suddenly your home looks like it belongs to the chicest ghost on the block.
So yes, making a creepy DIY skull topiary for Halloween takes some effort. It involves glue strings, paint fumes, and at least one moment where you question your engineering choices. But it is also the kind of project that feels genuinely fun from start to finish. It is creative, weird, customizable, and surprisingly satisfying. And when October rolls around, that is exactly the kind of energy a great Halloween DIY should bring.