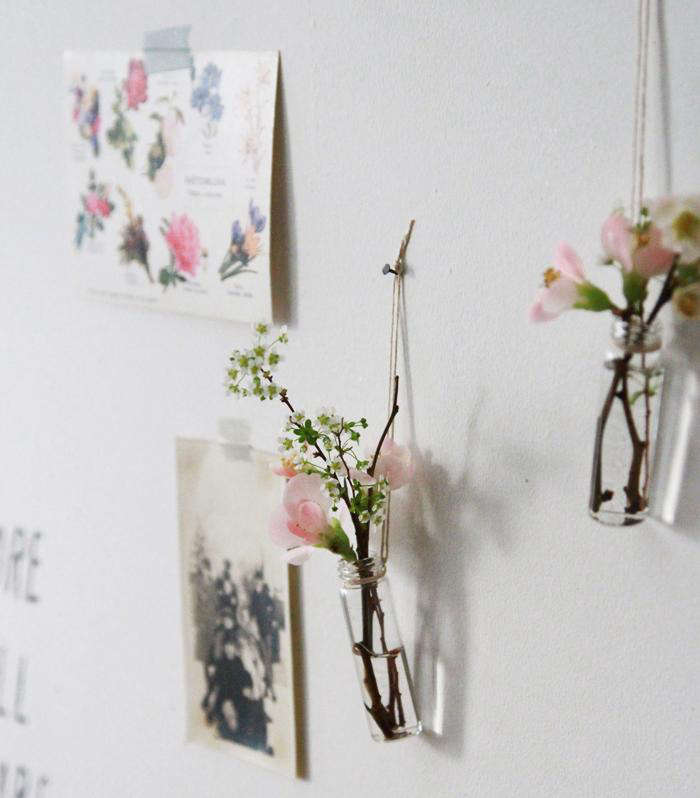
Some home projects whisper. This one winks. A wall of tiny medicine vials turned into mini flower holders has that rare talent of being equal parts romantic, quirky, and surprisingly classy. It feels a little like an old apothecary met a flower shop, fell in love, and moved into your hallway. Not bad for a weekend DIY.
If you have been craving wall decor that does more than just sit there looking polite, this project is worth your time. A medicine vial wall vase display adds texture, color, and a touch of vintage charm without demanding a full renovation budget. It is floral wall art, but with personality. It is also a smart way to decorate narrow spaces, awkward corners, above desks, beside mirrors, or anywhere a full-size vase would be too bulky and a blank wall feels too boring.
Better yet, this DIY love potion idea fits the mood of modern home decor. Small vessels, bud vase styling, upcycled bottle decor, and layered wall accents are all having a moment. The result is a wall vase DIY that feels custom, artistic, and just a little mischievous, which is exactly what a memorable project should be.
Why Medicine Vials Make Such Great Wall Vases
Medicine vials are tiny scene-stealers. Their slim shape naturally supports a few stems, which means your arrangement looks intentional instead of like flowers got lost on the way to a bigger vase. They also encourage restraint. With only one to three stems per vial, you focus on shape, line, and color instead of creating a leafy traffic jam.
That is why this project works so well visually. A row of small glass vials gives you repetition, rhythm, and plenty of negative space. In decorating terms, that means the wall feels interesting without looking crowded. In normal-human terms, it means your guests will say, “Wait, you made that?” and you will get to pretend you are suddenly the mysterious creative friend who casually owns a glue gun and good taste.
Another win: these small wall vases are flexible. Fresh flowers look beautiful, but so do dried stems, herbs, eucalyptus sprigs, lavender, baby’s breath, and even faux blooms if you want the look without the maintenance. You can shift the style from cottagecore to moody vintage to clean modern just by changing the flowers and the backing material.
What You Need for This DIY Wall Vase Project
You do not need a workshop the size of a reality TV set. For most versions of this craft, a short supply list will do the job:
- Small glass medicine vials or vintage-style apothecary bottles
- A wood board, metal strip, acrylic panel, or reclaimed frame as the base
- Pipe clamps, metal loops, leather straps, wire, or strong adhesive holders
- Screws, picture-hanging hardware, or drywall anchors
- Sandpaper, paint, stain, or wax finish for the backing
- Fresh or dried flowers
- Optional extras like labels, ribbon, brass hooks, or a stencil for a “love potion” look
If you want the easiest route, use identical vials for a clean, symmetrical display. If you prefer a more collected-over-time look, mix heights and shapes. Matching bottles say “modern boutique.” Mismatched bottles say “I thrift with purpose and probably know how to make soup from scratch.” Both are excellent vibes.
How to Build Medicine Vials as Wall Vases
1. Pick a Style Before You Pick Up a Screwdriver
Before you start attaching anything, decide on the mood. A dark stained wood board with amber vials creates a vintage apothecary aesthetic. Whitewashed wood and clear glass feel light and airy. Black metal with slim tubes leans minimalist. If you want the “DIY love potion” angle to really shine, consider antique brass details, handwritten labels, or soft pink and red florals for a romantic finish.
Choosing the style first saves you from the classic DIY problem of ending up with something that is technically assembled but emotionally confused.
2. Prep the Vials Properly
Clean your glass thoroughly before installing it. If you are repurposing old bottles, remove labels, sticky residue, and any dust hiding in the corners like it pays rent. Clear glass shows everything. Nothing ruins a charming wall vase arrangement faster than mystery gunk.
If your vials are decorative replicas, this step is simple. If they are true vintage finds, inspect for chips or cracks before using them with water. Tiny vessels may be cute, but leaking directly onto your wall is not the sort of drama you want in your decor story.
3. Create the Backing Board
Cut your backing to the size that fits your space. A narrow vertical board works well for small hallways or bathroom corners. A long horizontal board looks beautiful above a console table, kitchen nook, or bed. Sand the edges, then stain or paint it. Let the finish dry completely before attaching anything.
For a more layered look, mount the vials to an old frame, shutter, or reclaimed wood plank. This gives the project extra character and turns it into statement wall decor rather than just a functional flower holder.
4. Attach the Vials Securely
Now for the important part: keeping the pretty thing from becoming a gravity experiment. Measure the spacing between each bottle carefully. Even spacing looks polished, while intentionally uneven spacing can feel artistic if done with confidence. “Oops” spacing is less charming.
Use clamps, rings, or loops sized to the diameter of your vials. Secure them firmly to the backing board so each bottle can slide in and out for cleaning and refilling. That detail matters more than people think. A wall vase you cannot clean easily becomes a very elegant science project.
If you plan to fill multiple vials with water, remember that the total weight increases. Choose hanging hardware based on the finished weight of the piece, not just the board itself. A lightweight decorative display might hang happily on simple hardware, but a larger piece with water-filled glass should be mounted with properly rated anchors or into studs when possible.
5. Hang It Like You Mean It
Placement can make or break the result. Eye level is usually safest, especially in entryways, dining corners, and above sideboards. Avoid spots where elbows, doors, or energetic pets regularly swing by. A medicine vial wall vase belongs in the “admire me” zone, not the “accidental collision course” zone.
Good locations include:
- Beside a front door for an inviting first impression
- Above a nightstand for soft bedroom charm
- In a bathroom where tiny flowers add spa-like warmth
- Above a desk to soften a practical workspace
- Along a gallery wall for a living, breathing accent
How to Style a DIY Love Potion Wall Vase
Once the structure is done, the fun begins. Tiny wall vases are best when styled with restraint. You are not building a supermarket bouquet. You are composing a mood.
Start with greenery to create a base. Then add one focal bloom here and there, followed by lighter filler stems for softness. Odd numbers usually look more natural than even groupings, and varying stem heights keeps the whole display from looking stiff. If every flower stands at military attention, the magic disappears.
Here are a few styling directions that work beautifully:
Romantic Apothecary
Use blush roses, ranunculus, baby’s breath, and eucalyptus. Pair with amber or smoked glass vials and a dark wood board. Add tiny handwritten labels for a storybook finish.
Minimal Modern
Choose clear glass tubes, a pale oak board, and just one stem per vial. Try tulips, anemones, or a single clipped branch. This version feels clean, airy, and a little Scandinavian in the best possible way.
Wild Garden
Mix daisies, chamomile, lavender, herbs, and loosely arranged greenery. A weathered backing board works especially well here. It looks casual, charming, and delightfully unbothered.
Dried and Dramatic
Use dried bunny tails, preserved eucalyptus, statice, or strawflower for a display that lasts much longer. This is perfect if you love floral decor but are not interested in maintaining fresh stems every few days.
How to Keep the Flowers Looking Fresh
Because these vials are small, flower care matters. Tiny containers can get cloudy fast, and wilted stems are not exactly giving “love potion.” They are giving “forgotten science fair.”
To keep your medicine vial wall vases looking their best:
- Wash the vials before each refill
- Use clean water and clean snips or scissors
- Remove leaves that would sit below the waterline
- Change the water regularly, especially with fresh flowers
- Keep the arrangement away from direct heat and harsh sun
- Trim stems again when refreshing the display
Small stems, herbs, and hardy flowers usually perform best in narrow containers. Spray roses, carnations, chamomile, wax flower, statice, and greenery clippings are all excellent choices. If you want fragrance, a little lavender or rosemary can pull double duty as decor and subtle scent.
Mistakes to Avoid With a Wall Vase DIY
Like most good projects, this one is simple until you rush it. A few common mistakes can make the final result look less “enchanted handmade decor” and more “I lost a bet with a craft store.”
- Using vials that are too fragile: Decorative glass should still be sturdy enough for handling, filling, and cleaning.
- Ignoring weight: Water, wood, and glass add up quickly. Do not guess on hardware.
- Overstuffing the vials: Tiny containers shine when arrangements are light and intentional.
- Choosing the wrong wall: Skip high-traffic impact zones.
- Forgetting maintenance access: You need to remove the bottles easily for cleaning and refilling.
- Going too theme-heavy: “Love potion” is charming. Turning your living room into a haunted gift shop is a different project.
Why This Project Works So Well in Real Homes
The best DIY decor solves more than one problem at a time. This project adds color, uses vertical space, and creates a focal point without eating up tabletops. That makes it especially useful in apartments, small homes, or rooms where every surface is already busy holding real-life things like keys, coffee mugs, and the one charger nobody can ever find.
It also feels personal. Store-bought wall decor can be pretty, but handmade decor tells a better story. A wall of medicine vials used as bud vases feels thoughtful and a little unexpected. It says you care about details. It says you like flowers but do not need a giant centerpiece to prove it. It says romance can live in small things, including a single stem clipped from the yard and placed in the right glass bottle.
of Real-Life Experience With the DIY Love Potion Look
The first time I saw medicine vials used as wall vases, I had the same reaction many people do: “That is either genius or a sign someone has been left alone in a craft store too long.” Then I tried it, and the charm made immediate sense. There is something oddly satisfying about taking a row of small, serious-looking glass vessels and turning them into something soft and alive. The contrast is what makes the project special. The structure feels neat and almost scientific, but the flowers keep it from feeling rigid.
In real life, the effect is stronger than it looks in photos. A regular vase sits on a surface and waits to be noticed. A wall vase display changes the wall itself. It brings depth to a flat space and gives the eye something to follow. In the morning, especially when natural light hits the glass, the entire setup seems to wake up before the room does. The water catches the light. The stems cast little shadows. Even a single clipped sprig can feel theatrical in the best way.
One of the nicest surprises is how approachable the project feels once it is hanging. People assume it must be fussy because it looks curated, but it is actually forgiving. You do not need to be a florist. You just need a few stems with different shapes and the willingness to let them be simple. A grocery store bunch can be broken apart and suddenly look more expensive when each bloom gets its own little stage. Even herbs from the kitchen can work. A few rosemary or mint stems in glass vials look fresh, useful, and quietly stylish.
There is also something emotional about this kind of decor. Because the vials are small, the arrangement invites little rituals. You replace one stem, trim another, add a clipping from the yard, or swap pink flowers for white ones when the mood changes. It does not feel like maintaining decor. It feels like checking in on the room. That is a big reason the project holds attention over time. It evolves without demanding a complete redo.
Guests notice it, too. Not in the polite “nice lamp” way. They walk closer. They ask if the vials are vintage. They try to figure out how the bottles are attached. Then they usually say some version of, “I never would have thought of that.” That is the sweet spot for handmade home decor. It looks special, but not impossible. It feels original, but not strange for the sake of being strange.
Most of all, this project proves that romance in design does not have to be grand or expensive. It can live in a narrow board, a few small glass bottles, and a handful of flowers cut short on purpose. That is what makes the “DIY love potion” idea so memorable. It is not really about the vials. It is about transforming ordinary materials into a wall moment that feels tender, clever, and alive.
Conclusion
DIY love potion medicine vials as wall vases are the kind of project that checks all the boxes: affordable, stylish, customizable, and full of character. They blend upcycled charm with floral softness, work in nearly any room, and bring a fresh twist to wall decor without demanding much space. Whether you lean vintage apothecary, modern minimalist, or romantic cottage style, this wall vase DIY gives you endless ways to make your home feel more personal.
And that may be the real magic here. Not the glass. Not the flowers. Not even the lovely little “love potion” theme. It is the fact that a simple handmade object can make a room feel more alive, more thoughtful, and more like you. For a project built from tiny bottles, that is a pretty big trick.