Some DIY projects begin with a trip to the hardware store. Others begin with a long, suspicious stare into your closet and the realization that you own three belts you have not worn since cargo shorts had their first great empire. Good news: those forgotten men’s belts can become something much cooler than waist management. They can become stylish hanging shelves.
Using men’s belts to create cool hanging shelves is one of those rare home projects that checks nearly every box. It is affordable, practical, good-looking, beginner-friendly, and mildly smug in the best possible way. You get extra storage, wall decor, and a fun story when guests ask, “Where did you buy that?” Then you get to say, “I made it from an old belt,” while pretending not to enjoy the dramatic pause.
This guide walks through the design ideas, materials, installation tips, safety notes, styling tricks, and real-life lessons that make DIY belt shelves work. Whether you want a rustic leather strap shelf for books, a modern hanging shelf for plants, or a tiny bathroom shelf that can hold candles and your emotional support eucalyptus, this project has plenty of room for personality.
Why Men’s Belts Make Surprisingly Great Shelf Straps
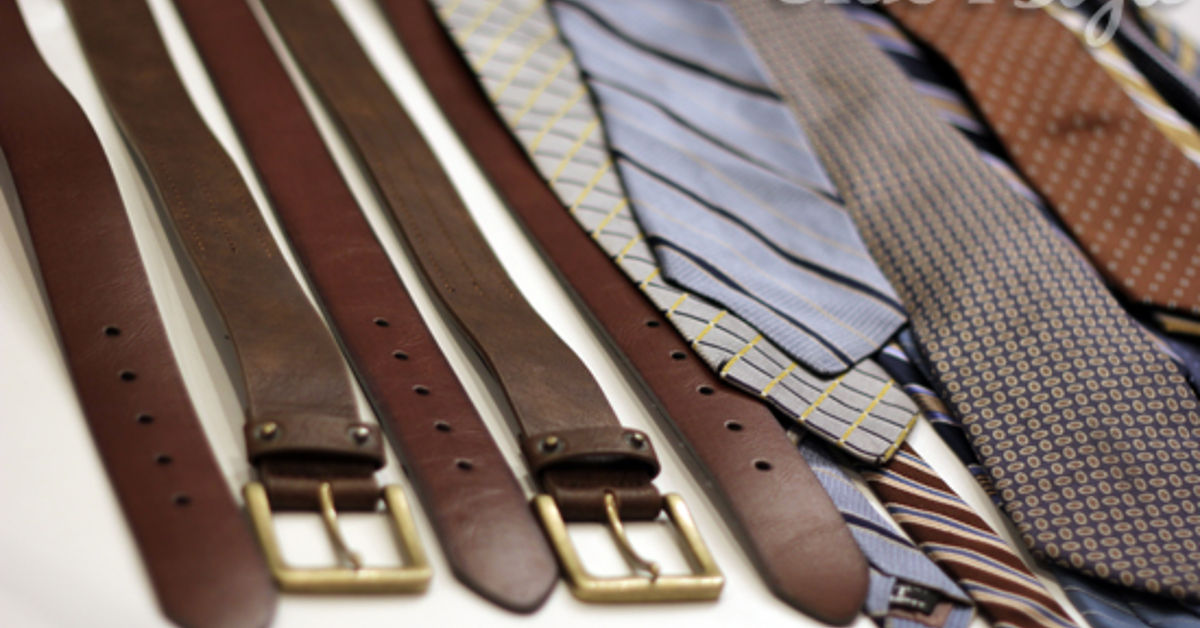
Belts are basically ready-made leather or faux-leather straps with finished edges, holes, buckles, and character. That makes them perfect for DIY hanging shelves. A belt already has the kind of rugged structure and visual detail that many store-bought leather straps try very hard to imitate. The buckle adds hardware charm, the punched holes make adjustment easier, and worn leather brings instant warmth to plain wood.
Another advantage is sustainability. Repurposing old men’s belts keeps usable material out of the trash and gives your space a custom look without buying a brand-new decorative shelf. Upcycled home decor is especially appealing because it turns ordinary objects into conversation pieces. A belt shelf says, “I care about design,” but also, “I am not above raiding the closet for building supplies.” That is range.
What Is a Belt Hanging Shelf?
A belt hanging shelf is a wall-mounted shelf where belts or leather straps support a wooden board. The most common version uses two belt loops fixed to the wall with screws. A board rests inside those loops, creating a clean suspended look. The design can be rustic, industrial, minimalist, farmhouse, boho, or modern depending on the belt color, board finish, hardware, and styling.
Unlike a traditional bracket shelf, the support is visible and decorative. The belts are part of the design, not something to hide. This is what makes the project so appealing. A simple pine board can look elevated when paired with dark brown leather. A black belt can make a shelf feel graphic and modern. A tan belt can soften a bright bathroom or entryway. Even a slightly worn belt can add character, as long as it is structurally sound.
Best Places to Use Men’s Belt Hanging Shelves
Living Room Display Shelf
In a living room, a men’s belt hanging shelf works beautifully as a display ledge. Use it for framed photos, small books, pottery, candles, or a trailing plant. It looks especially good above a reading chair, near a sofa, or beside a gallery wall. Keep the shelf lightly styled so the belt detail remains visible.
Bathroom Storage Shelf
A small belt shelf can bring warmth to a bathroom, especially if the room has cold tile, white walls, or chrome fixtures. Use it to hold rolled washcloths, a small jar, soap, a tiny plant, or guest towels. Avoid placing untreated leather directly in a splash zone, because moisture can stain, stretch, or weaken the material over time.
Kitchen or Coffee Bar Shelf
For a kitchen, belt shelves are best for lightweight decorative storage rather than heavy dishes. Think mugs, spice jars, tea tins, small bowls, or cookbooks. A belt shelf over a coffee station can look charming with a few mugs, a jar of sugar, and a little sign that says “But first, coffee,” if your kitchen enjoys telling people what to do.
Bedroom Nightstand Alternative
If floor space is tight, a small hanging belt shelf can act as a floating nightstand. It can hold a book, glasses, a phone, or a small lamp if the shelf is securely installed and the lamp is lightweight. This idea is especially useful in apartments, guest rooms, dorm rooms, and compact bedrooms.
Entryway Drop Zone
Near the front door, a belt shelf can hold keys, sunglasses, mail, and a small bowl for loose change. Pair it with hooks underneath for bags or hats, but do not hang heavy items from the shelf unless the entire setup is designed and anchored for that load.
Materials You’ll Need
The materials list is refreshingly simple. You need a wood board, two men’s belts, screws, wall anchors or stud-mounted screws, a drill, a level, measuring tape, a pencil, and sandpaper. Optional supplies include wood stain, paint, polyurethane, leather conditioner, washers, decorative screw caps, a stud finder, and a leather punch.
For the board, common choices include pine, oak, poplar, plywood, or reclaimed wood. Pine is affordable and easy to cut, while oak and maple are stronger and more refined. Reclaimed wood adds rustic charm but should be checked carefully for cracks, warping, old nails, and splinters. For beginners, a board around 24 to 30 inches long and 6 to 8 inches deep is a manageable size.
For the belts, choose real leather or strong synthetic belts that are not cracked, brittle, peeling, or stretched thin. Wider belts usually look more balanced and provide better support. Belts between 1 and 1.5 inches wide are ideal for most small shelves. Avoid elastic belts, fabric belts, and anything that looks like it might give up during a light breeze.
How to Choose the Right Belts
The best belts for hanging shelves are sturdy, flexible, and visually compatible. Real leather belts age beautifully and tend to hold their shape well. Faux leather can also work for light-duty shelves, but inspect it closely. If the surface is flaking, the material is separating, or the belt feels weak near the holes, save it for a costume drawer rather than a wall project.
Color matters too. Dark brown belts create a classic workshop-meets-library feel. Black belts look sharp and modern. Tan belts feel casual, boho, and warm. Matching belts give a clean appearance, while mismatched belts can feel artsy and relaxed. If you use mismatched belts, keep at least one design element consistent, such as width, color family, or buckle finish.
Buckle placement is another design decision. Some DIYers hide the buckle underneath the shelf. Others let the buckle sit near the front edge as a decorative feature. Both methods can look good. The key is symmetry. If one buckle is proudly posing for the camera and the other is hiding behind the board like it owes money, the shelf may look accidental instead of intentional.
Step-by-Step Guide: How to Make Hanging Shelves With Men’s Belts
Step 1: Plan the Shelf Size
Decide where the shelf will go and what it will hold. A shelf for framed art can be narrow. A shelf for books needs more depth and stronger support. For a first project, start with a lightweight display shelf rather than a heavy storage shelf. Mark the wall lightly with painter’s tape to visualize the size and height before drilling.
Step 2: Prepare the Wood Board
Cut the board to your desired length, or have it cut at a home improvement store. Sand the edges and corners until smooth. This matters because belts wrap around the board, and rough wood can scratch or wear the straps. Finish the board with stain, paint, clear coat, or natural oil depending on your style. Let the finish dry fully before assembly.
Step 3: Measure the Belt Loops
Wrap each belt around the board to form a loop. The board should sit securely in the loop without being squeezed so tightly that it tilts. Use existing belt holes if they line up well. If not, punch new holes with a leather punch. Both belt loops must be the same length, or your shelf will lean like it just heard bad news.
Step 4: Mark the Wall
Use a level and measuring tape to mark where the two belt loops will attach to the wall. The marks should be evenly spaced and level. If possible, attach the screws directly into wall studs. A stud finder is helpful for locating the strongest mounting points. If studs are not available, use wall anchors rated for the expected load and wall type.
Step 5: Install the Belts
Fold each belt into a loop and secure it to the wall with screws. Use washers if the screw head is small, because washers help distribute pressure over the belt. Tighten the screws firmly, but do not crush the leather so much that it tears. The belt should feel secure before the board is added.
Step 6: Slide in the Board
Place the board through both belt loops. Check it with a level. Adjust the belt holes, buckle position, or screw placement if needed. Once the board is level, add a small screw through the underside of each belt into the board if you want extra stability. This helps prevent the board from sliding forward or shifting sideways.
Step 7: Test Before Styling
Before adding decor, gently press down on the shelf and watch for movement. Add weight gradually. Start with lightweight items and observe whether the belts stretch or the fasteners loosen. If anything moves, creaks, pulls, or makes you whisper “that seems fine” in an unconvincing tone, stop and reinforce the installation.
Important Safety Tips
Men’s belt shelves are stylish, but they are not magic. They need proper support. The safest option is to screw into wall studs whenever possible. If that is not possible, choose high-quality anchors suitable for your wall material, such as drywall, plaster, brick, or masonry. Always check the weight rating of anchors and hardware, and remember that the total load includes the board, the belts, and everything placed on the shelf.
A belt hanging shelf is best for light to medium decorative use. It is not ideal for heavy stacks of books, large plants, expensive electronics, dumbbells, cast-iron cookware, or anything your cat considers a launchpad. If you need serious storage, use brackets, cleats, or a shelving system designed for heavier loads.
Also think about location. Avoid placing a belt shelf directly above a bed, crib, pet bed, stove, or high-traffic walkway unless it is professionally secured and used only for very light items. In homes with children or pets, keep tempting objects off the edge. A dangling leather strap may look like design to you, but to a kitten it looks like a gym membership.
Design Ideas for Cool Belt Hanging Shelves
Rustic Workshop Style
Use dark leather belts, reclaimed wood, black screws, and a matte stain. Style the shelf with old books, a small brass object, and a plant in a clay pot. This look works well in dens, home offices, cabins, and living rooms with warm neutrals.
Modern Minimalist Style
Choose black belts and a smooth, light wood board. Hide the buckles underneath or keep them aligned at the bottom. Style with one framed print, one sculptural object, and one small plant. The trick is restraint. Minimalism is just clutter with excellent self-control.
Boho Natural Style
Pair tan leather belts with a whitewashed or natural wood board. Add a trailing pothos, woven basket, ceramic vase, or small stack of travel books. This style works nicely in bedrooms, sunrooms, and relaxed living spaces.
Industrial Loft Style
Use black or dark brown belts with a thick wood board and exposed screws. Add metal accents, vintage tins, or a black-framed photo. This look is excellent for apartments, home bars, and office corners.
Kids’ Room Display Shelf
A belt shelf can hold small toys, picture books, or collectibles. Use colorful painted wood and sturdy belts. Keep the shelf high enough to prevent climbing and avoid heavy items. For children’s spaces, safety should lead the design.
How to Style Your Finished Belt Shelf
Styling is where the shelf becomes part of the room instead of just a board wearing suspenders. Start with the largest item first, such as framed art or a small plant. Then add medium objects, such as books or a candle. Finish with one or two smaller details, like a stone, tiny dish, or decorative box. Varying height, texture, and shape makes the display feel layered rather than lined up like a tiny courtroom.
Use the rule of three if you feel stuck. Group three objects of different sizes and textures: for example, a framed photo, a small plant, and a ceramic bowl. Leave breathing room between items so the shelf does not look crowded. Negative space is not empty; it is design taking a deep breath.
For practical shelves, keep frequently used items within reach. In a bathroom, use small jars or baskets. In an entryway, use a tray for keys. In a kitchen, display items that are attractive enough to be seen and useful enough to justify the space. If an object is neither beautiful nor useful, it may be auditioning for the junk drawer.
Common Mistakes to Avoid
The biggest mistake is using weak belts. If a belt is cracked, thin, stretched, or peeling, it should not hold a shelf. The second mistake is skipping the level. Even a tiny slope becomes obvious once objects start sliding to one side like they are trying to escape.
Another common issue is choosing the wrong hardware. Screws that are too short, anchors that are too weak, or fasteners that do not match the wall type can lead to failure. Take hardware seriously. It may not be glamorous, but neither is explaining why a succulent just attacked your floor.
Do not overload the shelf. Belt shelves are excellent for decor and light storage, but they are not a substitute for heavy-duty shelving. Keep the load modest and evenly distributed. Place heavier objects near the wall rather than at the front edge, where they create more pull on the straps.
Budget Breakdown
This project can be very affordable, especially if you already own belts and basic tools. A simple pine board may cost only a few dollars. Thrifted belts are often inexpensive. Screws, anchors, washers, sandpaper, and stain may add a little more, but many DIYers already have them. In many cases, a small belt hanging shelf can be made for less than the cost of a store-bought decorative shelf.
The best value comes from using quality where it matters. Spend a little more on strong hardware and a decent board. Save money by repurposing belts, using leftover stain, or shopping the scrap wood section. DIY does not mean using the cheapest possible materials. It means using materials wisely so the finished project looks intentional, not like it survived a garage sale tornado.
Maintenance and Care
Dust the shelf regularly with a soft cloth. If the board is sealed, wipe it gently with a damp cloth when needed. Avoid soaking the wood or leather. For real leather belts, a small amount of leather conditioner can help prevent drying and cracking, especially in sunny rooms. Keep belt shelves away from excessive moisture and direct heat.
Check the screws and anchors every few months, especially during the first year. Leather can relax slightly over time, and wall hardware can loosen if the shelf is bumped or overloaded. A quick inspection keeps the shelf safe and level.
Experiences From Making and Using Men’s Belt Hanging Shelves
The first thing you learn when making a belt shelf is that belts have personalities. Some are cooperative, flexible, and ready for their second career in home decor. Others are stiff, dramatic, and behave like they were personally offended by the drill. Before committing to a belt, wrap it around the board and test how it hangs. If it fights the shape too much, choose another belt.
One helpful experience is to mock up the entire shelf before drilling. Lay the belts and board on the floor, adjust buckle placement, and take a photo. This gives you a visual reference and helps you spot awkward details before they become holes in the wall. Painter’s tape is also a lifesaver. Tape the shelf outline on the wall and step back. What looks perfect up close may look strangely high, low, or lonely from across the room.
Another lesson is that belt holes rarely line up exactly where you want them. A leather punch makes the project much cleaner. Trying to force a screw through leather with random tools can create messy holes and a surprising amount of regret. If you do not have a leather punch, carefully drilling through the belt on a scrap wood backing can work, but go slowly.
Finishing the board before installation is also worth the patience. A raw board can look charming, but sanding and sealing make the shelf feel more finished. Even a simple clear coat can bring out the grain and protect the surface. If you stain the board, test the color on the underside first. Wood stain has a sneaky habit of looking calm on the can and wildly different on your actual board.
When styling the shelf, less is usually better. The belts are already a design feature, so overcrowding the shelf hides the best part. A small stack of books, a framed print, and one plant can be enough. If the shelf is narrow, avoid round objects that can roll. Decorative balls, tiny jars, and smooth stones may look cute until gravity joins the project.
One of the nicest surprises is how adaptable belt shelves are. In a hallway, they make a practical landing spot for keys. In a bathroom, they soften hard surfaces. In a bedroom, they create a lightweight nightstand alternative. In a home office, they give notebooks and small decor a place to live. The same basic project can feel completely different depending on wood tone, belt color, and styling.
The biggest real-world lesson is to respect weight. A belt shelf may look strong, but the wall connection is everything. If you install into studs, the shelf feels much more secure. If you use anchors, choose them carefully and stay within their limits. Do not guess. Do not “just see what happens.” DIY confidence is great; DIY overconfidence is how you end up holding a broken shelf at 11 p.m. and blaming the laws of physics.
Finally, belt shelves are rewarding because they look more difficult than they are. Guests notice the detail immediately. They often assume it came from a boutique home store with a name like “Oak & Intentionality.” That is the beauty of this project. It turns ordinary materials into something stylish, useful, and personal. And yes, it gives old men’s belts a noble retirement plan.
Conclusion
Using men’s belts to create cool hanging shelves is a smart way to combine storage, style, and upcycling. With a sturdy board, strong belts, reliable hardware, and careful installation, you can build a shelf that looks custom without requiring advanced woodworking skills. The project works in living rooms, bathrooms, bedrooms, kitchens, offices, and entryways, adding warmth and personality wherever blank wall space needs a little help.
The secret is balance. Choose belts that are strong enough to support the shelf, hardware that matches your wall, and styling that lets the design breathe. Keep the load reasonable, check the installation, and treat the shelf as decorative storage rather than industrial equipment. Do that, and your old belts can become one of the coolest DIY details in your home.