Publishing a Roblox outfit without testing it first is a little like walking into school picture day with a sticker on your forehead: technically possible, but deeply avoidable. Whether you are designing a classic Roblox shirt, pants, or T-shirt, testing is the step that separates “cute streetwear drop” from “why is my hoodie sleeve on my ankle?”
Roblox clothing looks simple from the outside. You create a design, upload it, name it, and share it with the world. Easy, right? Mostly. But under that simple process are tiny details that can make or break the final result: template alignment, seams, sleeve placement, torso wrapping, image quality, moderation rules, Marketplace presentation, and how the clothing behaves on different avatar styles.
This guide explains how to test your Roblox clothes before sharing them using five practical methods. You will learn how to preview clothing in Roblox Studio, check classic clothing templates, inspect seams and details, test across avatar movement and body types, and run a final Marketplace-readiness review before you put your design in front of players.
Why Testing Roblox Clothes Matters Before You Share Them
Testing is not just for perfectionists who zoom in until pixels start filing complaints. It saves time, Robux, and embarrassment. A design may look amazing in your image editor, but Roblox classic clothing wraps around an avatar body. That means one flat image becomes a wearable item with front, back, side, top, bottom, arm, and leg areas.
If the design is even slightly off, you might see problems such as:
- Misaligned sleeves or pant legs
- Shirt patterns that do not connect across the sides
- Shoes that climb too high and look like part of the pants
- Text that becomes distorted on the torso
- Edges, borders, or shadows that break at the seams
- Details that disappear when viewed on a smaller avatar
- Clothing that looks good in one angle but awkward in motion
Testing also helps you catch policy and branding issues. If your clothing uses copied logos, copyrighted characters, misleading names, or inappropriate imagery, it may be moderated or rejected. A final review before sharing is much easier than fixing a public mistake later.
Before You Test: Know Which Roblox Clothing Type You Made
Roblox classic clothing generally falls into three categories: T-shirts, Shirts, and Pants. They may sound similar, but they behave differently.
Classic T-Shirts
A classic T-shirt is a square image that appears on the front of a blocky avatar’s torso. It is usually the easiest clothing item to create and test because it does not wrap around arms, legs, or the back. If you are making a logo tee, simple graphic, badge, or front-only design, this is often the simplest route.
Classic Shirts
A classic Shirt wraps around the torso and arms. It uses a template with separate sections for the front, back, torso sides, sleeves, and arm surfaces. This is where testing becomes important. A jacket zipper might look centered in your file but shift visually once wrapped around the avatar.
Classic Pants
Classic Pants wrap around the torso and legs. They are used for jeans, shorts, skirts styled as pants, shoes, socks, belts, and full lower-body outfits. Pants can be tricky because small details near the bottom of the legs may appear stretched, hidden, or blended into the wrong section.
Once you know your clothing type, you can test it correctly. Testing a Shirt as a T-shirt, for example, is like trying to judge a pizza by looking only at the box. You need the correct preview method for the correct asset type.
1. Test Your Roblox Clothes in Roblox Studio First
The best first test is Roblox Studio. Studio lets you preview classic clothing before you upload it as a Marketplace item, which helps you find design problems early. This is especially useful if you are still experimenting with colors, seams, and template placement.
How to Preview Classic Clothing on a Rig
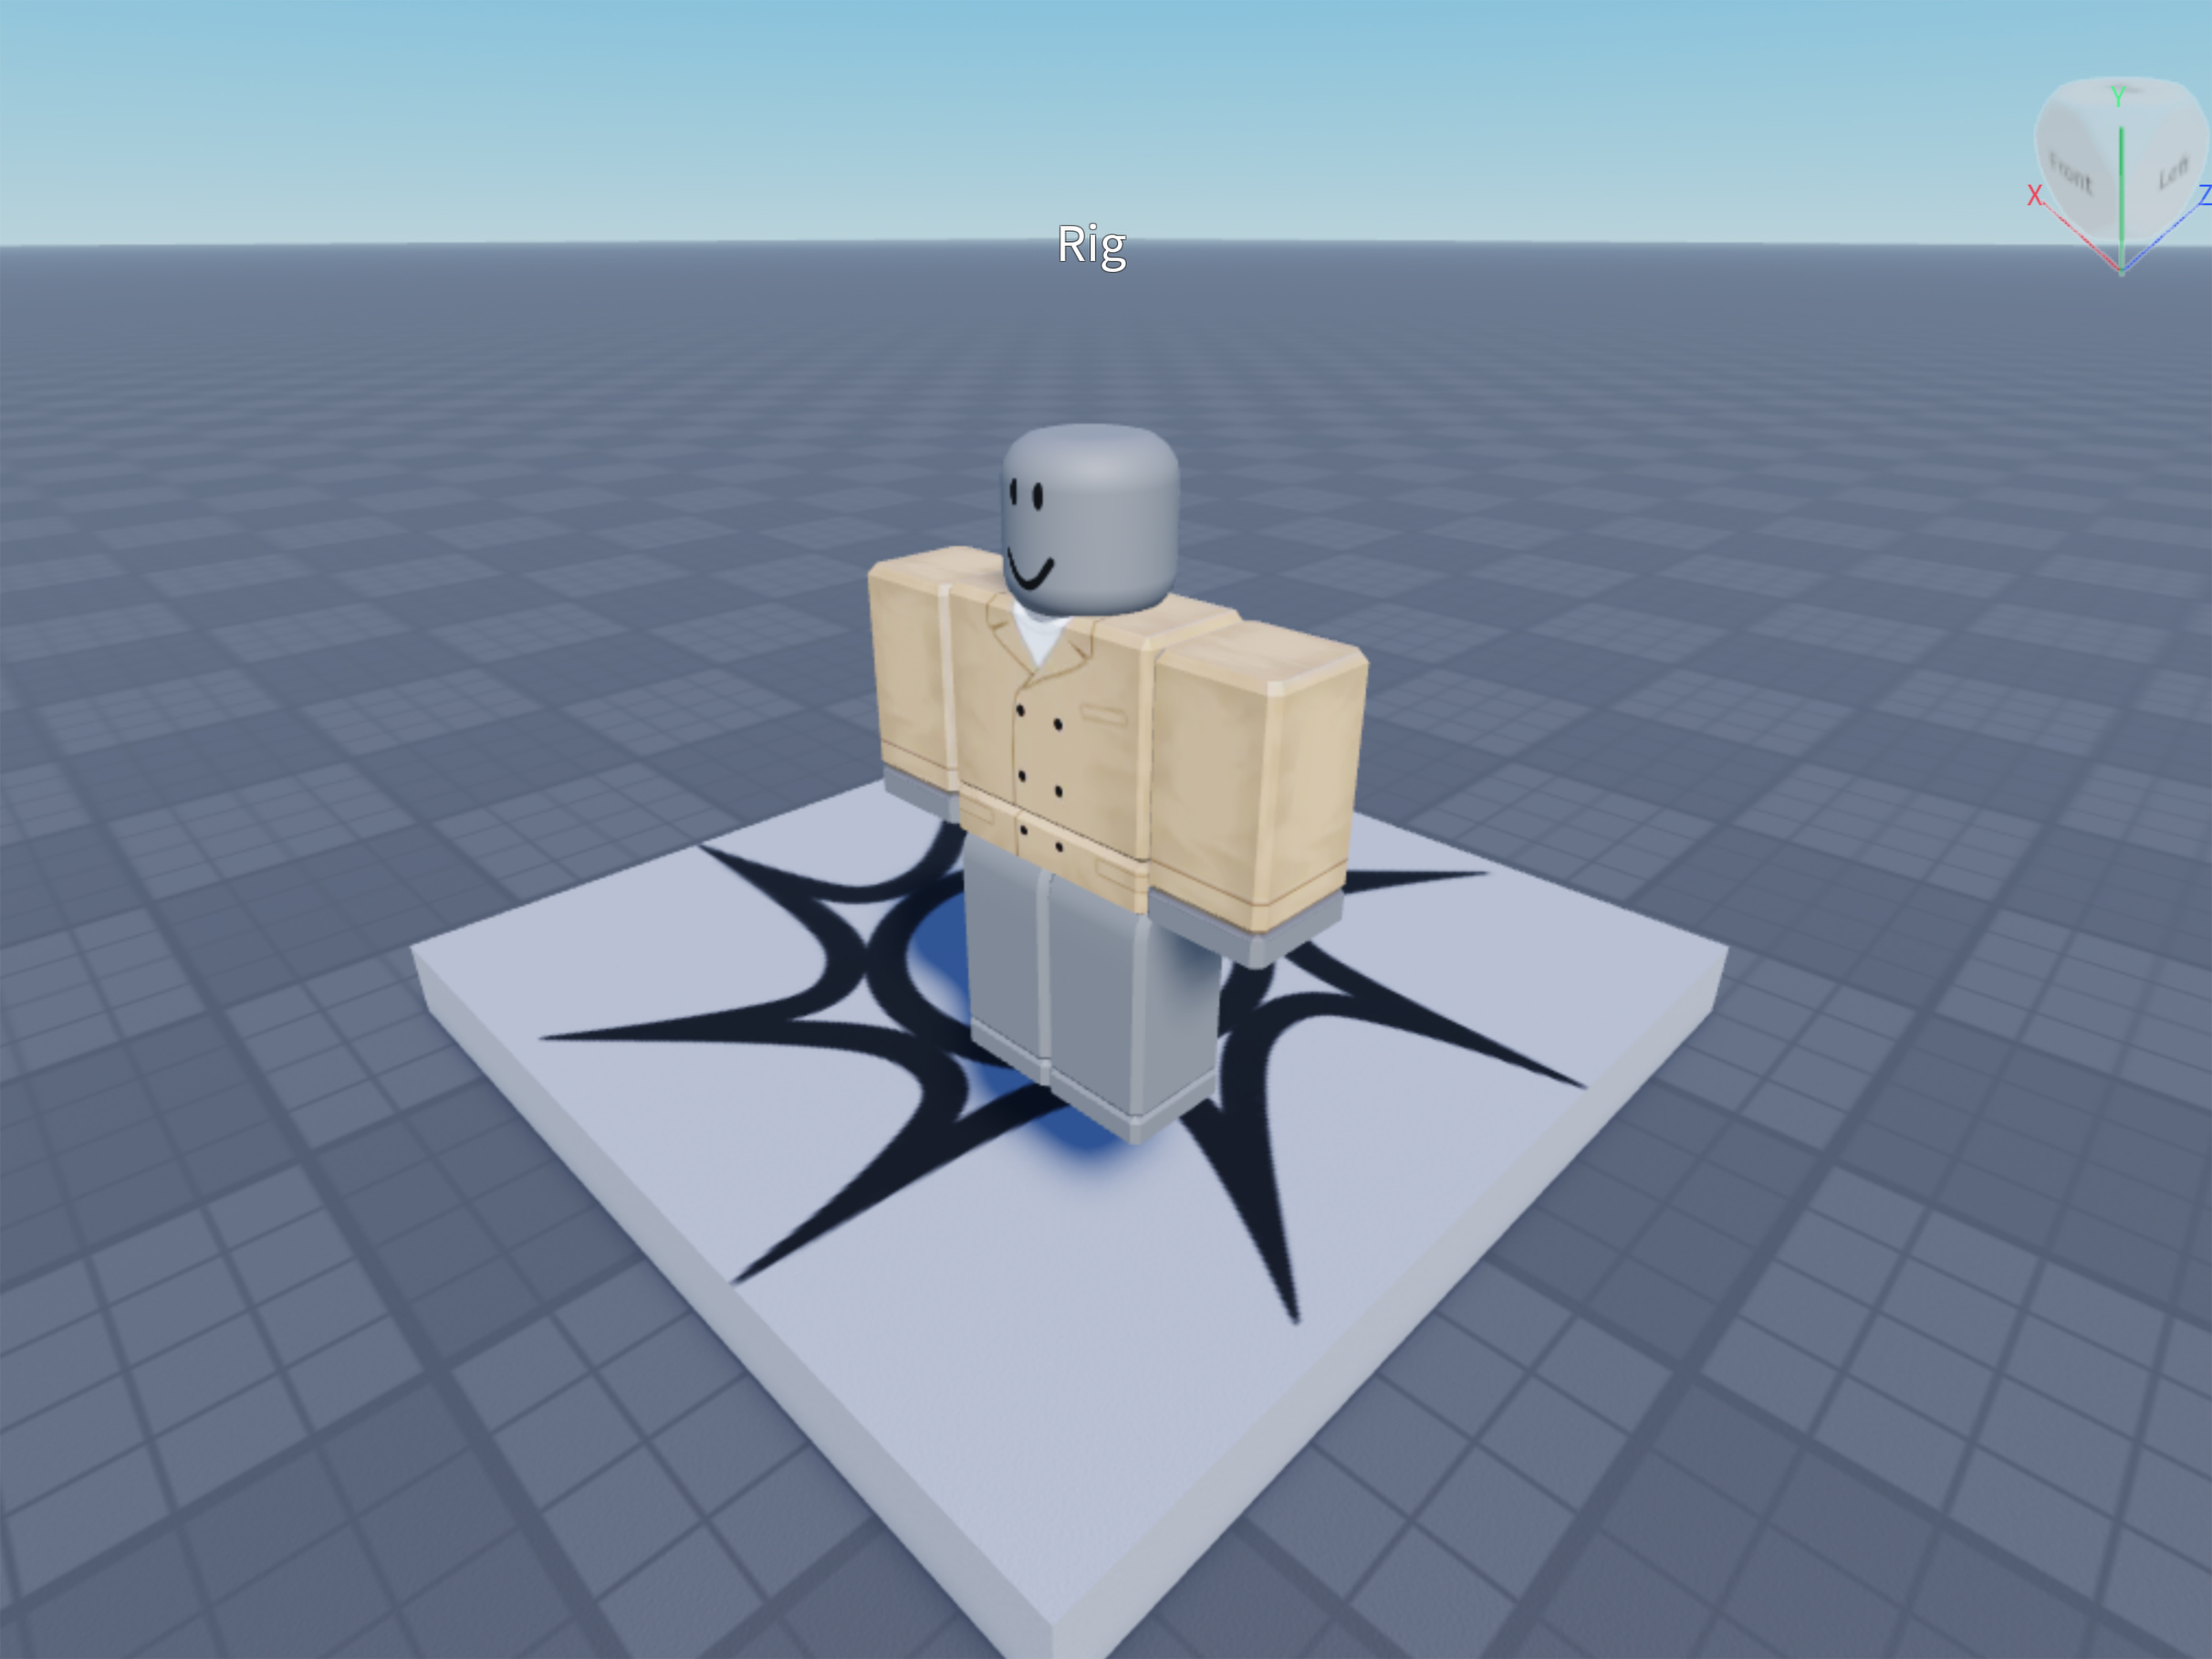
Open Roblox Studio and create or open a simple place. You do not need a full game map. A blank baseplate is enough. Then use the Avatar tools to insert a block-style avatar rig into the workspace. This rig acts like a mannequin, except it does not complain when you make it wear neon plaid pants at 2 a.m.
After the rig appears, add the correct clothing object:
- For a T-shirt, insert a ShirtGraphic object.
- For a classic Shirt, insert a Shirt object.
- For classic Pants, insert a Pants object.
Then apply your uploaded image or test asset to the matching property. A T-shirt uses the Graphic property. A Shirt uses the ShirtTemplate property. Pants use the PantsTemplate property. This matters because each clothing type is read differently by Roblox.
What to Look For in Studio
Once your clothing appears on the rig, rotate around it slowly. Do not just stare at the front. Most template mistakes hide on the sides like tiny fashion gremlins. Check the front, back, arms, shoulders, legs, waist, and bottom edges.
Ask yourself:
- Does the front design sit where I intended?
- Are the sleeves facing the right direction?
- Do colors match across seams?
- Are outlines too thick or too blurry?
- Do shoes, cuffs, belts, or hems stop at the right place?
- Does the item still look good when zoomed out?
If something looks wrong, return to your image editor, adjust the template, export again, and test again. Yes, this loop can feel repetitive. But every good Roblox designer has had a “why is the pocket on the elbow?” moment. Testing is how you escape that phase.
2. Check the Template Alignment Like a Detective
Classic Roblox Shirts and Pants rely on templates. These templates show which parts of your flat design wrap onto the avatar’s body. The front torso, back torso, arm sides, leg sides, tops, and bottoms all have their own spaces.
When beginners struggle with Roblox clothing, the problem is often not the art itself. It is the alignment. A hoodie string may cross into the wrong panel. A sleeve stripe may not continue across the shoulder. A shoe texture may climb too far up the leg. A belt may sit too low and turn into a mystery waist shadow.
Use a Template Checklist
Before sharing your clothes, check your file against this template-focused list:
- Front and back: Are the main design elements centered and balanced?
- Left and right sides: Do patterns continue naturally around the body?
- Arms: Are sleeve cuffs, stripes, or logos placed on the correct arm panels?
- Legs: Do pant patterns line up from front to side to back?
- Top and bottom areas: Are you avoiding unwanted color blocks on the top or underside of limbs?
- Transparent areas: Are they intentional and clean, not leftover editing marks?
A good trick is to create a temporary test version with bright guide colors. For example, make the left sleeve red, the right sleeve blue, the front green, and the back yellow. Apply it to a rig and see where each color lands. Once you understand the wrap, replace the guide colors with your real design.
Do Not Rely on the Flat Image Alone
Your design may look perfectly symmetrical in the template file but still look odd on the avatar. Roblox clothing is viewed in 3D space, not as a flat poster. That means shadows, outlines, and repeated patterns behave differently once wrapped.
For example, a checkerboard shirt can look clean on the template but messy on the side seams if the squares do not meet evenly. A denim jacket can look great from the front but unfinished from the back if you forget collar and shoulder details. A simple black hoodie can look flat if you do not add subtle shading, but it can also look muddy if you overdo the shadows.
3. Inspect Seams, Edges, and Small Details at Multiple Zoom Levels
One of the biggest mistakes Roblox clothing creators make is testing only from close range. In Studio, your design might look sharp when the camera is almost touching the avatar’s nose. But in a real experience, players often see clothing from farther away, while moving, jumping, dancing, or standing in a crowd of twenty avatars dressed like space cowboys.
Test Close, Medium, and Far Views
Use three viewing distances:
- Close view: Check pixels, seams, logos, text, and outlines.
- Medium view: Judge the overall outfit shape, color balance, and style.
- Far view: Make sure the design is still recognizable in normal gameplay.
This is especially important for text. Tiny words on shirts often become unreadable. If your design depends on a phrase, make it large, simple, and high contrast. Do not use thin fonts that disappear when Roblox compresses or scales the texture.
Watch for Seam Breaks
Seams are where the flat template panels meet on the avatar. Common seam problems include:
- One side being darker than the other
- Patterns suddenly stopping at the torso edge
- Sleeve cuffs not wrapping evenly
- Back details sitting higher than front details
- Pants pockets appearing too far to the side
To fix seam breaks, copy edge colors from one panel to the neighboring panel. If you use stripes, continue the stripe across both pieces. If you use shading, keep the light direction consistent. If the left side of your hoodie is shaded like sunset and the right side is shaded like a haunted basement, players will notice.
Check Image Quality Before Uploading
Export your clothing image in a clean format such as PNG or JPG, depending on the design. PNG is usually better for crisp lines and transparent areas. JPG can work for designs with painterly textures, but too much compression may create blurry edges or color noise.
Before you share your item, open the exported file by itself. Zoom in. Look for stray pixels, accidental brush marks, jagged edges, or leftover template guide lines. If the file looks messy before it enters Roblox, it will not magically become cleaner after upload. Roblox is powerful, but it is not a laundry detergent.
4. Test Movement, Body Fit, and Layering
A clothing item is not finished just because it looks good on a still mannequin. Roblox avatars move. They walk, jump, climb, dance, sit, fall, and occasionally run into walls with great confidence. Your clothing should look acceptable during normal movement.
Use Playtesting in Studio
After applying the clothing to a rig or your test character, use Studio’s playtesting tools. Walk around, rotate the camera, jump, and view the outfit from different angles. Pay attention to the shoulders, elbows, waist, knees, and ankles. These areas often expose placement issues.
For classic clothing, movement testing is mostly about visual consistency. Because classic clothing is a 2D surface texture, it does not physically fold like real fabric. But it can still look awkward when joints bend or when the camera reveals areas you did not decorate carefully.
Test With Different Avatar Looks
If your design is meant for a specific style, such as a blocky classic avatar, test it on that style first. If you plan to promote it broadly, test it with several avatar appearances when possible. Some user-generated avatars may not support 2D classic clothing the same way classic blocky avatars do, so do not assume every body shape will display your clothing perfectly.
For creators working with modern layered clothing or 3D clothing accessories, Roblox’s Accessory Fitting Tool is especially useful. It lets you preview how an accessory or layered clothing item appears with different bodies, clothing combinations, and animations. This is important because layered clothing must fit over avatar bodies and interact with other worn items.
Check Layering Conflicts
If you are designing layered clothing, test it with other clothing items. A jacket may look great alone but clip through a bulky shirt. Shoes may look fine while standing but odd during movement. A skirt or long coat may behave differently depending on body proportions and animation.
Layering tests help you answer questions like:
- Does this item fit over common clothing combinations?
- Does it hide important design details?
- Does it clip through the avatar during movement?
- Does the layer order make sense?
- Does the item still match the intended style from every angle?
Even if you are making only classic clothing, this mindset helps. Think like a player: “Would I actually wear this with my favorite hair, face, accessories, and shoes?” If the answer is yes, you are getting closer to a shareable design.
5. Run a Final Sharing and Marketplace Readiness Review
After your clothing passes visual testing, do not rush straight to sharing. Run a final review. This step is less exciting than designing flames on a jacket, but it is what makes your item look professional.
Review the Name and Description
Your clothing name should be clear, searchable, and honest. Avoid spammy names stuffed with unrelated keywords. If the item is a black oversized hoodie, call it something like “Black Oversized Hoodie” or “Minimal Black Streetwear Hoodie.” Do not call it “FREE RARE LIMITED SUPER ROBUX ADMIN HOODIE,” because that sounds like it was written by a vending machine having a panic attack.
Your description should explain the style in one or two clean sentences. Mention the color, theme, and outfit idea. For example:
“A clean black streetwear hoodie with soft shading, front pocket detail, and casual everyday styling. Great for minimal, emo, city, and casual Roblox avatars.”
This kind of description helps users understand the item while naturally supporting SEO and Marketplace search behavior.
Check Community and Copyright Safety
Before sharing, ask yourself:
- Did I create the artwork myself?
- Am I using any brand logo, celebrity image, anime character, or copyrighted artwork without permission?
- Does the clothing follow Roblox Community Standards?
- Could the name or image mislead users?
- Is the item appropriate for the Roblox audience?
Original work is safer, more professional, and better for building a recognizable clothing brand. Inspired designs are fine when they are truly original. Direct copying is not. If your “inspiration” still has the exact logo, character face, or design layout from someone else’s work, it is time to redesign.
Ask for Feedback Before a Public Drop
Before sharing your clothes widely, show a preview to a few trusted friends, group members, or testers. Ask specific questions. Do not just say, “Is it good?” That usually gets replies like “yeah” or “cool,” which is friendly but not very useful.
Try asking:
- Does the outfit look clear from far away?
- Do the seams look broken anywhere?
- Would you change the color or shading?
- Does the item name match the design?
- Would you wear this on your avatar?
If multiple people notice the same issue, fix it. Feedback is not an insult. It is free quality control with fewer spreadsheets.
Common Roblox Clothing Testing Mistakes to Avoid
Uploading Too Early
Many creators upload the first version as soon as it looks decent. Wait. Test two or three versions first. Small improvements in shading, alignment, and naming can make the final item look much more polished.
Forgetting the Back View
Players see avatars from behind all the time, especially in third-person experiences. If the back of your shirt is blank, unfinished, or mismatched, the outfit may feel cheap even if the front looks great.
Using Too Much Detail
Roblox clothing designs are small when worn on avatars. Ultra-detailed graphics can become visual soup. Strong shapes, readable contrast, and clean edges usually work better than tiny complicated details.
Ignoring Color Contrast
Dark gray on black may look stylish in your editor, but it can disappear in-game. Test your clothing in bright and dark environments if possible. A good outfit should survive more than one lighting condition.
Copying Popular Designs Too Closely
Trends are useful, but copying is risky and forgettable. Study what makes popular Roblox clothing work: clean silhouettes, recognizable themes, strong thumbnails, and good color palettes. Then create your own version from scratch.
Extra Creator Experience: What Testing Roblox Clothes Teaches You Over Time
After testing enough Roblox clothes, you start developing a strange sixth sense for template problems. You can look at a sleeve stripe and think, “That is going to land somewhere weird.” You can spot a shoe design that is about to become a sock-pants hybrid. You begin to understand that Roblox clothing design is not only about art; it is about translation. You are translating a flat image into a wearable avatar item.
One useful experience is to keep a “failed tests” folder. It sounds dramatic, but it is incredibly helpful. Save versions where seams broke, colors looked wrong, or details landed in strange places. Later, compare them with the fixed versions. You will learn faster from your own mistakes than from any perfect tutorial screenshot. A failed hoodie sleeve can teach you more than a finished outfit that happened to work by luck.
Another helpful habit is testing in batches. Instead of adjusting one pixel, exporting, opening Studio, checking, closing, and repeating forever, create three variations at once. For example, make Version A with darker shading, Version B with cleaner seams, and Version C with larger front details. Test all three on the same rig. This makes it easier to compare choices and prevents you from obsessing over tiny changes that players may never notice.
Color testing is also underrated. A shirt that looks amazing on a white background may look dull on a Roblox avatar with dark accessories. Try previewing your design with different skin tones, hair colors, and accessory styles. A black jacket with black shadows may lose detail when paired with dark hair. A pastel outfit may look washed out in bright lighting. A red-and-green design may accidentally scream “holiday sweater” even if you were aiming for “cyberpunk racer.” Context matters.
Creators also learn that simple designs often sell the idea faster. This does not mean boring. It means clear. A clean varsity jacket, a sharp pair of jeans, or a well-shaded hoodie can look more professional than an overloaded design with chains, flames, skulls, stars, lightning, and seventeen logos fighting for emotional custody of the torso.
Finally, testing teaches patience. The first version is rarely the best version. Good Roblox clothing usually comes from several passes: sketch, template, export, Studio preview, seam fix, movement check, feedback, final polish, then upload. That process may sound slow, but it builds better instincts. Over time, your first drafts get cleaner, your templates get more accurate, and your clothing brand starts to look consistent. The goal is not just to share one outfit. The goal is to become the creator players recognize because your items look finished, wearable, and worth saving.
Conclusion
Testing your Roblox clothes before sharing them is the easiest way to avoid awkward seams, blurry details, poor fit, and preventable upload regrets. Start in Roblox Studio, use the correct clothing object, check template alignment, inspect your design from multiple distances, test movement and layering, and finish with a Marketplace-readiness review.
The more you test, the better your design instincts become. You will understand where to place details, how to make seams behave, when to simplify a design, and how to prepare clothing that players actually want to wear. In Roblox fashion, polish matters. A tested outfit looks intentional. An untested one looks like it got dressed during an earthquake.
So before you share your next hoodie, pants, T-shirt, uniform, cosplay-inspired outfit, or streetwear drop, give it a proper test run. Your avatar deserves it. Your future customers deserve it. And your sleeves definitely deserve to stay on the arms.