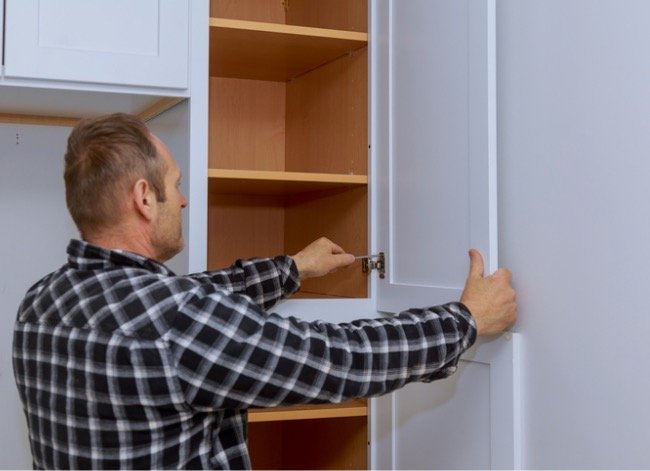
Cabinet doors have a sneaky way of ruining a perfectly good kitchen. One day everything looks crisp, clean, and magazine-ready. The next day, one door is drooping like it just received bad news, another is rubbing its neighbor, and a third refuses to close unless you give it the kind of shove normally reserved for stuck garage doors.
The good news? Learning how to adjust cabinet hinges is one of the simplest DIY fixes in the home-improvement universe. You do not need to rebuild the cabinet box, replace every door, or call a contractor while dramatically whispering, “It’s worse than we thought.” In most cases, a screwdriver, a patient eye, and a few tiny turns are all it takes to bring your cabinet doors back into alignment.
This guide explains how cabinet hinge adjustment works, how to identify the right screws, how to fix common problems like sagging doors and uneven gaps, and when it is time to replace the hinge instead of adjusting it. Whether your cabinets use modern concealed European hinges, soft-close hinges, face-frame hinges, or older exposed hardware, the goal is the same: doors that sit level, close smoothly, and stop looking like they had an argument overnight.
Why Cabinet Doors Become Misaligned
Cabinet doors move more than most people realize. Every morning coffee grab, every late-night snack mission, and every “I know the measuring cups are in here somewhere” expedition puts a little stress on the hinges. Over time, that repeated movement can loosen screws, shift the hinge plate, or slightly change the door position.
Humidity can also play a role. Wood expands and contracts as indoor moisture changes, especially in kitchens and bathrooms. A door that looked perfect in winter may rub in summer. Add gravity, heavy door fronts, kids who treat cabinet handles like playground equipment, and the occasional enthusiastic slam, and misalignment becomes almost inevitable.
The most common cabinet door problems include doors that sit too high or too low, uneven gaps between double doors, doors that stick out from the cabinet frame, doors that rub at the top or bottom, and doors that will not close flush. Fortunately, modern cabinet hinges are designed with adjustment in mind, so most of these problems are fixable without replacing the cabinet.
Tools You Need to Adjust Cabinet Hinges
You do not need a garage full of tools to adjust cabinet hinges. In many cases, the entire job can be handled with one screwdriver and a decent amount of patience. That said, having the right tools nearby makes the process smoother and reduces the chance of damaging the screw heads.
Basic Tool List
- Phillips-head screwdriver
- Pozidriv screwdriver, if your European hinges require it
- Small level
- Tape measure or ruler
- Pencil
- Flashlight
- Wood glue and toothpicks or dowels for stripped screw holes
- Replacement screws, if existing screws are worn or too short
A manual screwdriver is often better than a power drill for hinge adjustment. A drill can over-tighten screws, strip holes, or move the door farther than intended. Cabinet hinge adjustment is a tiny-turn project, not a “let’s see what this cordless beast can do” project.
Know Your Cabinet Hinge Type Before You Start
Before turning screws, open the cabinet door and look closely at the hinge. Most kitchen cabinets today use concealed European-style hinges, also called cup hinges. These are hidden when the door is closed and usually offer three-way adjustment: up and down, side to side, and in and out.
Older cabinets may have exposed butt hinges, wraparound hinges, semi-concealed hinges, or surface-mounted decorative hinges. These can still be adjusted, but the process is less elegant. Instead of turning built-in adjustment screws, you may need to loosen mounting screws, reposition the door manually, or shim behind the hinge.
If your cabinets have soft-close hinges, they may also include adjustment screws plus a soft-close mechanism. The soft-close feature controls the speed of closing, while the hinge screws control alignment. Do not confuse the two, unless you enjoy turning random screws and asking the cabinet, “Did that help?”
How European Cabinet Hinges Adjust in Three Directions
European hinges are popular because they allow fine-tuning after installation. Most have three main adjustment zones. The exact screw layout varies by brand, but the general idea is consistent.
Side-to-Side Adjustment
The side-to-side screw moves the cabinet door left or right. This is the screw you use when the gap between two doors is uneven or when one door overlaps the other too much. Turning this screw changes the reveal, which is the visible gap around the cabinet door.
Up-and-Down Adjustment
The vertical adjustment usually happens at the hinge mounting plate. Many hinges have elongated screw slots that let the door slide slightly up or down after the screws are loosened. This is useful when one door is sitting lower than its neighbor.
In-and-Out Adjustment
The depth adjustment moves the door closer to or farther from the cabinet box. Use this when the door sticks out, closes unevenly, or sits too deep compared with nearby doors. A small depth adjustment can make a cabinet look dramatically cleaner.
Step-by-Step: How to Adjust Cabinet Hinges
Cabinet hinge adjustment works best when you go slowly. Make one change, close the door, check the result, and adjust again if needed. The biggest mistake is turning every screw at once and then wondering why the door now looks like it is trying to leave the kitchen.
Step 1: Inspect the Door and Identify the Problem
Close the cabinet door and study the gaps. Is the door too high? Too low? Is the top gap wider than the bottom? Does the door rub against another door? Does one corner stick out? Look at the door from the front and from the side.
If you are adjusting a pair of cabinet doors, compare them to each other. The goal is not mathematical perfection; it is visual consistency. A kitchen full of even reveals looks polished, even if every gap is not measured to the thousandth of an inch.
Step 2: Tighten the Mounting Screws First
Before making alignment adjustments, check whether the hinge is loose. Open the door and tighten the screws that attach the hinge to the cabinet box and the door. If a screw turns endlessly without tightening, the hole may be stripped. Do not ignore that. A stripped screw hole will not hold alignment for long.
Sometimes tightening the mounting screws solves the entire problem. Loose hinges can make a door sag, rub, or close unevenly. This is the DIY equivalent of checking whether the appliance is plugged in before replacing the motherboard.
Step 3: Adjust the Door Height
If one cabinet door is higher or lower than the one beside it, use the vertical adjustment. On many concealed hinges, this means slightly loosening the screws on the mounting plate, moving the door up or down, and tightening the screws again.
Support the weight of the door with one hand while loosening the screws with the other. Move the door in small increments. Even a tiny shift can make a big visual difference. Once the tops and bottoms of neighboring doors line up, tighten the screws firmly but not aggressively.
Step 4: Adjust the Side Gap
If the space between two doors is too wide, too narrow, or uneven from top to bottom, adjust the side-to-side screw. On many European hinges, this screw is located near the front of the hinge arm. Turning it one way pulls the door toward the hinge side; turning it the other way pushes the door away.
Adjust the top and bottom hinges separately if the door is angled. For example, if the top of the door leans too close to its neighbor but the bottom looks fine, adjust only the top hinge. Think of the door as a rectangle you are gently steering back into position.
Step 5: Adjust the Door Depth
If the door does not sit flush with the cabinet frame, use the depth adjustment. This moves the door inward or outward. It is especially helpful when one corner appears proud of the cabinet or when the door closes but looks slightly twisted from the side.
Again, adjust in small turns. Close the door after each adjustment and view it from the side. The door should sit evenly against the cabinet, without one hinge pulling it too far inward or leaving it standing out like it has stage fright.
Step 6: Test the Swing and Close
After the door looks aligned, open and close it several times. Listen for rubbing. Watch the gaps. Make sure the door does not hit the adjacent door, cabinet frame, countertop edge, or drawer pull.
If the door has a soft-close hinge, let it close naturally. Do not push it shut while testing. A properly adjusted soft-close cabinet door should glide toward the frame and finish quietly, not stop halfway like it suddenly remembered an appointment.
How to Fix a Sagging Cabinet Door
A sagging cabinet door usually means one of three things: loose screws, stripped screw holes, or a hinge that has worn out. Start by tightening the screws. If the screws tighten securely and the door lifts back into place, congratulationsyou have won the five-minute repair lottery.
If the screws will not hold, remove the loose screw and repair the hole. A quick fix is to dip wooden toothpicks in wood glue, insert them into the hole, let the glue dry, trim the excess, and reinstall the screw. For a stronger repair, drill out the damaged hole and glue in a wood dowel, then drill a new pilot hole.
If the hinge itself is bent, cracked, rusty, or no longer holds tension, replacement is smarter than adjustment. Hinges are inexpensive compared with the frustration of adjusting the same door every three days while muttering things you would not say in front of polite company.
How to Fix Uneven Gaps Between Cabinet Doors
Uneven gaps are one of the most visible cabinet problems. They make a kitchen look tired, even when the cabinets are otherwise in good shape. To fix them, start with the door height, then adjust side-to-side alignment, and finish with depth.
This order matters. If you adjust the side gap before correcting height, you may end up chasing the problem around the cabinet. First make the tops and bottoms line up. Then make the vertical gap even. Finally, make sure the doors sit flush.
For double doors, adjust both doors gradually. Do not force one door to do all the work. A small adjustment on the left door and a small adjustment on the right door often produce a cleaner result than a dramatic change to only one side.
How to Adjust Old-Style Cabinet Hinges
Older exposed hinges usually do not have fancy adjustment screws. To adjust them, loosen the screws slightly, reposition the door by hand, and tighten the screws again. If the hinge leaf has slotted holes, use those slots to shift the door up, down, left, or right.
If the door needs to move outward or inward, a thin shim behind the hinge can help. Cardstock, veneer, or a specialty hinge shim can move the hinge leaf slightly and change how the door sits. Use very thin material; this is a cabinet, not a sandwich.
When old hinges are painted over, adjustment becomes harder. Score the paint around the hinge with a utility knife before loosening screws. This reduces paint chipping and keeps the cabinet finish from peeling away like old wallpaper in a haunted house.
When to Replace Cabinet Hinges Instead of Adjusting Them
Adjustment is not magic. It can correct normal movement, minor sagging, and uneven reveals, but it cannot make damaged hardware new again. Replace cabinet hinges if they are bent, broken, heavily rusted, missing screws, or no longer holding the door securely.
You should also consider replacement if you want to upgrade to soft-close cabinet hinges. Soft-close hinges reduce slamming, protect cabinet doors, and make the kitchen feel more refined. They are especially helpful in busy households where cabinet doors close with the emotional force of a courtroom objection.
When replacing hinges, match the hinge type, overlay, opening angle, cabinet construction, and cup size. Many concealed hinges use a 35 mm cup hole, but overlay measurements and face-frame requirements vary. Take one old hinge with you when shopping, or measure carefully before ordering online.
Common Mistakes to Avoid
The first mistake is over-adjusting. Cabinet hinges respond to small movements. Turn a screw a quarter-turn, close the door, and check the result. If you spin the screw like you are opening a submarine hatch, you will probably overshoot the alignment.
The second mistake is using the wrong screwdriver. Some European hinge screws look like Phillips screws but work better with a Pozidriv driver. Using the wrong tip can strip the screw head, turning a simple adjustment into a tiny metal tragedy.
The third mistake is ignoring the cabinet box. If the cabinet itself is loose, out of square, or pulling away from the wall, hinge adjustment may not solve the problem. Tighten cabinet mounting screws and inspect the structure before blaming the door.
The fourth mistake is adjusting a warped door as if it were only misaligned. If the door slab is twisted or bowed, hinge adjustments may improve the look but will not fully correct the shape. In that case, replacement or professional repair may be the better option.
Maintenance Tips to Keep Cabinet Doors Aligned
Once your cabinet doors are aligned, keep them that way with light maintenance. Every few months, open frequently used doors and check the hinge screws. Tighten anything that feels loose. This takes less time than making toast and prevents bigger repairs later.
Avoid hanging heavy towels, bags, or organizers from cabinet doors unless the hardware is designed for it. Extra weight pulls on the hinges and can cause sagging. Also, teach everyone in the house to close doors normally. Cabinet doors are not percussion instruments, even if someone in the family believes otherwise.
Clean hinges occasionally with a dry cloth. If a hinge squeaks, use a small amount of appropriate lubricant, but do not overdo it. Too much lubricant attracts dust and grime, which can make the hinge sticky over time.
Field Notes: Real-World Experiences Adjusting Cabinet Hinges
In real kitchens, cabinet hinge adjustment is rarely a glamorous project. It usually begins when you notice one door sitting slightly lower than the next. At first, you ignore it. Then you notice it every single time you walk by. Eventually, that tiny crooked gap becomes the most important architectural issue in the house, and you find yourself standing in the kitchen at 10:43 p.m. holding a screwdriver like a determined detective.
One useful experience is to start with the most obvious door, not the worst-looking cabinet section. Pick one door that has a clear problem: too low, too far left, or sticking out. Fixing one door gives you confidence and helps you understand how the hinge responds. After that, adjusting the rest becomes much easier.
Another practical lesson is that cabinet doors often affect each other visually. You may adjust one door perfectly, only to realize the neighboring door is actually the crooked one. This happens often with double doors. The trick is to step back several feet after every few adjustments. Up close, you see screw heads and hinge plates. From across the kitchen, you see the real visual alignment.
Lighting also matters. A shadow line can make a gap look larger than it is. If you are adjusting cabinets under dim lighting, use a flashlight or turn on overhead lights. You want to fix the hinge, not negotiate with a shadow.
For older cabinets, patience is everything. Screws may be soft, holes may be worn, and painted hinges may resist movement. If a screw feels stuck, do not force it until the head strips. Apply steady pressure, use the correct driver, and score paint lines where necessary. The goal is controlled movement, not a wrestling match with hardware from 1987.
Soft-close hinges bring their own little learning curve. Sometimes the alignment is correct, but the closing action feels wrong. In that case, check whether the soft-close feature has its own tension setting or switch. Door position and closing speed are related, but they are not always controlled by the same adjustment.
The most satisfying part of the job is the final reveal. When the doors line up, the whole kitchen suddenly looks more intentional. No new cabinets, no paint, no renovation dust migrating into your cereal bowlsjust a cleaner, sharper look created by a few careful turns of a screwdriver. That is the quiet beauty of cabinet hinge adjustment: it is small, affordable, and oddly rewarding.
Conclusion
Learning how to adjust cabinet hinges is a practical DIY skill that pays off quickly. A misaligned cabinet door can make an otherwise beautiful kitchen look neglected, but the fix is often simple. Tighten loose screws, identify the correct adjustment points, move the door gradually, and test the swing after each change.
Modern concealed hinges make the job especially friendly because they allow three-way adjustment: vertical, horizontal, and depth. Older hinges may require a little more hands-on repositioning, but the same principle applies: work slowly, make small changes, and check your progress often.
If the hinge is damaged, the screw holes are stripped, or the door itself is warped, adjustment may not be enough. In those cases, repair the screw holes, replace the hinge, or consider replacing the door. But for everyday sagging, rubbing, and uneven gaps, a screwdriver and a calm approach can make your cabinets look freshly tuned.