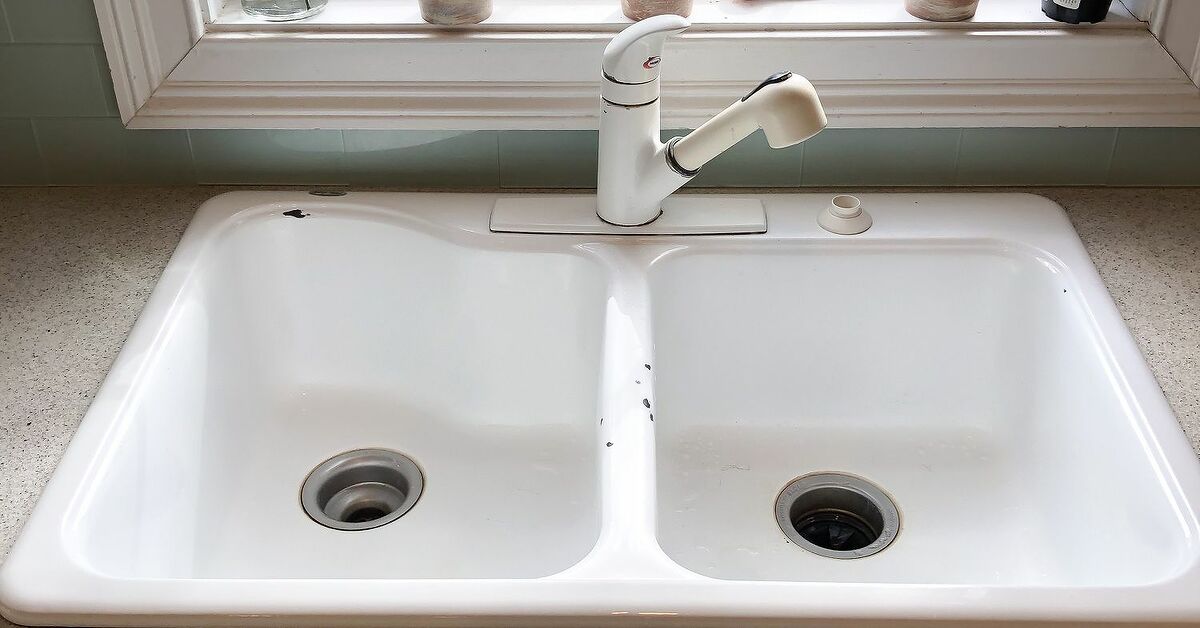
A farmhouse sink can transform an ordinary kitchen into a room that looks ready for fresh bread, heirloom tomatoes, and a suspiciously photogenic stack of dishes. Fortunately, a farmhouse drop-in sink is easier to retrofit than many traditional apron-front models because its finished rim rests on top of the countertop.
“Easier,” however, does not mean “drop it into a hole and celebrate.” You still need accurate measurements, careful cabinet modifications, dependable sealing, and plumbing that lines up beneath the deeper bowl. The following guide explains how to install a farmhouse drop in sink DIY style without turning the sink cabinet into modern art.
Understand What a Farmhouse Drop-In Sink Is
A farmhouse sink, also called an apron-front sink, has an exposed front panel instead of being hidden behind the cabinet face. A drop-in or top-mount version adds a visible rim that rests over the countertop. This design is especially useful when updating an existing kitchen because it may allow you to keep the current cabinet box and countertop.
Traditional undermount farmhouse sinks are supported below the countertop and commonly require custom cabinetry, a new counter, or extensive structural reinforcement. A retrofit drop-in farmhouse sink is designed to slide into a modified opening from above. The cabinet face still needs to be cut for the apron, but the project is generally more approachable for an experienced DIYer.
Do not assume that every apron-front sink can be installed this way. The product description or installation manual must specifically identify the model as drop-in, top-mount, dual-mount, retrofit, or quick-fit compatible.
Plan the Installation Before Buying the Sink
Measure the Sink Base Cabinet
Measure the cabinet’s exterior width, interior width, depth, and distance from the cabinet top to the doors. The apron must fit between the cabinet sides without colliding with doors, drawer hardware, a dishwasher, or an adjacent corner cabinet.
A 33-inch sink, for example, often requires a 36-inch sink base, but model requirements vary. Some manufacturers specify a cabinet at least three inches wider than the sink. Never order by the size printed on the old sink alone; confirm the minimum cabinet width listed for the new model.
Measure the Actual Sink
Fireclay and other handcrafted sinks may differ slightly from their published dimensions. Measure the actual sink at several points, including:
- The overall width and front-to-back depth
- The bowl width beneath the mounting deck
- The apron width and height
- The thickness and shape of the top rim
- The distance from the back of the sink to the drain center
- The amount of countertop required to support the rear deck
Some retrofit models require a specific amount of countertop beneath the back deck and a small amount of additional clearance so the bowl can slide into the opening. Those dimensions are model-specific, so use the supplied template or the exact measurements in the manual.
Check the Countertop Material
Laminate, butcher block, and many wood countertops can usually be cut with common woodworking tools. Quartz, granite, porcelain slab, and other stone surfaces should generally be modified by a professional fabricator. A small cutting mistake in laminate may be annoying; the same mistake in stone can be an extremely expensive lesson in geology.
Compatibility also depends on the sink model. Certain farmhouse sinks are not approved for laminate, while some retrofit drop-in models are created specifically for existing laminate countertops. Follow the sink manufacturer’s instructions rather than applying a universal rule.
Tools and Materials
Your exact list will depend on the countertop, cabinet construction, faucet, and drain configuration. Most farmhouse drop-in sink installations require:
- Tape measure, carpenter’s square, pencil, and level
- Manufacturer’s cutout template, if supplied
- Painter’s tape and water-soluble marker
- Jigsaw with an appropriate blade
- Oscillating multi-tool or pull saw for tight corners
- Drill, driver bits, and screwdrivers
- Utility knife and putty knife
- Adjustable wrench, tongue-and-groove pliers, and basin wrench
- 100% silicone sealant approved for kitchens
- Plumber’s putty or the sealant specified for the drain
- Replacement supply lines and drain fittings as needed
- Wood framing, screws, construction adhesive, and shims if support is required
- Safety glasses, hearing protection, and cut-resistant gloves
- Buckets, towels, and a shop vacuum
How to Install a Farmhouse Drop in Sink DIY
Step 1: Inspect and Dry-Fit the Sink
Unpack the sink and inspect every surface before making permanent cuts. Check for cracks, chips, bent rims, finish defects, and missing hardware. Place the sink near the cabinet and compare its measurements with the available space.
Confirm where the faucet, soap dispenser, water filter, garbage disposal, and dishwasher drain will go. A deep farmhouse bowl may sit several inches lower than the old sink, so verify that the drain outlet and P-trap can be connected without an uphill section.
Step 2: Shut Off Water and Electrical Power
Close the hot and cold shutoff valves. Open the faucet to relieve pressure, then place a bucket beneath the connections. If the sink has a garbage disposal, unplug it and switch off the correct circuit breaker before touching the unit or its wiring.
Take several photos of the plumbing before disconnecting anything. These pictures are remarkably helpful when you are later staring at three pipes and wondering which one previously went where.
Step 3: Remove the Old Sink
Disconnect the supply lines, P-trap, dishwasher hose, disposal, and any accessory tubing. Remove the sink clips beneath the counter. Cut through the old caulk with a utility knife, slide a putty knife beneath the rim, and gently break the seal.
Lift the sink out with a helper if it is heavy. Scrape away old sealant and clean the countertop thoroughly. Disconnecting electrical components, releasing the mounting hardware, and separating the old seal are standard parts of safe sink removal.
Step 4: Mark the Countertop Opening
Apply painter’s tape around the cutting area. The tape gives you a clear marking surface, helps protect the finish, and may reduce splintering on laminate or wood.
Center the supplied template over the cabinet. Verify the centerline with a carpenter’s square and check the location from several reference points. When no template is provided, transfer the actual sink dimensions according to the manufacturer’s directions. Do not simply trace the outside edge unless the manual specifically tells you to do so.
Mark all countertop cuts, apron notches, and cabinet-face cuts separately. Recheck the required support under the back deck and confirm that enough counter remains for the faucet and backsplash.
Step 5: Cut the Countertop
Drill starter holes inside the waste section where appropriate. Cut slowly with a blade intended for the countertop material. Support the waste piece as the final cut approaches so it does not break away and damage the surrounding counter.
Use an oscillating tool or pull saw where the jigsaw cannot reach. Keep corners square or rounded exactly as specified in the template. Never enlarge the opening aggressively because the cut will be hidden. The rim may cover a small amount of imperfection, but it cannot cover enthusiasm with a power saw.
Seal every exposed particleboard or wood-composite edge in a laminate countertop with an appropriate waterproof coating. Manufacturer guidance for farmhouse installations specifically warns that unlaminated cut edges must be sealed against water intrusion.
Step 6: Modify the Cabinet Face for the Apron
Remove the false drawer front, cabinet doors, and any hardware that blocks the work area. Center the apron template on the face frame and tape it securely. Verify that the distance between the cabinet top and doors is greater than the apron height.
Cut just inside the marked line, then sand or file the opening gradually until the apron fits. Cutting conservatively is much easier to repair than removing too much material. Manufacturer instructions commonly recommend painter’s tape to protect the cabinet finish and help produce a cleaner cut.
Step 7: Add Support When the Manufacturer Requires It
A standard lightweight drop-in sink may be supported primarily by its rim, but heavy farmhouse sinks are a different category. Fireclay, cast iron, composite, and some large stainless steel models may require an internal frame or support system.
Follow the sink’s rated support requirements. Depending on the model, the cabinet structure may need to support 200 to 300 pounds or more when the bowl is full. Manufacturers commonly use horizontal wood cleats, front and rear crossbars, vertical legs, adjustable brackets, or a combination of these components.
Install framing without blocking the drain, water lines, disposal, or shutoff valves. Level the supports from side to side and front to back. If the sink is meant to sit partly on a frame, position it at the exact height required for the rim to meet the countertop correctly.
Step 8: Perform a Complete Dry Fit
With a helper, lower the sink into the opening before applying silicone. Confirm that:
- The apron slides into the cabinet opening without binding
- The rim rests evenly on the countertop
- The required rear deck remains supported
- The sink is level in both directions
- The drain and disposal have adequate clearance
- The faucet can be installed and serviced
- Cabinet doors and nearby appliances still open
Remove the sink and make small adjustments. Repeat the dry fit until the sink sits correctly without being forced.
Step 9: Install the Faucet and Drain Hardware
Install the faucet, soap dispenser, basket strainer, or disposal flange while the sink is out whenever access will be easier. Use the gaskets, plumber’s putty, or silicone required by each component’s manufacturer.
Do not automatically use plumber’s putty on every material. Some stone, composite, and specialty finishes require a non-staining sealant instead.
Step 10: Apply Silicone and Set the Sink
Clean the contact surfaces and allow them to dry. Apply a continuous bead of 100% silicone where the sink rim meets the countertop, following the model’s installation diagram. Avoid gaps, especially near corners and around the back deck.
Lower the sink straight into the opening with a helper. Press it down evenly and confirm that the apron is centered. Install clips or mounting hardware when included, tightening them in stages rather than fully tightening one clip at a time. Wipe away excess silicone before it cures. A complete bead and accurate alignment are essential for a watertight top-mount installation.
Step 11: Reconnect the Plumbing
Connect the faucet supply lines without twisting or overtightening them. Install the tailpiece, P-trap, disposal, and dishwasher drain according to their manuals and local plumbing requirements.
Because a farmhouse sink is often deeper than the sink it replaces, the original drain arrangement may no longer fit. Avoid forcing pieces together or creating a pipe that slopes upward toward the wall. A plumber should relocate the wall connection when the trap cannot be configured correctly.
Step 12: Test for Leaks
Allow the silicone to cure for the period stated on its label before exposing the joint to water. Then open the shutoff valves slowly and inspect the supply connections.
Run the faucet, test the sprayer, fill the sink partway, and release the water while watching every drain joint. Place dry paper towels beneath the fittings; even a tiny leak will leave an obvious mark. Test the disposal and dishwasher connection separately.
Common Farmhouse Sink Installation Mistakes
Cutting Before Reading the Manual
Two sinks with the same advertised width can require different openings. Read the model-specific directions before drawing a single line.
Measuring Only Once
Measure the sink, cabinet, counter, doors, drain, and faucet clearance. A farmhouse installation combines several systems, and all of them need to agree.
Assuming the Rim Carries All the Weight
Some retrofit sinks are designed to rest on the counter, while others require additional cabinet support. Treat the installation manual as the final authority.
Failing to Seal a Laminate Cut Edge
Water entering exposed particleboard can cause swelling, crumbling, and countertop failure. Seal the raw edge even though it will disappear beneath the sink.
Ignoring the Lower Drain Height
A deeper bowl can put the strainer below the old trap connection. Check the drain geometry before permanently setting the sink.
Using the Sink Before the Silicone Cures
A wet bead may shift, tear, or develop hidden gaps. Give the sealant the full curing time specified by its manufacturer.
DIY Experience: Lessons From a Farmhouse Drop-In Sink Project
The most valuable lesson from installing a farmhouse drop-in sink is that the dramatic moment is not the cutting. It is the dry fit. Cutting feels important because it is noisy and produces an impressive quantity of sawdust, but a patient dry fit is what prevents the expensive mistakes.
On a typical retrofit, the first test fit may reveal that the countertop opening is wide enough while the cabinet face is slightly too narrow near one corner. That does not mean the measurements were careless. Cabinets are not always perfectly square, and handcrafted sinks may not be dimensionally identical from front to back. Removing a tiny amount of material, testing again, and repeating the process produces a much cleaner result than trying to achieve the finished opening in one pass.
Another practical discovery is that access matters almost as much as appearance. A beautiful apron can tempt you to focus entirely on centering the sink from the front. Meanwhile, the faucet mounting nut, disposal body, or shutoff valve may be trapped in an awkward location beneath it. Before applying silicone, reach into the cabinet and pretend that you need to repair every component later. If a tool cannot reach a fitting during installation, it will not become more cooperative during an emergency.
Painter’s tape deserves more credit than it receives. Besides reducing surface damage, it creates a clean place for marks and makes the edge of the cut easier to follow. Labeling the waste side of every line also helps. After ten minutes of staring at intersecting pencil marks, even a confident DIYer can briefly forget which side is supposed to remain attached to the kitchen.
Having a helper is equally important. A farmhouse sink can be bulky even when its listed weight seems manageable. Lowering it at an angle may smear the silicone, chip a fireclay corner, or pinch fingers between the rim and countertop. Two people can keep the sink level, protect the apron, and position it accurately before the sealant develops a skin.
Plumbing often consumes more time than the cabinet work. A deeper sink changes the elevation of the strainer, and an offset drain may shift the trap several inches. Buying a few approved drain fittings in advance is helpful, but avoid assembling a maze of unnecessary bends simply to reuse the old wall connection. A compact, properly sloped drain is easier to maintain and less likely to collect debris.
The final lesson is to stop and call a professional when the project crosses into unfamiliar territory. Stone fabrication, electrical alterations, damaged shutoff valves, and drain lines that must be opened inside the wall can turn a satisfying weekend upgrade into a much larger repair. Good DIY work is not measured by refusing help; it is measured by knowing which parts you can complete safely and correctly.
When to Hire a Professional
Professional assistance is sensible when the countertop is granite, quartz, porcelain, or another brittle slab; the cabinet requires major structural rebuilding; the water valves are corroded; electrical wiring must be altered; or the drain connection must be moved inside the wall.
You should also pause when the sink manufacturer requires professional installation for warranty coverage. Observe applicable building and plumbing codes, wear proper protective equipment, and never work on a disposal circuit unless the power has been disconnected and verified.
Conclusion
Installing a farmhouse drop-in sink is a realistic DIY project when the sink is designed for retrofitting and the existing cabinet and countertop are compatible. Success depends less on heroic carpentry than on careful planning: measure the actual sink, protect the work surfaces, cut conservatively, add the required support, dry-fit everything, and seal the rim continuously.
Once the plumbing has passed a thorough leak test, the result delivers the deep-bowl convenience of an apron-front sink without necessarily replacing the entire countertop. You may even feel inspired to bake bread. Whether the bread survives is, thankfully, outside the scope of this installation guide.
Note: This guide provides general DIY information. Always follow the instructions supplied with your specific sink, faucet, disposal, countertop, and drain components because installation requirements vary by model and local code.