Paper clutter has a remarkable survival instinct. You recycle one catalog, and three envelopes, two receipts, and a mysterious instruction manual immediately take its place. A DIY wood desk organizer and mail sorter gives that wandering paperwork a permanent home while adding a handmade accent to your desk, kitchen counter, entryway, or home office.
This beginner-friendly woodworking project creates three practical compartments for incoming mail, bills, documents, notebooks, and folders. The finished organizer measures approximately 13 inches wide, 8 inches deep, and 9 inches tall. It is compact enough for a desktop but wide enough to hold most standard letters without folding or bending them.
Better still, you do not need a workshop that looks like a television set. A circular saw or jigsaw, a drill, a few clamps, and some patience will do the job. The patience is mostly for waiting on glue and finish to dry instead of poking them every four minutes.
Why Build a Wooden Desk Organizer?
Store-bought organizers are convenient, but they are usually designed for an imaginary desk where every envelope is identical and nobody owns charging cables. Building your own organizer lets you control the width, number of compartments, wood species, finish, labels, and placement.
A vertical mail sorter also uses less desk space than several horizontal trays. Each category remains visible, so important paperwork is less likely to disappear beneath a grocery flyer. Home organization experts commonly recommend keeping paper systems simple, accessible, and divided by clear actions or categories. Complicated filing systems tend to become decorative furniture once people stop using them.
Practical Categories for the Compartments
A three-slot design works well because it provides enough separation without turning mail sorting into an administrative career. Useful label combinations include:
- Incoming, Action, File for a home office
- Me, Family, School for a household command center
- Bills, Receipts, Coupons for kitchen-counter organization
- Clients, Projects, Reference for a small business
- Today, This Week, Later for task-oriented paperwork
Choose labels based on what regularly lands on your desk. Designing a compartment called “Miscellaneous” is risky. Miscellaneous is not a category; it is where organization goes for a long nap.
Recommended Dimensions and Design
This plan produces an organizer approximately 13 inches wide, 8 inches deep, and 9 inches high. Its interior width is about 12 inches, allowing it to accommodate typical business envelopes, letter-size paper, and standard folders.
The U.S. Postal Service classifies letter-size mail as no more than 11 1/2 inches long and 6 1/8 inches high. Large envelopes and flats can reach 15 inches long, so oversized catalogs and magazines may need a separate basket or wider custom build.
Suggested Slot Arrangement
The front compartment should be the shortest, with each divider rising toward the back. This stepped design improves visibility and makes it easier to grab documents without fishing around blindly.
- Front rail height: 2 3/4 inches
- First divider height: 5 1/4 inches
- Second divider height: 7 inches
- Back panel height: 9 inches
- Approximate compartment depth: 2 to 2 1/2 inches
These dimensions are guidelines rather than sacred woodworking law. Measure the folders, envelopes, tablets, or notebooks you plan to store before cutting anything.
Materials and Tools
Materials
- One 2-by-4-foot sheet of 1/2-inch sanded plywood
- Wood glue
- 1-inch brad nails or trim-head wood screws
- Wood filler
- 120-, 150-, and 220-grit sandpaper
- Paint, wood stain, or clear protective finish
- Felt pads or rubber feet
- Optional label holders, knobs, hooks, or decorative hardware
Sanded plywood is a practical choice because it is stable, widely available, and relatively easy to paint or stain. Hardwood boards can create a more furniture-like appearance, while pine is inexpensive and easy to cut. Pine may absorb stain unevenly, so testing the finish and using an appropriate pre-stain conditioner can improve the final color.
Tools
- Tape measure and pencil
- Carpenter’s square or combination square
- Circular saw, table saw, or jigsaw
- Drill and small drill bits
- Brad nailer or screwdriver
- Two or more clamps
- Sanding block or orbital sander
- Paintbrush, foam brush, or clean finishing cloth
- Safety glasses, hearing protection, and a suitable dust mask or respirator
Cut List for a Three-Slot Mail Sorter
Cut the following pieces from 1/2-inch plywood:
| Part | Quantity | Dimensions |
|---|---|---|
| Base | 1 | 13 x 8 inches |
| Back panel | 1 | 13 x 9 inches |
| Side panels | 2 | 8 x 9 inches before shaping |
| Front rail | 1 | 12 x 2 3/4 inches |
| Front divider | 1 | 12 x 5 1/4 inches |
| Rear divider | 1 | 12 x 7 inches |
The 12-inch pieces fit between the two 1/2-inch side panels, producing a total exterior width of 13 inches. Actual plywood thickness can be slightly less than its listed size, so dry-fit the parts and adjust the divider widths when necessary.
How to Build the DIY Wood Desk Organizer
Step 1: Mark the Side-Panel Profile
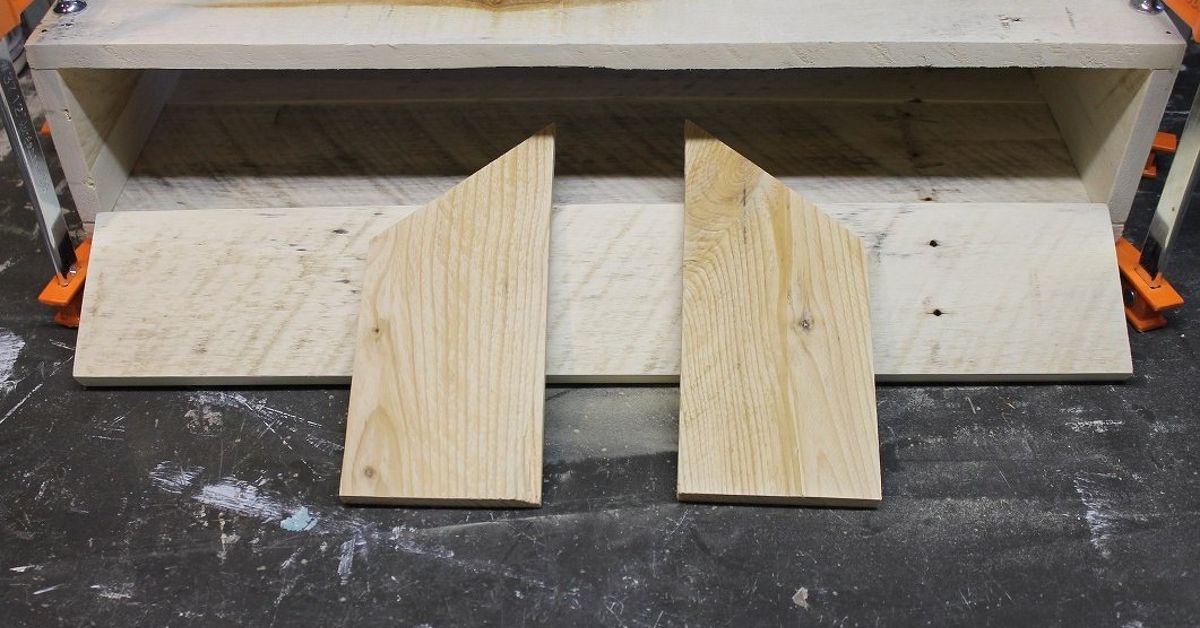
Place the two 8-by-9-inch side pieces together and align their edges. On the front edge, measure 3 inches upward from the bottom. Draw a diagonal line from that point to the upper rear corner.
Clamp the panels securely and cut along the line with a jigsaw or circular saw. Cutting both pieces together helps produce matching sides. If your saw cannot safely cut the stacked thickness, cut one side first and use it as a template for the second.
Step 2: Sand the Pieces Before Assembly
Sand all faces and cut edges while the parts are still separate. Begin with 120-grit paper to remove saw marks, continue with 150-grit, and finish with 180- or 220-grit depending on the finish you plan to use.
Sand in the direction of the grain on solid wood and face veneer. Clean away dust before changing grits and before applying a finish. Progressive sanding helps remove scratches left by the previous grit instead of merely polishing them into permanent souvenirs.
Slightly round the exposed front edges with sandpaper. This small detail makes the organizer feel more comfortable to use and reduces the chance of veneer splinters.
Step 3: Mark the Divider Positions
Place the base on a flat work surface. Mark a line 2 3/4 inches from the front edge for the first divider. Mark another line approximately 5 1/4 inches from the front for the second divider.
Use a square to extend each line across the base and onto the inside faces of both side panels. Accurate layout matters because crooked dividers will announce themselves every time you look at the organizer.
Step 4: Attach the Back to the Base
Apply a thin bead of wood glue along the rear edge of the base. Position the back panel against it, check the joint with a square, and clamp the pieces together.
Secure the joint with brad nails driven through the back into the base. Trim-head screws can also be used, but drill pilot holes first to reduce the risk of splitting or separating the plywood layers.
Step 5: Install the Side Panels
Apply glue along the bottom and rear edges of one side panel. Position it against the base and back, keeping the taller edge at the rear. Clamp it in place and fasten it with brad nails or screws. Repeat on the opposite side.
Check that the box remains square by measuring diagonally from corner to corner. Matching diagonal measurements indicate a square assembly. If the measurements differ, gently shift the structure before the glue begins to set.
Step 6: Add the Front Rail
Glue the front rail between the side panels at the front edge of the base. Align its lower edge with the bottom and fasten it through the sides and base.
The front rail keeps envelopes from sliding forward while leaving enough of the contents visible. For easier access, cut a shallow semicircle or curved dip in the center before installation.
Step 7: Install the Dividers
Apply glue along the bottom and side edges of the 5 1/4-inch divider. Position it on the first marked line, confirm that it is vertical, and secure it through the base and sides.
Repeat the process with the 7-inch divider on the second line. Use a spacer block between the panels to maintain consistent compartment depth while fastening them.
Pocket-hole screws are another option for hidden, strong joints, particularly when building with solid lumber. Pocket-hole equipment must be adjusted for the actual material thickness before drilling. For a small plywood organizer, glue and brad nails are usually simpler and leave more interior space.
Step 8: Fill, Inspect, and Final-Sand
Allow the glue to cure according to the manufacturer’s instructions. Fill visible nail holes and small gaps with stainable or paintable wood filler. Once dry, sand the repaired areas smooth.
Run your hand carefully across every exposed edge. Look for dried glue, sharp corners, proud fasteners, and rough plywood layers. Dried glue should be removed before staining because it can block stain penetration and create pale patches.
Finishing Options
Natural Clear Finish
A clear water-based polyurethane or similar protective finish preserves the natural wood appearance and provides a wipeable surface. Apply thin coats in the direction of the grain. After each coat dries, lightly sand as directed by the product label, remove the dust, and apply the next coat.
Stained Wood
Stain highlights grain and can make inexpensive wood resemble nearby furniture. Test the stain on a scrap from the same board because website samples, store displays, and the wood in your hands may produce three very different colors.
Apply the stain evenly, allow it to penetrate for the time stated on the label, and wipe away the excess in the direction of the grain. Once completely dry, protect it with a compatible clear topcoat.
Painted Organizer
Paint is ideal when the plywood edges contain patches or when you want a bold accent. Prime first, especially on exposed plywood edges. Two thin coats generally look smoother than one heroic coat applied with excessive optimism.
For a farmhouse-style mail sorter, try warm white, charcoal, muted green, or navy. For a child’s desk, paint each compartment a different color and add simple icons instead of formal labels.
Decorative Edge Treatments
Raw plywood edges can be painted, covered with iron-on edge banding, or trimmed with thin solid-wood strips. Edge banding creates a cleaner furniture-like appearance without changing the basic construction.
Customization Ideas
Add a Pen Compartment
Attach a narrow wooden cup or small box to one side for pens, scissors, highlighters, and a ruler. Keep the container shallow enough that it does not make the organizer unstable.
Install Key Hooks
Small hooks along the bottom front edge can hold keys, badges, or reusable shopping tags. A desktop organizer with hooks is particularly useful near an entryway, although it should be anchored if heavy key rings make it tip forward.
Create Removable Labels
Metal label holders, chalkboard tags, or wooden clips allow the compartments to change as your needs change. Keep labels short and specific. “Pay,” “File,” and “Reply” are easier to follow than “Documents Requiring Various Forms of Future Attention.”
Convert It Into a Wall-Mounted Mail Sorter
For a wall version, use a thinner base or eliminate the deep desktop base entirely. Reinforce the back and install an appropriate French cleat, keyhole hangers, or mounting hardware. Attach wall storage to studs when possible or use anchors rated for the expected load. Vertical storage can free valuable desk and counter space.
Add a Phone Charging Shelf
A small ledge on the front can hold a phone while it charges. Drill a smooth cable hole through the back and protect the opening with a rubber grommet so the cord does not rub against a rough plywood edge.
Common Mistakes to Avoid
Making the Compartments Too Narrow
A slot that holds only three envelopes will become full before you finish making coffee. Allow room for several days of mail, folders, and the occasional booklet.
Skipping the Dry Fit
Assemble all pieces without glue first. A dry fit reveals incorrect measurements, bowed material, reversed side panels, and dividers that are mysteriously wider than the space intended for them.
Using Too Much Glue
A small, continuous bead is usually sufficient. Excess glue creates cleanup work and can interfere with stain. Clamp with enough pressure to close the joint, but do not tighten until the project begins producing sounds associated with medieval siege equipment.
Finishing Only the Visible Surfaces
Apply finish to the interior compartments as well as the outside. Unfinished interiors collect dirt and are harder to wipe clean. Coating both faces of broad panels can also help the material respond more evenly to environmental changes.
Creating Too Many Categories
An organizer should reduce decisions, not create them. Three useful compartments usually outperform seven highly specific ones that require a committee meeting before an envelope can be filed.
Woodworking Safety
Wear safety glasses when cutting, drilling, sanding, or fastening wood. Use hearing protection with loud power tools, keep hands away from blades, clamp workpieces securely, and follow the instructions supplied with every tool.
Wood dust should not be treated as harmless confetti. Use effective dust collection when available, work in a ventilated area, and wear suitable respiratory protection for dusty operations. OSHA and NIOSH guidance identifies flying particles and wood dust as hazards that may affect the eyes, skin, and respiratory system.
Allow oily finishing rags to dry safely according to the finish manufacturer’s disposal directions. Do not leave them crumpled in a pile, trash can, or closed container unless the product instructions specifically identify a safe disposal method.
How to Use the Organizer After Building It
A mail sorter succeeds only when it becomes part of a routine. Place it near the location where paperwork naturally enters the room. Sort mail immediately, recycle obvious junk, and put actionable items in the appropriate slot.
Empty the organizer at least once a week. Pay bills, respond to notices, scan documents, and move long-term records into permanent files. The wooden organizer is a processing station, not a retirement community for unopened envelopes.
A simple maintenance routine works well:
- Sort incoming papers when they arrive.
- Recycle unwanted material immediately.
- Complete urgent actions before filing.
- Clear each compartment on a scheduled day.
- Wipe the organizer with a dry or slightly damp cloth as needed.
Project Experience: Lessons From Building and Using a Wood Mail Sorter
The most useful lesson from building a DIY wood desk organizer is that the cutting is rarely the most difficult part. The real challenge is deciding what the organizer needs to hold. My first instinct was to make a small, elegant design with narrow compartments. It looked excellent while empty. Once loaded with envelopes, folders, and a notebook, it developed the storage capacity of a jacket pocket.
Measuring actual paperwork before finalizing the design solved that problem. A few ordinary envelopes fit almost anywhere, but thick statements, greeting cards, school notices, and letter-size folders need additional width and depth. Increasing the organizer to 13 inches wide produced a much more forgiving interior without consuming excessive desk space.
Another practical discovery involved the height of the dividers. Equal-height panels create a tidy geometric shape, but they hide the contents of the rear compartments. Stepped dividers immediately improve visibility. When each panel rises toward the back, a person can identify all three categories from across the room instead of pulling papers out one stack at a time.
Pre-sanding also made a major difference. Sanding the narrow spaces after assembly was possible, but it required folded sandpaper, awkward hand positions, and language unsuitable for a family woodworking guide. Sanding each component before gluing provided smooth interior surfaces with much less effort. A final light sanding after assembly was still necessary, but it focused only on joints, filler, and exposed edges.
Dry-fitting the parts prevented another common problem. Plywood sold as 1/2 inch is not always exactly 1/2 inch thick, and a tiny difference across two side panels affects the width of every divider. Cutting all internal pieces to an assumed measurement can leave them slightly short or too wide. The better approach is to cut the base, back, and sides first, temporarily assemble them, and measure the actual interior opening before trimming the dividers.
During glue-up, spacer blocks were surprisingly helpful. Two scraps cut to the intended compartment depth kept the dividers parallel while the fasteners were installed. Without spacers, a divider can rotate by a small amount that is difficult to notice until the glue dries. The project will still hold mail, but every envelope will lean at an angle as if exhausted by administrative work.
The finishing process also rewarded restraint. Thin coats dried more evenly and produced fewer runs than one heavy coat. Painting the interior before final assembly would have been even easier, but it would also have required keeping glue areas free of paint. For beginners, assembling first and using a small foam brush inside the compartments provides a reasonable compromise.
Once the organizer was placed on a desk, felt pads proved worthwhile. They protected the surface, prevented sliding, and lifted the base slightly above minor spills. Adding labels improved the system further, but the best labels described actions rather than document types. “Act,” “File,” and “Outgoing” produced clearer decisions than broad labels such as “Personal” and “Other.”
The project also demonstrated that an organizer cannot fix a routine by itself. When papers were placed in the correct slots but never reviewed, the compartments eventually became three neatly separated piles of procrastination. Choosing one weekly clearing day transformed the sorter into a useful workflow. Friday afternoon worked well: urgent items were handled, records were filed, and the organizer began the next week mostly empty.
For future versions, I would add removable label holders and a shallow tray for stamps, clips, and a letter opener. I would avoid adding a drawer unless the project needed storage for larger supplies. Drawers increase cutting and alignment work, while a small open tray keeps frequently used items visible.
Overall, this is an excellent beginner woodworking project because minor imperfections rarely affect its usefulness. A slightly uneven edge can be sanded. A visible fastener can be filled. A blotchy stain can become a painted finish. The completed organizer provides immediate value, teaches basic measuring and assembly skills, and offers enough customization to make every version feel personal.
Conclusion
A DIY wood desk organizer/mail sorter is a manageable weekend project with an everyday purpose. The stepped three-compartment design keeps mail visible, protects important papers, and reduces the footprint of desktop clutter. It can be built with basic tools, inexpensive plywood, and straightforward glue-and-fastener joinery.
The most successful version will be designed around your real paperwork and habits. Measure the items you use, keep the categories simple, sand before assembly, and schedule a regular time to empty the compartments. The result is not merely a wooden box with dividers. It is a small traffic-control system for the paper parade marching through your home.