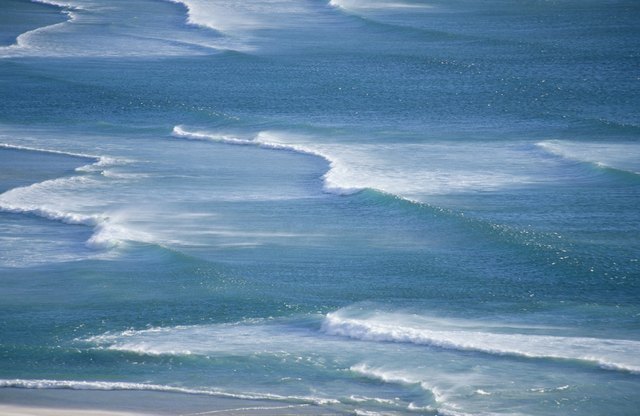
If you have ever tried to make paper ocean waves and ended up with something that looked less like the Pacific and more like a sad blue lasagna, welcome. You are among friends. The good news is that realistic paper waves are absolutely possible, and you do not need a fancy art studio, a degree in marine biology, or mystical powers over cardstock. You just need to understand one simple truth: real-looking waves are all about layering, movement, texture, and light.
That means flat blue paper alone will not save you. Real ocean waves have darker troughs, lighter crests, soft gradients, irregular edges, and a little frothy chaos where the water breaks. Paper happens to be surprisingly good at all of those things. Tear it, curl it, fold it, overlap it, crumple it, glaze it with diluted glue, and suddenly your humble craft supply starts acting like a miniature sea.
In this guide, you will learn how to make real-looking ocean waves out of paper using simple materials and smart techniques. Whether you are building a school project, a beach-themed backdrop, a shadow box, a bulletin board, a handmade card, or a wall art piece that says, “Yes, I am crafty now,” this step-by-step method will help you get there.
Why Paper Waves Can Look Surprisingly Real
The secret is that paper is not just one thing. Different papers do different jobs. Cardstock gives your waves structure. Tissue paper creates translucent color shifts. Crepe paper adds stretch and organic movement. Mulberry paper has soft, wispy torn edges that are perfect for foam and spray. Put them together, and you get depth instead of a flat blue blob.
That matters because the ocean is not one solid shade of blue. Real waves are shaped by wind, light, motion, and foam. Some areas look deep navy, some lean teal or green, and breaking edges often turn pale and frothy. If you want a convincing paper ocean, your job is not to make everything uniform. Your job is to make it look alive.
What You Need
Basic materials
- Heavy cardstock or construction paper for the base
- Blue paper in at least three shades: dark, medium, and light
- White tissue paper or white crepe paper for foam
- Optional mulberry paper for extra realistic torn edges
- Scissors and a craft knife
- Glue stick for clean layers
- White glue or decoupage medium for tissue layers
- Foam adhesive dots or double-sided foam tape for dimension
- Pencil and eraser
- Paintbrush for glue application
Nice extras if you want more drama
- A scoring tool or the back of scissors for curling paper
- Watercolor paint or watered-down acrylic for shading
- Gloss medium for a wet look
- A shadow box frame or sturdy backing board
Choose the Right Style of Paper Wave
Before you start cutting, decide what kind of ocean you want. Not all paper waves behave the same way.
1. Layered cardstock waves
This is the cleanest and easiest method. You cut several wave shapes from different shades of blue and stack them from dark in the back to light in the front. It works beautifully for wall art, classroom displays, cards, and dioramas.
2. Tissue paper waves
This method gives you softer transitions and a more painterly look. Torn tissue paper overlaps in semi-transparent layers, creating the visual effect of water depth and light passing through the wave.
3. Crepe paper waves
If you want movement, crepe paper is your drama queen. It stretches, gathers, and curves beautifully, which makes it great for party backdrops and large decorative installations.
4. Mixed-media waves
This is the sweet spot for most people. Use cardstock for structure, tissue paper for color blending, and white torn paper for foam. Translation: more realism, less frustration.
Step-by-Step: How to Make Realistic Ocean Waves Out of Paper
Step 1: Start with a dark background
Glue a sheet of dark blue paper onto your backing board. This becomes the “deep water” behind everything else. Starting dark matters because it gives the later layers somewhere to go visually. Ocean scenes look more believable when the background recedes instead of shouting for attention like a toddler with a kazoo.
Step 2: Sketch wave bands, not one giant wave
Draw three to five long, horizontal wave bands on separate sheets of paper. Each one should be slightly different. Avoid perfect symmetry. Real waves are irregular. Their crests rise and fall, dip unexpectedly, and rarely look like clip art. Make the back layers wider and smoother. Make the front layers more detailed and dramatic.
Step 3: Cut and layer from dark to light
Cut your wave bands from progressively lighter blues. Place the darkest band toward the back and the palest toward the front. Overlap them slightly. Use foam tape under some sections to lift the paper and create shadows. Those small shadows are magic. They trick the eye into seeing movement and depth.
Step 4: Add curled edges for motion
Now the fun part: make the paper stop acting like paper. Run the edge of scissors gently along the top crest of a few wave pieces to curl them. You can also score and bend selected areas so the crest tips forward. Do not curl every edge the same way. The best-looking waves have variation. Some should roll, some should flick, and some should look like they are seconds away from splashing your tiny paper surfer into another dimension.
Step 5: Build color variation with tissue paper
Tear small pieces of tissue paper in turquoise, aqua, light blue, and white. Notice the word tear, not cut. Torn edges blend better and look more natural. Apply diluted white glue or decoupage medium in a thin layer, then overlap the tissue pieces across parts of the waves. This creates transparent color shifts that mimic the way water changes under light.
Do not cover everything evenly. Keep some cardstock visible. The contrast between crisp shapes and soft translucent patches is what makes the whole piece feel more realistic.
Step 6: Make the foam
If you want your ocean waves to look real, foam is where the illusion lives or dies. Breaking waves do not end in neat white lines. They feather, scatter, and bunch up. Tear white tissue paper, white crepe paper, or thin mulberry paper into uneven strips. Crumple lightly, then open it just enough to keep the texture. Glue the pieces along the top of the front wave crests and in a few patches below them.
For extra realism, use less white than you think you need. Beginners often go full bubble-bath. A little foam goes a long way.
Step 7: Add highlights and shadows
Use a dry brush with white paint, a white colored pencil, or a gel pen to add highlights to the highest ridges. Then deepen selected troughs with a darker blue pencil, ink, or diluted paint. This one-two punch of highlight and shadow creates form. It turns “paper cutouts” into “hey, that actually looks like water.”
Step 8: Seal for a subtle wet look
If your project is decorative rather than temporary, brush on a thin layer of gloss medium over selected sections. Do not coat the entire piece in one thick, gloopy layer unless your artistic goal is “ocean after an oil spill.” A few glossy areas are enough to catch light and suggest moisture.
How to Make Your Paper Waves Look Even More Realistic
Use more than one blue
The fastest way to make paper waves look fake is to use one flat color. Real water shifts constantly. Mix navy, cobalt, aqua, teal, and even a touch of green-gray if you want a coastal look.
Make edges uneven
Smooth, identical curves scream “school bulletin board.” Irregular crests whisper “wind and tide.” Always whisper. It is classier.
Work in layers of depth
At minimum, use a background, middle ground, and foreground. Five layers often look even better. More layers create more depth, which creates more realism.
Use transparency strategically
Tissue paper and thin paper are excellent for imitating the semi-translucent quality of water near the crest. When light areas overlap darker layers, the wave starts to glow instead of sitting there like a cardboard fence.
Remember that foam is messy
Sea foam does not march in a straight line like disciplined little marshmallows. Break up your white details. Cluster some. Feather others. Leave gaps.
Best Project Ideas for Paper Ocean Waves
Shadow box wall art
Layer your waves inside a deep frame and add a small sailboat, lighthouse, moon, or surfer silhouette. This version looks polished and giftable.
School diorama
Use a shoebox, build three to four wave layers, and add sea creatures, coral, or a beach. Cardstock waves with tissue highlights are sturdy and easy for classrooms.
Party backdrop
Use long sheets of crepe paper or bulletin board paper. Twist, stretch, and overlap them across a wall. Add torn white paper “spray” at the top. Suddenly your dessert table has a coastline.
Handmade card or scrapbook page
Smaller wave strips with foam tape create dimension without taking up much space. This is perfect for beach vacation photos, summer invitations, or nautical cards.
Common Mistakes to Avoid
Using only one paper type: Realistic results come from mixing textures.
Cutting every edge cleanly: Tear some sections. Roughness helps.
Making all waves the same size: Variation creates movement.
Adding too much foam: You are making surf, not whipped topping.
Skipping shadows: Depth depends on contrast.
Over-gluing tissue paper: Too much liquid makes paper wrinkle like it has seen things.
Conclusion
Making real-looking ocean waves out of paper is not about copying one perfect shape. It is about building the illusion of motion. When you combine strong base layers, torn translucent color, curled edges, and restrained white foam, paper starts doing a remarkably good impression of the sea.
The beauty of this craft is that it scales. You can make a tiny wave on a greeting card or a giant rolling backdrop for a classroom play. You can keep it simple with layered cardstock or go full mixed-media sea witch with tissue, crepe, mulberry paper, gloss medium, and dramatic lighting. Either way, the trick stays the same: layer thoughtfully, add texture, and do not make everything too perfect. The ocean certainly does not.
So grab your paper, make a mess, and build some waves. Worst case, you end up with a very blue table. Best case, you end up with ocean art that looks like it might start making seagull noises.
Experience Notes: What Making Paper Ocean Waves Actually Feels Like
The first experience most people have with this project is mild overconfidence. You look at a few sheets of blue paper and think, “How hard can it be?” Then you cut one wave, place it on a background, and discover it looks like a decorative mustache for Poseidon. This is normal. Realistic paper waves usually do not happen on the very first cut. They happen when you begin noticing how much better the piece looks after the second, third, and fourth layer.
That is why the experience of making paper waves is so satisfying. It rewards patience in a very visible way. Every time you add a deeper blue behind a lighter one, curl an edge, or tear a sliver of white tissue for foam, the project improves. It is one of those rare crafts where the transformation is easy to see in real time. Ten minutes in, it is paper. Thirty minutes in, it starts to feel like water. An hour later, you are holding the thing at arm’s length and saying, “Okay, that is actually kind of awesome.”
Another common experience is realizing that imperfect edges look better than perfect ones. People who like ruler-straight cuts often have to fight their instincts here. Ocean waves are not tidy. The more you loosen up, the more believable the project becomes. Torn tissue gives softer transitions. Slightly crooked foam patches feel more natural. Uneven spacing between crests makes the whole scene look wind-blown and alive. In a weirdly helpful way, this craft teaches you to stop trying to control every millimeter.
There is also a strong tactile pleasure to the process. Cardstock feels crisp and architectural. Tissue paper feels delicate and luminous. Crepe paper stretches with a kind of dramatic swoop that makes you feel like a set designer for a tiny Broadway production called Very Emotional Ocean. The materials behave differently under your hands, and part of the fun is learning which one gives you structure, which one gives you softness, and which one gives you that slightly chaotic sea energy.
People who make paper waves for school projects often discover another bonus: the craft photographs well. Layered shadows and curled paper edges show up nicely in pictures, especially near a window. That means your project does not just look better in person; it also survives the universal modern test of being shown to relatives through a phone screen.
Most of all, the experience tends to make people see everyday paper in a new way. A plain white torn strip becomes foam. A crumpled scrap becomes spray. A darker offcut becomes depth. Once that shift happens, the craft becomes less about following instructions and more about experimenting. And that is when the best paper waves usually appear: not when you are trying to make them perfect, but when you are letting paper behave a little more like the sea.