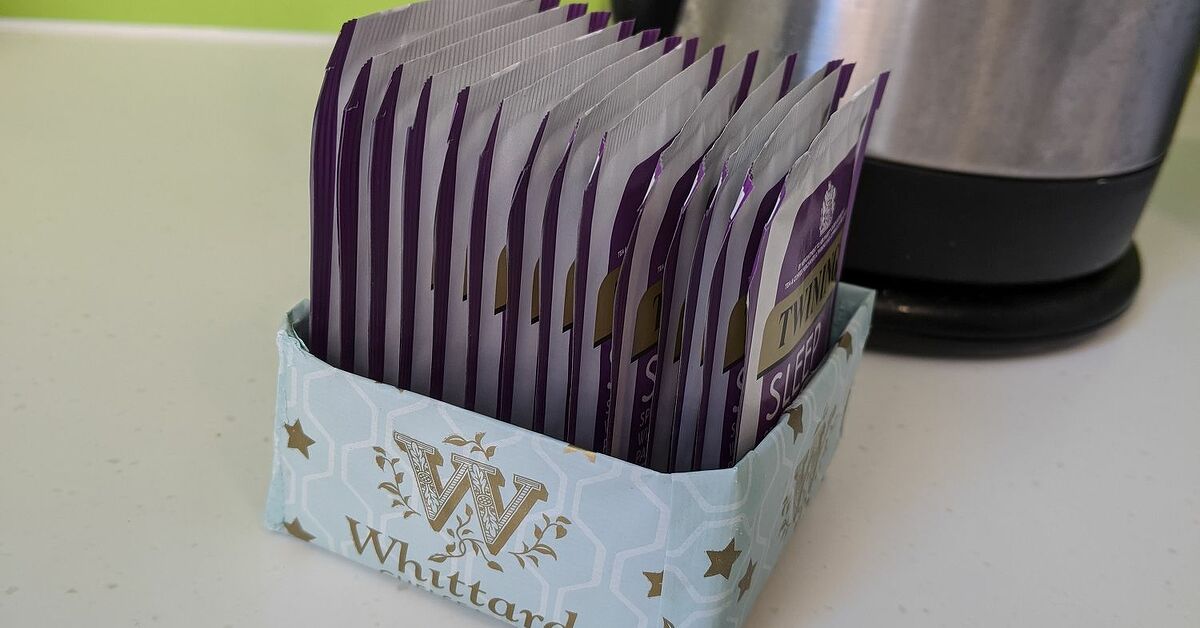
If your tea bags are currently living in a sad cardboard box beside the coffee filters, this is their glow-up moment. A DIY origami box for tea bags is simple, charming, inexpensive, and surprisingly practical. With just a few sheets of square paper, you can create a custom tea organizer that looks handmade in the best possible waynot handmade in the “I panicked before guests arrived” way.
This project is based on the classic origami masu box, a traditional square paper box folded from a single sheet. Make one box and you have a tiny tray. Make two boxes in slightly different sizes and you have a base with a lid. Make several and suddenly your tea shelf looks like it hired an interior designer who accepts payment in Earl Grey.
In this guide, you will learn how to make an origami box for tea bags DIY style, what paper works best, how to size the box correctly, how to decorate it, and how to use it without sacrificing tea freshness. The result is a small paper craft that is useful for kitchens, office desks, hostess gifts, party favors, and cozy tea corners.
Why Make an Origami Box for Tea Bags?
A tea bag origami box is more than a cute craft. It solves a real organizing problem. Tea bags are lightweight, flat, and easy to scatter. One minute you have a calm tea drawer; the next minute chamomile is wrestling with peppermint like it is a tiny botanical cage match.
An origami tea box keeps flavors grouped, makes your pantry prettier, and gives you a creative way to reuse decorative paper. It is also a no-glue, low-cost project, which means you can make a polished-looking container without buying specialty tools. For renters, students, crafters, or anyone who likes a neat countertop, this is a small project with big visual payoff.
What Is an Origami Masu Box?
The masu box is a classic square origami container. Historically, wooden masu boxes were used in Japan for measuring rice and later became associated with sake cups and celebration. The paper version keeps the same basic square shape but turns it into a foldable, decorative box.
For tea bags, the masu box is ideal because it has straight sides, a flat bottom, and a clean lid option. It can hold individually wrapped tea bags, small loose tea packets, sugar sachets, honey sticks, or even tiny cookies if your tea break believes in snacksand honestly, your tea break is correct.
Supplies You Need
You do not need an advanced craft room for this DIY origami box. A table, a ruler, and a willingness to crease paper like you mean it are enough.
Basic Materials
- Two sheets of square paper for each box with lid
- A ruler for measuring and sharpening creases
- Scissors or a paper trimmer if you need to resize paper
- Optional stickers, labels, washi tape, stamps, or ribbon
- Optional bone folder for extra-crisp folds
Best Paper for a Tea Bag Box
Origami paper is easy to fold and great for practice, but it may feel thin if you plan to use the box every day. Scrapbook paper, lightweight cardstock, or decorative craft paper usually works better for a tea bag storage box because it has more structure.
A good rule: choose paper that bends cleanly without cracking. Very thick cardstock can become bulky at the corners, while very thin paper may collapse once filled. For beginners, 12-by-12-inch scrapbook paper is a friendly choice because it is large enough to create a useful box and comes in patterns that do half the decorating work for you.
Choosing the Right Size for Tea Bags
Most individually wrapped tea bags are roughly rectangular, but brands vary. Before folding, place a few tea bags on your paper and estimate how many you want the finished box to hold. A box made from larger paper will be wider and taller; a box made from smaller paper will be better for samples, gift sets, or single-flavor servings.
For a practical countertop tea box, start with one 12-by-12-inch square for the lid and one slightly smaller square for the base. Cutting the base paper about 1/2 inch smaller on two sides helps the lid slide over it more easily. If you want a looser lid, reduce the base a tiny bit more. If you want a snug lid, reduce it less. Origami is geometry, but thankfully not the kind that gives people flashbacks to high school.
How to Make Origami Box for Tea Bags DIY
The following instructions make one square origami tea bag box. Fold the lid first using the larger paper, then repeat the same steps with the slightly smaller paper to make the base.
Step 1: Start With a Square Sheet
Place your paper pattern-side down on a clean table. If your paper has one decorative side and one plain side, the decorative side should face the table at the beginning. This ensures the pattern shows on the outside of the finished box.
Step 2: Fold Diagonally Both Ways
Fold one corner to the opposite corner to create a triangle. Crease firmly, then unfold. Fold the other two corners together, crease again, and unfold. You should now have an X-shaped crease across the square.
These first creases help you find the center point. Do not rush them. A crooked center crease is how a box starts developing “abstract sculpture” energy.
Step 3: Fold All Corners to the Center
Bring each corner into the center point and crease. When all four corners meet in the middle, your paper will look like a smaller square made of four triangular flaps. This fold is often called a blintz fold, and it is the foundation of many origami boxes.
Step 4: Fold the Top and Bottom Edges to the Center
With the corners still folded in, fold the top edge down to the center line. Crease firmly. Then fold the bottom edge up to the center line and crease. Unfold these two edge folds.
Step 5: Fold the Left and Right Edges to the Center
Repeat the same process with the left and right edges. Fold each side toward the center, crease, then unfold. At this point, your paper will have a neat grid of creases. This grid becomes the walls of your tea bag box.
Step 6: Open Two Opposite Corners
Open the top and bottom triangular flaps so they point away from the center. Leave the left and right flaps folded inward. Your paper should look like a long shape with pointed ends.
Step 7: Raise the Side Walls
Fold the left and right sides upward along the crease lines. These will become two walls of the box. Use your fingers to pinch the corners so the walls begin standing upright.
Step 8: Fold One End Into the Box
At one open end, push the side creases inward. The pointed flap should naturally lift and fold over the side walls. Bring that flap down into the inside bottom of the box. Press it flat.
This is the one step that feels a little magical and slightly suspicious the first time you do it. Trust the creases. The paper knows where it wants to go.
Step 9: Repeat on the Other End
Repeat the same movement on the opposite end. Push the side creases inward, lift the point over the walls, and fold it down inside the box. Smooth the bottom and pinch the corners. You now have a square origami box.
Step 10: Make the Matching Base or Lid
Repeat all steps using your second sheet of paper. If you made the first piece from the larger sheet, that piece can become the lid. Use the slightly smaller sheet for the base so the lid fits over it. Test the fit gently rather than forcing it. Paper has feelings, or at least corners that crumple when offended.
How to Turn the Box Into a Tea Bag Organizer
Once your origami box is folded, decide how you want to use it. For daily tea storage, you can leave the lid off and use the box as an open tray. This is perfect for a coffee bar, guest station, office desk, or breakfast nook.
For gifting, use the lid. Add three to six tea bags, a handwritten label, and maybe a small honey stick. Tie the box with ribbon or baker’s twine. It becomes a thoughtful handmade gift for teachers, coworkers, neighbors, book club friends, or anyone who believes hot water and leaves can fix at least 37 percent of life’s problems.
Tea Storage Tips Before You Fill the Box
An origami tea bag box is beautiful, but tea still needs proper storage. Tea bags keep their best flavor when protected from air, light, heat, moisture, and strong odors. That means your paper box is best for individually wrapped tea bags, short-term display, or tea you plan to drink soon.
If your tea bags are not individually sealed, place them in an airtight tin, jar, or canister first, then use the origami box for serving. Avoid storing tea near the stove, sunny windows, scented candles, spices, or anything with a strong smell. Tea is a professional aroma sponge. Leave it beside garlic powder and your morning cup may become an accidental soup experience.
Decoration Ideas for Your DIY Tea Bag Box
The best part of this project is customization. You can match the box to your kitchen, a holiday, a party theme, or a specific tea flavor.
Minimal and Modern
Use solid-color paper in cream, gray, sage, navy, or kraft brown. Add a small white label with the tea flavor: green tea, black tea, herbal tea, chai, mint, or breakfast blend.
Cozy Cottage Style
Choose floral scrapbook paper, gingham prints, or soft vintage patterns. Add a small tag that says “Tea Time” or “Steep & Smile.” This style works beautifully for brunch tables and homemade gift baskets.
Holiday Tea Box
Use red and green paper for Christmas tea gifts, pastel paper for spring gatherings, or orange and gold paper for fall. Fill with seasonal flavors such as peppermint, cinnamon spice, apple, ginger, or vanilla chai.
Office Tea Station
Make several boxes and label each by caffeine level: caffeinated, decaf, herbal, and emergency Monday tea. The last category is not official, but it should be.
Common Mistakes and How to Fix Them
The Lid Is Too Tight
If the lid does not fit, the base paper may be too large. Make the base again using paper that is slightly smaller. Trimming about 1/2 inch from the base sheet before folding usually solves the problem.
The Box Looks Uneven
Uneven boxes usually come from soft or inaccurate creases. Refold slowly, align corners carefully, and sharpen each crease with a ruler or bone folder.
The Corners Pop Open
Paper that is too thick may resist staying folded. Press the inside flaps firmly into the bottom. For a display box, you can use a tiny sticker inside to hold the flap down while keeping the outside clean.
The Box Feels Too Flimsy
Use heavier paper or make a double-layer version. You can also fold a second box and nest it inside the first for extra strength.
Creative Uses Beyond Tea Bags
Once you know how to make an origami box for tea bags, the same fold can organize many small items. Use it for sugar packets, paper clips, jewelry, wrapped candies, sewing notions, stickers, gift cards, or tiny stationery supplies. Make mini versions for party favors or large versions for drawer dividers.
This is why the origami box is such a satisfying DIY project. It is simple enough for beginners but useful enough that you will actually keep it. Not every craft passes that test. Some crafts are born, photographed, and quietly “recycled” before dinner.
Personal Experience: What I Learned Making Origami Tea Bag Boxes
The first time I made an origami box for tea bags, I underestimated two things: paper thickness and my own confidence. I grabbed a beautiful piece of heavy cardstock, assumed elegance would follow, and started folding like I was training for the paper Olympics. The result was technically a box, but the corners looked bulky and dramatic, as if the box had unresolved emotional tension.
My second attempt used medium-weight scrapbook paper, and everything improved immediately. The folds were crisp, the walls stood straighter, and the lid actually fit without requiring negotiation. That was the first big lesson: for tea bag boxes, paper should be sturdy but not stubborn. If it fights every fold, it is too thick. If it droops when you add tea bags, it is too thin.
I also learned that measuring matters. When making a lid and base, the base must be slightly smaller. At first, I tried using two sheets the exact same size. The finished pieces looked nice separately, but together they behaved like two people trying to walk through a doorway at the same time. Trimming the base sheet by about 1/2 inch made the lid slide on smoothly.
Another helpful discovery was that tea boxes work best when they are organized by purpose, not just flavor. I made one box for morning teas, one for caffeine-free evening teas, and one for guest-friendly assorted teas. This made the tea corner feel intentional rather than cluttered. It also prevented the classic problem of offering someone tea and then digging through twenty packets while saying, “I know the lemon one is in here somewhere,” with increasing panic.
For gifts, I found that the box feels more special when it includes a small handwritten note. A few tea bags in a paper box are nice. A few tea bags in a handmade box with a tag that says “For slow mornings” feels personal. The difference is small, but handmade gifts live in the details.
One practical tip: do not use an origami paper box as long-term storage for unwrapped tea bags. It is perfect for wrapped tea bags, short-term serving, or gift presentation, but loose or unsealed tea needs airtight storage to protect flavor. I now keep my main tea supply in tins and refill the origami boxes when guests come over or when I want the counter to look cozy.
The best part of this project is how calming it becomes after the first box. Once your hands remember the folds, the process feels almost meditative. Fold, crease, turn, fold again. By the third box, you may find yourself looking around the house for more things that need tiny paper containers. This is normal. This is how origami gets you.
Conclusion
Learning how to make origami box for tea bags DIY is a small craft with a lot of charm. It turns ordinary paper into a useful tea organizer, gift box, or serving tray without glue, expensive supplies, or complicated tools. With the classic masu box fold, the right paper, and a little patience, you can create a custom container that makes your tea collection look tidy, thoughtful, and ready for its close-up.
Use decorative paper for personality, sturdier paper for durability, and slightly different paper sizes when making a lid and base. Most importantly, remember that paper boxes are best for wrapped tea bags or short-term display. For long-term freshness, keep tea protected from air, light, heat, moisture, and strong odors.
Note: This article is original, rewritten content based on practical origami box techniques, traditional masu box concepts, and widely accepted tea storage guidance.