Note: This article is written for readers who want soft, natural-looking waves without relying on curling irons, flat irons, or a full bathroom counter of mystery products. Results vary by hair type, length, porosity, and patience levelbecause hair, like a housecat, has opinions.
Want naturally wavy hair without heat damage, crunchy curls, or waking up looking like you lost a pillow fight? Good news: you do not need a curling wand, a salon appointment, or a personal glam squad named Tiffany to create soft, beachy waves. With the right technique, a little moisture, and a healthy respect for drying time, you can encourage your hair to form natural bends, texture, and movement.
The secret is simple: waves happen when damp hair dries in a shaped position. Braids, twists, buns, scrunching, plopping, and lightweight styling products help guide the hair into that shape. The trick is choosing a method that matches your hair type. Fine hair usually likes lighter products and looser styling. Thick hair may need more sections, stronger hold, and longer drying time. Curly or textured hair often benefits from moisture first, shape second, and frizz control always.
Below are four practical ways to make hair naturally wavy, plus pro-style tips, common mistakes, and a real-life experience section to help you get better results without turning your head into a science project.
Why Heatless Waves Are Better for Everyday Styling
Heat tools can create gorgeous waves fast, but frequent high heat may dry out hair, weaken strands, and increase breakage. That does not mean you must break up with your curling iron forever. It just means your hair deserves a few low-drama styling days. Heatless waves are especially helpful if your hair is color-treated, dry, frizzy, fine, or already showing signs of damage.
Natural wavy hairstyles also tend to look more relaxed and lived-in. Instead of identical ringlets, you get movement that feels softer and less “I spent 47 minutes negotiating with a curling wand.” Heatless methods also work overnight, while air-drying, or during your morning routine if you have enough time.
Before You Start: Prep Hair the Right Way
Great waves begin before the braid, bun, or twist. Start with clean or lightly damp hair. If your hair is freshly washed, gently squeeze out excess water using a microfiber towel or soft cotton T-shirt. Avoid rough towel rubbing, which can lift the hair cuticle and invite frizz to the party.
Apply a small amount of leave-in conditioner, curl cream, mousse, or lightweight styling spray depending on your texture. Fine hair may need only a pea-size amount of product. Thick or coarse hair may need more moisture and stronger hold. If your hair gets oily quickly, keep products away from the roots and focus on the mid-lengths and ends.
Best Products for Natural Waves
You do not need every product on the shelf. For most people, one or two of these will do the job:
- Leave-in conditioner: Adds softness and helps prevent dry, frizzy ends.
- Lightweight mousse: Gives fine or flat hair volume and hold.
- Curl cream: Helps define waves on dry, thick, or textured hair.
- Sea salt spray: Adds beachy texture, but use lightly if your hair is dry.
- Hair oil or serum: Smooths frizz after waves are dry. A little goes a long way.
1. Make Hair Naturally Wavy with Overnight Braids
Overnight braids are the classic heatless wave method for a reason: they are easy, affordable, and wonderfully low-tech. If you can braid and sleep, congratulationsyou are already overqualified.
How to Do Overnight Braid Waves
Start with hair that is damp, not soaking wet. If your hair is too wet, it may still be damp in the morning, and damp braids usually create limp, confused waves. Apply a light styling product from the middle of your hair to the ends. Then divide your hair into sections.
For loose waves, create one or two large braids. For tighter waves, make four or more smaller braids. If you want waves to begin higher near the roots, try French braids or Dutch braids. If you prefer movement mainly through the lengths and ends, regular three-strand braids work beautifully.
Secure the ends with soft hair ties that will not leave harsh dents. In the morning, gently undo the braids and separate the waves with your fingers. Do not attack them with a brush unless you are specifically going for “romantic thundercloud.” Finish with a tiny amount of serum or a flexible-hold spray.
Who This Method Works Best For
Braid waves are ideal for medium to long hair, straight hair that needs texture, and wavy hair that needs more definition. Fine hair should use fewer products to avoid weighing down the waves. Thick hair may need more braids so every section dries evenly.
Common Braid Wave Mistakes
The biggest mistake is braiding hair while it is too wet. Another common problem is braiding too tightly, which can create stiff, crimped lines instead of soft waves. For natural-looking wavy hair, keep the braids snug but not scalp-yanking tight. Your follicles should not feel like they are filing a complaint.
2. Create Soft Waves with Twists and Buns
Twists and buns are perfect for people who want loose, romantic waves without the defined pattern of braids. This method creates bends that look more effortless, especially on medium-length or long hair.
How to Make Bun Waves
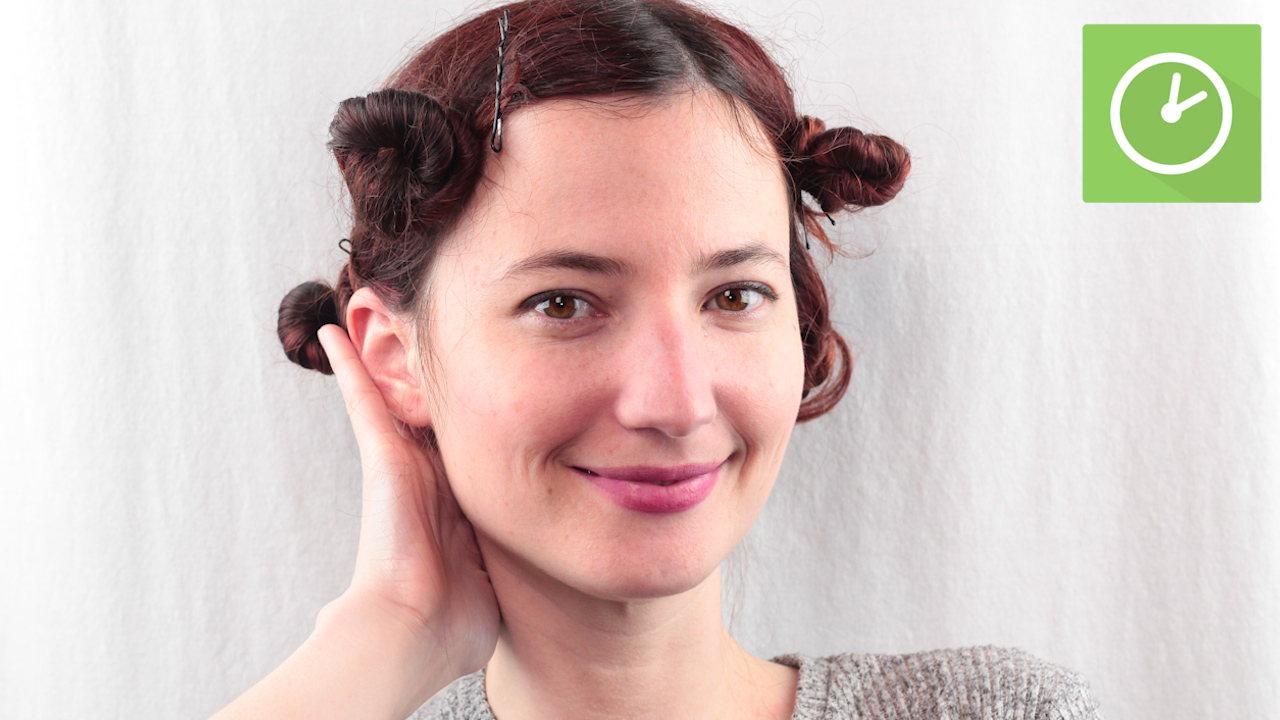
Begin with slightly damp hair and apply a lightweight mousse or curl cream. Part your hair down the middle and divide it into two sections. Twist each section away from your face, then wrap each twist into a loose bun near the nape of your neck or slightly higher behind your ears. Secure with soft scrunchies, pins, or spiral hair ties.
For bigger, softer waves, make two loose buns. For more texture, create four smaller buns. Let your hair dry completely before taking the buns down. When you release the twists, shake out your roots gently and separate the waves with your fingers.
How to Make Rope Twist Waves
Rope twists create a slightly more polished wave. Divide damp hair into two or four sections. Split each section into two pieces, twist both pieces in the same direction, then wrap them around each other in the opposite direction. Secure the ends and let dry. This technique helps waves hold their shape longer, especially if your hair tends to fall flat.
Who This Method Works Best For
Twist and bun waves work well on straight, wavy, thick, and layered hair. If you have short hair, try mini twists pinned flat against the head instead of buns. If your hair is very fine, avoid heavy creams and use mousse for airy movement.
3. Scrunch and Plop for Natural Wavy Texture
Scrunching and plopping are popular for wavy and curly hair because they encourage natural texture without stretching it out. This method is especially useful if your hair already has a slight bend but dries unevenly or frizzy.
How to Scrunch Hair for Waves
After washing and conditioning, gently squeeze excess water from your hair. Apply leave-in conditioner, curl cream, or mousse while your hair is still damp. Tilt your head to one side or flip it forward, then cup the ends of your hair in your palm and squeeze upward toward the roots. You should hear a soft squishing sound. That is not your hair applauding, but it is close.
Repeat this motion around your head. The goal is to help waves clump together instead of drying into random frizz. Once the shape looks good, stop touching your hair. Over-touching wet waves is a fast route to puffiness.
How to Plop Hair with a T-Shirt
Lay a soft cotton T-shirt or microfiber towel on a flat surface. Flip your damp, product-coated hair forward so the ends gather in the center of the shirt. Wrap the fabric around your head and secure it gently. Leave it on for 10 to 30 minutes, depending on your hair thickness and how much water you need to absorb.
After plopping, release your hair and let it air-dry. Avoid brushing. Once fully dry, scrunch out any stiffness with clean hands or a drop of lightweight oil.
Who This Method Works Best For
Scrunching and plopping are excellent for naturally wavy hair, loose curls, frizz-prone hair, and hair that loses shape when towel-dried roughly. It may not create dramatic waves on very straight hair, but it can add body and soft texture.
4. Use Sea Salt Spray or Heatless Rollers for Beachy Waves
If your hair needs extra help holding texture, sea salt spray or heatless rollers can make a big difference. These methods are especially useful when you want more visible waves without using a hot tool.
How to Use Sea Salt Spray for Natural Waves
Sea salt spray adds grip and texture, creating that “I just came from the beach” look even if the closest you got to the ocean was watching a travel video during lunch. Spray it lightly on damp hair, focusing on the mid-lengths and ends. Scrunch upward and let your hair air-dry.
If your hair is dry, color-treated, or coarse, choose a moisturizing texture spray or use leave-in conditioner first. Salt can make some hair types feel dry if overused. Think seasoning, not soup.
How to Use Heatless Rollers
Heatless rollers, foam rollers, satin rods, and bendy rollers can create soft waves while you sleep or while your hair air-dries. Start with slightly damp hair. Wrap medium-size sections around each roller, rolling away from your face for a flattering shape. Secure gently and allow hair to dry completely.
When you remove the rollers, avoid combing immediately. Use your fingers to loosen the waves and apply a small amount of finishing cream or serum to tame flyaways.
Who This Method Works Best For
Sea salt spray is great for fine to medium hair that needs texture. Heatless rollers work well for straight hair, long hair, and anyone who wants more polished waves. For thick hair, use smaller sections and give the style plenty of drying time.
How to Make Natural Waves Last Longer
Once you have created your waves, the next goal is keeping them alive past breakfast. Start by letting your hair dry fully before undoing braids, buns, twists, or rollers. If you release hair too early, the wave pattern may collapse quickly.
Use flexible-hold products instead of stiff sprays whenever possible. Natural waves should move. If your hair feels crunchy, wait until it is completely dry, then gently scrunch it with your hands to soften the hold. Sleep on a satin or silk pillowcase to reduce friction, or loosely gather long hair into a high, soft ponytail before bed.
Best Tips for Different Hair Types
Fine Hair
Use mousse or a light texture spray. Avoid heavy creams and oils before styling. Try two loose braids or two buns for soft volume. If your waves fall quickly, apply product while hair is damp and let it dry completely before touching it.
Thick Hair
Work in sections. Thick hair often needs four braids, four twists, or several rollers to dry evenly. Use a leave-in conditioner to reduce frizz, and consider styling when hair is about 70% dry so it does not stay wet overnight.
Short Hair
Try mini twists, small buns, pin curls, or a light sea salt spray. Scrunching can also add movement. Keep products light so short waves do not look greasy or stiff.
Curly or Textured Hair
Focus on hydration first. Use conditioner, leave-in products, and gentle styling techniques. Avoid tight styles that pull on the scalp. Scrunching, plopping, and loose twists can help define natural pattern while reducing frizz.
Common Mistakes to Avoid
Using too much product: More product does not always mean better waves. It can make hair sticky, heavy, or flat.
Taking hair down before it is dry: This is the number one reason heatless waves fail. Damp hair may look promising for three minutes, then surrender.
Brushing finished waves: Use fingers or a wide-tooth comb only if needed. Brushing can turn defined waves into frizz.
Making styles too tight: Tight braids, buns, and ponytails can create dents, discomfort, and unnecessary tension on the scalp.
Ignoring your haircut: Long, heavy, one-length hair may struggle to hold waves. Layers can help create movement, especially for thick hair.
Extra Experience: What It Is Really Like to Make Hair Naturally Wavy
Anyone who has tried heatless waves knows the first attempt can be humbling. You follow the steps, sleep like a delicate museum artifact, wake up with excitement, undo the braids, and somehow one side says “soft beach waves” while the other says “folded laundry.” That is normal. Natural wavy hair methods usually require a little experimenting before they become reliable.
One of the biggest lessons is that dampness matters more than people think. Hair that is too wet may not dry fully, especially when braided or twisted tightly. Hair that is too dry may not form a lasting wave. The sweet spot is slightly damp, almost like hair that has been towel-dried and then left alone for 15 to 30 minutes. For thick hair, styling at about 70% dry often works better than starting with freshly washed hair.
Another experience many people share is product confusion. It is tempting to use leave-in conditioner, curl cream, mousse, gel, sea salt spray, oil, and possibly a small prayer. But natural waves often look best with a simpler routine. Fine hair may only need mousse. Dry hair may need leave-in conditioner plus a little styling cream. Hair that falls flat may need texture spray near the ends. The right amount should make hair feel supported, not coated.
Overnight comfort is also important. Two low braids are usually easier to sleep in than hard rollers or tight buns. Satin scrunchies can help prevent dents, and a silk or satin pillowcase can reduce friction. If you toss and turn, loose braids may survive better than carefully arranged buns. Your hairstyle should not require you to sleep like a vampire in a display case.
Morning technique makes a difference too. When taking down braids or twists, patience wins. Gently unravel each section instead of pulling it apart. Then shake hair at the roots and separate only the pieces that look too chunky. A tiny amount of serum on the ends can make waves look polished. Too much oil near the roots, however, can flatten everything faster than a rainy-day picnic.
It also helps to accept that natural waves are not meant to be identical. The charm is in the relaxed shape, soft bends, and movement. Some days your waves will look beachy and effortless. Other days they may need a claw clip, a half-up style, or a strategic “this was intentional” attitude. The more often you practice, the better you will understand how your hair behaves.
The best part is that heatless waves are forgiving. If braids make your hair too crimped, try buns. If buns fall flat, try rope twists. If your natural texture needs encouragement, scrunch and plop. If your hair wants more structure, use heatless rollers. There is no single perfect methodonly the method that makes your hair look good without making your morning feel like a competitive sport.
Conclusion
Making hair naturally wavy is less about forcing your hair and more about guiding it. Braids, twists, buns, scrunching, plopping, sea salt spray, and heatless rollers can all create soft, beautiful waves without daily heat styling. The key is starting with properly damp hair, choosing lightweight products, letting your style dry completely, and handling the finished waves gently.
Whether your goal is beachy texture, loose romantic bends, or better definition for your natural wave pattern, these four methods give you flexible options. Try one technique at a time, adjust for your hair type, and remember: the best natural waves usually look effortless because they are allowed to be a little imperfect.