If your deck is already the unofficial headquarters for burgers, sunset selfies, and people asking, “Do you have any ice?”, it may be time for an upgrade. Enter the DIY beverage center: the hardworking, good-looking, party-saving station that keeps drinks cold, glasses handy, and your main kitchen from turning into Grand Central Station every time friends come over.
The beauty of a deck beverage center is that it does not need to be a full outdoor kitchen with a pizza oven, sink, and a budget large enough to make your wallet file a complaint. A smart beverage center can be compact, stylish, and surprisingly practical. With the right layout, weather-friendly materials, storage, and safety planning, you can build a drink station that feels custom without becoming a monthslong saga involving six hardware store trips and one dramatic argument with a crooked board.
In this guide, we will break down exactly how to plan, build, style, and enjoy the perfect DIY beverage center for almost any deck. Whether your vibe is simple weekend refreshment station or backyard entertainer’s command center, this project can be tailored to your space, your budget, and your level of confidence with a drill.
Why a DIY beverage center makes so much sense on a deck
A deck is meant to be lived on, not just looked at from the sliding door while you promise yourself you will “use it more this summer.” A beverage center turns that outdoor square footage into a destination. It creates a natural gathering point, reduces foot traffic in and out of the house, and gives you a place to organize the essentials: drinks, ice, mixers, napkins, cups, openers, and snack bowls that mysteriously empty five minutes after guests arrive.
It also fills a sweet spot between a rolling bar cart and a full-blown outdoor kitchen. A bar cart is flexible but often too small. A complete outdoor kitchen is fantastic, but it can be expensive, heavy, and sometimes more than a deck realistically needs. A beverage center is the middle child that actually got attention. It is practical, customizable, and perfect for homeowners who want function without overbuilding.
Best of all, you can design it around how you entertain. Love sparkling water, iced tea, and mocktails? Build open shelves for glassware and a cooler drawer. More of a coffee-on-the-deck-at-sunrise person? Add mug hooks, a power spot for a brewer, and concealed storage for beans and syrups. Prefer a grill-night setup? Let your beverage center double as prep space and a serving counter.
Start with the right location
Before you buy materials, decide where the beverage center should live. This choice affects everything from dimensions to storage to whether your guests admire your craftsmanship or accidentally hip-check the thing every ten minutes.
Keep it close to the action
The ideal location is near your seating or dining zone but not blocking the main traffic path. You want people to reach it easily without creating a bottleneck. If the deck connects directly to the kitchen, placing the station near the door makes loading and cleanup simpler. If the grill is the social magnet, position the beverage center nearby, but not so close that heat, smoke, and splatters become part of the cocktail menu.
Think about sun, shade, and weather
Direct afternoon sun can warm drinks fast and make ice melt like it is speed-running summer. A partially shaded area is ideal. If your deck has no cover, consider adding an umbrella nearby or designing the station with a covered top shelf, pergola edge placement, or lidded cooler insert. Wind exposure matters too. Lightweight accessories, paper goods, and decorative items love dramatic exits.
Respect the deck itself
Your deck is not just a stage set. It is a structure with load limits, railing rules, and safety considerations. A compact beverage center usually fits comfortably into most deck plans, but once you start adding stone tops, refrigerators, or large built-ins, weight matters more. If your deck is older or you are unsure about capacity, treat that as your sign to keep the design lighter or consult a qualified pro before building. Your future self would prefer sangria over structural regret.
Choose a beverage center style that matches your deck
The smartest DIY projects look like they belong. Your beverage center should feel connected to the deck, not like a kitchen island that got lost and wandered outside.
Freestanding station
This is the easiest and most flexible option. A freestanding beverage center works like a compact outdoor cabinet or serving table. It can be built from wood framing with an exterior-grade countertop, shelves below, and locking casters if you want mobility. This style is ideal for small to midsize decks because it adds function without permanently taking over the footprint.
Railing-side ledge bar
If your deck is tight on space, a slim bar ledge or fold-down counter along an interior railing edge can work beautifully. It offers a place to pour drinks and stage snacks while preserving floor area. This approach feels streamlined and modern, especially on enclosed or semi-enclosed decks.
Built-in beverage nook
If your deck already has a privacy wall, bench zone, pergola post line, or outdoor kitchen corner, a built-in station can create a polished custom look. Think lower cabinets, upper shelving, and a countertop that anchors the entertaining area. This option looks luxurious, but it requires more careful planning, especially if you add appliances or plumbing.
Hybrid grill-and-drink station
For hosts who like one-stop outdoor living, combine beverage service and prep space. One side handles drinks and supplies, while the other supports grilling or serving. This layout works best on larger decks where you can preserve safe clearance around the cooking area.
Pick materials that can handle real outdoor life
Outdoor projects fail when they are built like indoor furniture wearing a brave face. Your beverage center needs materials that tolerate moisture, sun, temperature swings, spills, and the occasional lemon wedge that lives under a tray longer than it should.
Frame materials
Pressure-treated lumber is a common choice for the base frame because it is durable and budget-friendly. Cedar is another favorite thanks to its natural resistance to rot and insects, plus it looks fantastic with a warm stain or clear finish. If you want a cleaner modern look, exterior metal framing or modular outdoor cabinet systems may also work, though they usually raise the cost.
Countertop options
A beverage center countertop should be easy to clean and tough enough for regular use. Concrete offers a sleek, durable finish but adds significant weight, so it is better for supported builds where structure has been considered carefully. Tile can be attractive and affordable, though grout maintenance is part of the deal. Stainless steel is practical and weather-friendly, especially for modern designs. Exterior-rated stone or composite surfaces can also work well if they fit your budget. If you choose wood for the top, use an exterior-rated species and a finish designed for outdoor exposure.
Storage and hardware
Use exterior-grade screws, corrosion-resistant hardware, and handles that can tolerate humidity. For shelves or cabinet boxes, stick with materials rated for outdoor use. Stainless steel and weather-resistant composite storage pieces are especially handy if you want a low-maintenance setup. Hinges, drawer slides, and hooks should be chosen like they have to survive a thunderstorm and an enthusiastic housewarming party. Because they probably do.
Features that make a beverage center genuinely useful
A good beverage center is pretty. A great one saves steps, reduces mess, and makes hosting feel weirdly easy.
Cold storage
The hero element is usually a cooler, ice bin, or insulated tub insert. A drop-in cooler creates a polished built-in feel, while a portable cooler tucked on a lower shelf offers flexibility and easier cleaning. If your deck structure and electrical setup allow for it, an outdoor-rated mini fridge can take convenience to the next level.
Prep space
Even a modest counter area makes a huge difference. You need room for slicing citrus, opening bottles, mixing pitchers, or lining up glasses without balancing everything on top of a napkin stack. A minimum of a few feet of clear prep surface goes a long way.
Open storage
Open shelving is perfect for pitchers, baskets, trays, and rolled towels. It also lets you grab what you need fast, which is exactly what you want when someone asks for “something fizzy, cold, and maybe with lime.”
Closed storage
Cabinet space keeps less glamorous essentials out of sight: paper towels, extra napkins, coasters, bug spray, bottle caps, and the emergency stash of unopened chips. Closed storage helps your deck feel calm instead of chaotic.
Convenience add-ons
Small upgrades can make the station feel custom: a towel bar, bottle opener, cap catcher, stemware rack, small trash bin, or side hooks for tools and bar towels. These are the kinds of details that whisper, “Yes, this homeowner has their life together,” even if the garage says otherwise.
Safety rules you should not treat like optional decor
A beverage center may be fun, but it still belongs in a real outdoor environment where safety matters. If the station is near a grill, give heat and flame the respect they deserve. Keep the grill well away from deck railings, siding, and anything combustible, and do not crowd cooking equipment into tight corners just because the layout looks tidy on paper.
If you want electrical features like a refrigerator, blender, or lighting, use outdoor-appropriate components and have any new electrical work handled to code. Water and electricity are not a charming duo when installed carelessly. Also, do not block walking paths, stair access, or railings with oversized storage or stools. A beautiful beverage center is not worth a twisted ankle and a flying tray of lemonade.
Finally, if your deck is older, inspect it before adding new built-ins or concentrated weight. Look for loose fasteners, deteriorated boards, rust, wobble, and railing problems. The beverage center should make entertaining easier, not introduce suspense.
A simple DIY build plan that works for most decks
If you want a practical starting point, build a freestanding beverage center roughly the size of a compact console table or outdoor sideboard.
Basic framework
Start with a sturdy rectangular frame sized to your deck and entertaining needs. Include a lower shelf, an upper work surface, and a back or side bracing system for stability. Keep the proportions comfortable for serving, with a countertop height that feels natural for standing use.
Functional layout
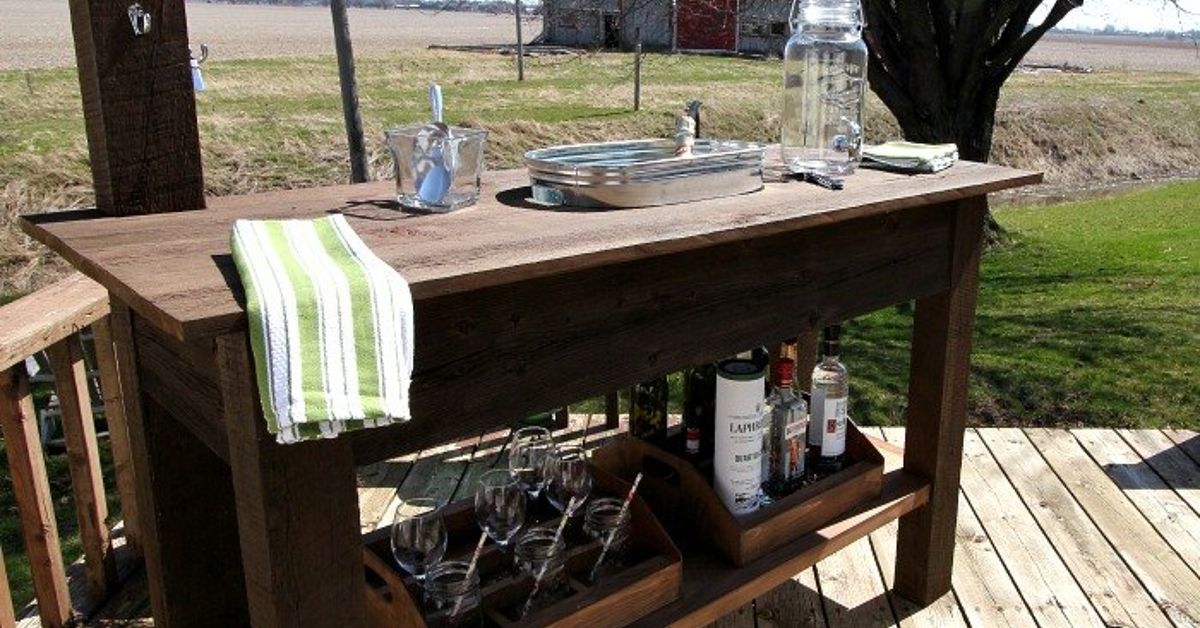
Reserve one side of the top for an ice bucket, drop-in cooler, or beverage tub. Leave the rest open for prep and serving. Use the lower shelf for extra drinks, baskets, or a compact cooler. Add one side rail for towels and a mounted opener on the other side.
Finish for longevity
Sand edges well, seal or stain exposed wood, and use a finish designed for outdoor conditions. If your deck gets intense sun or frequent rain, maintenance matters. A well-sealed piece lasts longer, looks better, and does not greet spring with the texture of a driftwood experiment.
Design ideas that make it look intentional, not improvised
The difference between “neat project” and “wow, where did you get that?” often comes down to design cohesion.
Match the station’s stain or paint color to your deck boards, trim, or railing accents. Use baskets, trays, and containers in a limited palette rather than mixing every color known to mankind. Add a small outdoor rug nearby if space allows. Hang string lights above, or place rechargeable lanterns on the counter for evening glow.
For decor, think functional first. A drink dispenser with citrus slices, a tidy tray of glassware, or a planter with mint and basil can be both useful and attractive. If you want a seasonal touch, swap accessories instead of rebuilding the whole look. Summer can be bright and playful, fall can lean rustic, and holiday hosting can go full sparkle without turning the station into a craft store explosion.
How to use your beverage center year-round
This project is not just for peak July. A well-designed beverage center can earn its keep through multiple seasons. In summer, it is your cold-drink headquarters. In fall, it becomes a cider and cocoa bar. In spring, it can host brunch beverages, iced coffee, and pastry trays. On football weekends, it turns into the snack-and-sip zone that keeps everyone outside a little longer.
If winters are harsh where you live, store delicate accessories indoors and cover the station when not in use. Drain any removable ice bins, clean surfaces thoroughly, and check the finish at the start of each season. A little maintenance is far cheaper than replacing the whole thing because the weather decided to humble your woodworking ambitions.
Common mistakes to avoid
Building too big for the deck
A beverage center should improve flow, not dominate the entire entertaining area. Leave enough room for chairs, traffic, and basic human movement.
Ignoring storage
Without storage, the station becomes a countertop and nothing more. Include a shelf, cabinet, bin, or hooks from the start.
Choosing indoor materials
Pretty does not equal outdoor-ready. Moisture, sun, and heat are ruthless editors.
Forgetting cleanup
Design it so spills wipe up easily, bins lift out, and accessories can be removed or covered. Hosting is more fun when cleanup does not feel like an archaeological dig.
Skipping safety planning
If the station is near a grill or outlet, think through clearances, weather exposure, and local code requirements early. Safety is not the boring part. Safety is the reason the fun part continues.
Conclusion: build the station, claim the deck
The perfect DIY beverage center for any deck is not about showing off. It is about making your outdoor space more useful, more welcoming, and a lot more enjoyable. With smart placement, weather-resistant materials, practical storage, and a design that fits your deck’s size and style, you can build a station that feels custom without requiring a luxury-resort budget.
The best version is the one that supports the way you actually live. Maybe that means mocktails and sparkling water by the grill. Maybe it means iced coffee at sunrise and lemonade for the kids in the afternoon. Maybe it means a neat little bar ledge that makes every evening feel like a mini vacation five steps from your back door. However you use it, a thoughtful beverage center turns your deck into a place where people want to linger, laugh, and ask for refills. That is a DIY win worth toasting.
Real-life deck beverage center experiences and inspiration
One of the best things about a DIY beverage center is how quickly it changes the way a deck feels in everyday life. Before building one, many homeowners use a patchwork system: a cooler on the floor, glasses balanced on a side table, napkins blowing away like tiny surrender flags, and at least one person walking back into the house every five minutes because someone forgot ice, a bottle opener, or the good cups. After the beverage center goes in, the deck starts working like a true extension of the home instead of a separate outdoor zone that needs constant support from the kitchen.
For families, the station often becomes more than a party feature. On ordinary afternoons, it can hold fruit-infused water, sunscreen, and snack bowls during summer hangouts. During weekend cookouts, it becomes the self-serve hub that keeps guests occupied and gives the cook a little breathing room. That is not a small perk. When people can help themselves to drinks, the host suddenly gets to enjoy the gathering too, instead of sprinting between the refrigerator and the patio like an unpaid event coordinator.
Homeowners with smaller decks often discover that even a narrow beverage center makes the space feel more organized. A slim ledge with shelves underneath can transform an awkward corner into the most useful spot outside. On large decks, a more substantial station helps define zones. The grill area feels intentional, the lounging area feels calmer, and the beverage center becomes the bridge between food, conversation, and comfort.
There is also something satisfying about the personal touches. Some people stain the wood to match the deck perfectly so the station looks built-in from day one. Others paint it a contrasting color to make it feel like a cheerful accent piece. Add a small planter of mint, a tray of chilled glasses, or a compact speaker tucked on a shelf, and suddenly the deck starts giving boutique-hotel energy on a very non-boutique budget.
Seasonal flexibility is another part of the appeal. In summer, the station might be loaded with sparkling water, lemonade, iced tea, and a giant ice bucket that earns its keep. In fall, the same setup can become a cider station with mugs, cinnamon sticks, and a cozy lantern. During holiday gatherings, it can hold hot chocolate toppings, coffee service, or even dessert trays. That year-round usefulness makes the project feel less like a novelty and more like a smart lifestyle upgrade.
Perhaps the most common experience people report is simple: they use the deck more. Not theoretically. Not someday. Actually more. Morning coffee lasts longer outside. Casual weeknight dinners move outdoors more often. Friends gather around the station naturally because people always orbit snacks and drinks like it is a universal law. A well-designed beverage center quietly changes behavior. It makes outdoor living easier, so people do it more often.
That is the real magic of the project. The perfect DIY beverage center is not just a cabinet with a countertop. It is an invitation to slow down, host a little more easily, and enjoy the deck you already have. And if it also makes you look impressively organized while handing someone a cold drink, well, that is just excellent design.