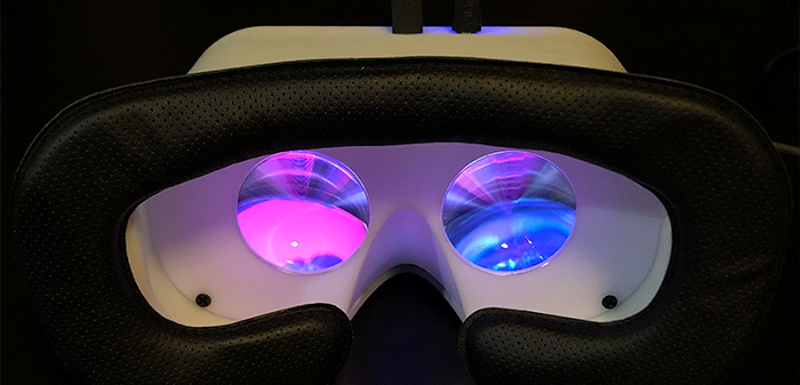
Virtual reality has always had a slightly unfair reputation. On one hand, it promises to put you in a race car, a fantasy world, a virtual movie theater, or a room full of floating spreadsheets. On the other hand, buying into VR can feel like adopting a small, expensive robot that needs its own charging station, accessories, software accounts, and emotional support cable.
That is why the idea of an open source VR headset for $200 is so compelling. Projects such as Relativty take the core ingredients of a virtual reality headsetdisplays, lenses, motion sensors, firmware, a PC driver, and a 3D-printed enclosureand make the design available for builders to study, modify, and improve.
The important word here is not just “cheap.” It is open. A low-cost DIY VR headset is less like buying a finished appliance and more like joining a workshop where everyone is allowed to inspect the gears. You may save money on hardware, but you are also trading cash for curiosity, patience, and the occasional moment of asking why one tiny sensor has decided to become philosophical.
What Is an Open Source VR Headset?
An open source virtual reality headset is a headset whose hardware designs, firmware, software, or mechanical files are publicly available. Instead of treating the device as a sealed black box, the project gives makers access to the ingredients behind the experience.
Relativty became one of the best-known examples of this approach. Its project files cover the basic VR hardware stack: motion tracking hardware, microcontroller firmware, SteamVR compatibility, display mounting, and 3D-printable headset parts. The project was designed for makers, not for someone who wants to open a shipping box, put on a headset, and immediately disappear into a laser-tag arena.
That distinction matters. A consumer VR headset is built for convenience. An open source VR headset is built for experimentation. One gives you a polished product. The other gives you a set of building blocks and politely hands you a screwdriver.
Why the $200 Price Tag Gets Attention
The original $200 figure attached to Relativty came from a time when commercial VR hardware was far less accessible than it is today. The project demonstrated that a working headset could be assembled from relatively affordable components instead of requiring a premium, closed ecosystem.
However, the phrase “$200 VR headset” needs an asterisk the size of a movie screen. It usually refers to a core build budget, not every possible expense. Shipping, replacement parts, 3D-printing materials, tools, a gaming PC, controllers, upgraded displays, and the occasional “I ordered the wrong cable” tax can all move the final total upward.
Still, the achievement remains impressive. The goal is not merely to beat retail pricing. The goal is to prove that immersive hardware can be understood, customized, and rebuilt by ordinary makers rather than being controlled entirely by a handful of giant technology companies.
How a $200 DIY VR Headset Works
A functional virtual reality headset needs several systems working together. The screens create the image, lenses reshape that image for your eyes, sensors detect head movement, and software tells the PC how to react. If one part gets confused, the whole system can feel less like virtual reality and more like a tiny haunted aquarium strapped to your face.
Displays and Driver Boards
The display system is usually the biggest variable in a DIY VR headset budget. A builder needs compact displays with enough resolution and refresh rate to make the experience reasonably comfortable. Those displays connect to a compatible driver board, which then connects to the computer.
Display compatibility is not a minor detail. A screen may look perfect in a product listing, but it still needs the correct controller board, cable arrangement, power requirements, and video input support. This is one reason experienced DIY builders often recommend validating the display setup before spending heavily on lenses, custom housings, and cosmetic upgrades.
Lenses, Interpupillary Distance, and Visual Comfort
Lenses are what turn two small displays into a believable 3D scene. Without them, the screens would simply look like two tiny monitors sitting much too close to your eyeballs, which is not exactly the future imagined by science fiction.
Good lens positioning matters because every face is different. The distance between a person’s pupils, known as interpupillary distance or IPD, affects how naturally the left and right images line up. A well-designed DIY headset can allow adjustments to lens position or display placement, helping the builder improve clarity and reduce eye strain.
Motion Sensors and Head Tracking
Most entry-level open source VR headsets use an inertial measurement unit, commonly called an IMU. This small sensor tracks orientation by detecting rotation and movement. It helps the headset understand when you look left, right, up, down, or tilt your head.
Relativty is fundamentally a three-degrees-of-freedom, or 3DoF, headset. That means it can track rotational movement: yaw, pitch, and roll. You can look around a virtual cockpit, inspect the ceiling of a spaceship, or lean your head dramatically while pretending to understand advanced telemetry.
What 3DoF does not naturally provide is accurate positional movement. If you physically lean forward, crouch, or step to the side, the virtual world may not respond the same way a modern six-degrees-of-freedom headset would. This is why 3DoF is better suited to seated experiences, virtual theaters, racing simulations, flight simulations, and desktop-focused VR projects.
3DoF vs. 6DoF: The Difference Between Looking and Moving
For many people, the biggest question is whether a $200 open source VR headset can compete with more advanced systems. The honest answer is that it depends on what you want to do.
A 3DoF headset can create an enjoyable sense of presence when you are seated. It is especially useful when the virtual activity already assumes you will stay in one place, such as driving, flying, watching a film, exploring a virtual museum, or using a giant virtual monitor.
A 6DoF VR headset adds positional tracking. It recognizes movement forward and backward, side to side, and up and down, alongside rotational head movement. This is essential for room-scale VR, hand interaction, physically dodging objects, and games that expect you to reach, grab, crouch, and occasionally wave your arms around like you are directing airport traffic.
Open source projects such as HadesVR explore more advanced DIY tracking approaches, including external camera-based tracking and custom controllers. But that added capability also increases complexity. More cameras, calibration work, tracking hardware, controller design, and software troubleshooting can quickly turn a “fun weekend project” into “a deeply personal relationship with USB drivers.”
Where the Budget Really Goes
The $200 concept works best when builders think in categories rather than assuming every component will cost the same everywhere. Availability changes, suppliers change, shipping changes, and electronics prices sometimes behave like they are being negotiated by squirrels.
| Component Category | Why It Matters | Budget Impact |
|---|---|---|
| Displays and driver board | Creates the image and connects the headset to the PC. | Usually the largest variable. |
| IMU and microcontroller | Handles orientation tracking and communication with the computer. | Relatively affordable. |
| Lenses | Shapes the image for each eye and affects clarity. | Moderate but important. |
| 3D-printed enclosure | Holds components in alignment and affects comfort. | Low to moderate, depending on printing access. |
| Face padding and straps | Determines whether the headset feels wearable or like a plastic sandwich press. | Easy to overlook. |
| Gaming PC and tools | Runs VR applications and supports the build process. | Usually not included in the headline price. |
The most practical takeaway is simple: the $200 figure is a design target, not a universal checkout total. Builders should expect variation based on display quality, printing access, shipping costs, and whether they already own tools and a VR-capable computer.
What Open Source Adds Beyond Lower Cost
The strongest argument for an open source VR headset is not that it will always be cheaper than an entry-level retail device. The real value is ownership of the design.
With open hardware and software, builders can change the enclosure shape, adjust display mounts, experiment with lenses, replace a damaged sensor, improve cable routing, or adapt the project for a specific use case. A sim racer may care most about comfort during long sessions. A teacher may care about creating an affordable demonstration unit. A developer may care about testing custom tracking ideas without reverse-engineering proprietary hardware.
Open source also helps preserve knowledge. When a commercial headset reaches the end of its support life, users may be left with discontinued accessories, abandoned software, or a very stylish paperweight. Open projects can continue through community maintenance, forks, updated parts lists, and new versions created by people who simply refuse to let a good design disappear.
SteamVR and OpenXR Matter
For a DIY headset to feel useful, it needs a path into actual VR software. Relativty uses a SteamVR driver, allowing the headset to communicate with the PC-side VR ecosystem. That connection is important because a headset is only as exciting as the software it can run.
OpenXR also plays a larger role in the modern VR landscape. It is an open, royalty-free standard designed to reduce fragmentation between different AR, VR, and mixed-reality platforms. For developers, standards like OpenXR make it easier to build immersive applications without creating a completely separate version for every headset on Earth.
In plain English: open hardware gives makers room to experiment, while open standards give software creators a better chance of reaching multiple devices. Together, they make VR feel a little less like a collection of locked amusement parks and a little more like a neighborhood.
Real Limits of a $200 Open Source VR Headset
DIY VR is exciting, but it is not magic. A low-cost open source headset has real limitations, and pretending otherwise would be like reviewing a bicycle while refusing to mention the pedals.
It Is Not Plug-and-Play
A commercial headset is designed to hide complexity. A DIY headset puts that complexity on the workbench. Builders may need to handle firmware, sensor calibration, mechanical alignment, cable management, software drivers, and troubleshooting. The learning is part of the reward, but it is still learning.
Refresh Rate and Latency Are Crucial
VR is unusually sensitive to display performance. A panel’s advertised specifications do not always match the refresh rate or latency a builder achieves in a finished headset. A newer open source DIY project by CNCDan demonstrated this tradeoff clearly: a low-cost headset could offer impressive resolution and adjustable hardware, yet still face refresh-rate limitations when operating at full resolution.
Lower frame rates, tracking delay, or poor calibration can make VR feel uncomfortable. Motion sickness in VR is often connected to a mismatch between what the eyes see and what the body feels. That is why careful setup matters more than simply chasing the highest number printed on a display listing.
Controllers Are a Separate Challenge
Head tracking is only one part of immersive VR. Many modern games assume you have hand controllers with buttons, triggers, haptics, and accurate positional tracking. Relativty’s base design does not include built-in controllers, so it is best viewed as a headset platform rather than a full room-scale gaming kit.
For seated games, that can be perfectly fine. A steering wheel, joystick, keyboard, gamepad, or flight stick can handle input. For physically active VR, however, controllers and 6DoF tracking quickly become necessary.
Who Should Build One?
An open source VR headset for $200 is a strong fit for makers, students, hardware hobbyists, tinkerers, VR developers, sim racers, and educators. It is also appealing to people who want to understand how virtual reality works instead of simply consuming it.
It is less ideal for someone who wants zero setup, premium comfort, polished tracking, official customer support, and a warranty that does not involve a Discord channel. There is nothing wrong with buying a consumer headset. The point of DIY VR is not superiority in every category. The point is freedom to learn and customize.
A Smarter Way to Approach the Build
The best way to think about an open source VR headset is as a staged project. Start with the most basic goal: reliable video output and stable head rotation tracking. Test the software path before committing to expensive displays or custom mechanical parts. Then improve comfort, lens alignment, cable routing, and enclosure design.
For many builders, a seated use case is the smartest first target. Sim racing, flight simulation, virtual cinema, and large-screen desktop use can deliver a satisfying experience without requiring complicated room-scale tracking. Once the core headset works, advanced tracking and custom controllers can become later experiments instead of immediate sources of frustration.
It is also wise to keep the experience physically comfortable. Use the headset in a clear area, take breaks, stop when you feel unwell, and avoid treating eye strain or dizziness as a badge of honor. Virtual reality should feel immersive, not like you have just returned from a storm at sea.
What It Feels Like to Use a $200 Open Source VR Headset
Using an open source VR headset feels different from using a polished commercial device because you are never completely separated from the machine behind the illusion. You know where the displays sit. You know which printed bracket holds the lenses. You know the sensor board is somewhere behind your forehead, quietly doing arithmetic while you stare at a virtual sunset. That knowledge does not ruin the magic. In a strange way, it makes the magic more satisfying.
The first successful startup is usually memorable. The screen lights up, SteamVR recognizes the headset, and the virtual world moves when you turn your head. It may not be glamorous at first. The straps might need adjusting. The lens spacing may need a little tuning. One cable might look as if it has been routed by a nervous octopus. But when the image finally locks into place, the project stops being a pile of parts and becomes a place you can visit.
For seated experiences, the headset can be surprisingly convincing. In a racing simulator, looking into a corner instead of dragging a camera with a mouse changes the entire feeling of driving. The dashboard seems to exist in front of you. Mirrors become useful rather than decorative. A virtual cockpit can make even a modest racing setup feel more alive, especially when the headset is comfortable enough to wear for more than ten minutes without negotiating with your forehead.
The limits are also obvious in the moments when you forget you are using a 3DoF system. You may instinctively lean toward a dashboard gauge, crouch to inspect something near the floor, or shift sideways in your chair. With a fully tracked 6DoF headset, the virtual world responds to those movements. With a basic DIY headset, the world may remain politely fixed in place. It is not necessarily a deal-breaker; it simply reminds you that this is a focused tool, not a full substitute for premium room-scale VR.
Visual quality can vary from delightful to slightly stubborn. A well-aligned display and lens setup can create a crisp, engaging image. A poorly aligned setup can make text fuzzy, edges blurry, or your eyes feel as though they are trying to solve a geometry problem against their will. That is why adjustable IPD, comfortable padding, and careful alignment are more valuable than flashy marketing words.
The most rewarding part may be the sense of progress. A commercial headset gives you a finished experience on day one. An open source VR headset gives you a better experience each time you improve it. You can revise the shell, adjust the strap, print a new lens mount, refine the software, or share a solution with other builders. The headset becomes a living project. At around $200, the real product is not only the virtual world in front of your eyes. It is the confidence that you can help build the doorway.
Final Thoughts
An open source VR headset for $200 is not a shortcut around every cost or every technical challenge in virtual reality. It is something more interesting: proof that immersive technology can be opened, examined, modified, and shared.
Relativty and newer DIY VR projects show that the essential pieces of a headset are no longer mysterious. Displays, sensors, Arduino-compatible microcontrollers, 3D-printed housings, SteamVR drivers, and open design files can come together to create a real working device. The result may not replace a premium consumer headset for every game or every user, but it can offer something retail hardware rarely does: the freedom to make VR your own.