Trimming a video in Windows 10 sounds like something that should require a giant editing program, a film-school vocabulary, and at least three cups of coffee. Fortunately, it does not. If all you want to do is cut off the awkward beginning, remove the “Wait, is this recording?” moment, or shorten a clip before sending it to someone, Windows 10 gives you several simple ways to do it.
The easiest method is usually the built-in Photos app. For more advanced edits, Microsoft Clipchamp is the better modern option. And if your computer still has Photos Legacy, you may also see the older Video Editor tools that many Windows 10 users remember fondly. In this guide, you will learn how to trim video in Windows 10 step by step, how to save your edited clip, when to use Clipchamp instead, and how to avoid common mistakes that make video trimming more annoying than it needs to be.
What Does It Mean to Trim a Video?
To trim a video means to remove unwanted footage from the beginning, the end, or both. It is different from cropping, which changes what part of the picture is visible. Think of trimming as cutting time, while cropping cuts the frame.
For example, if you recorded a two-minute video but the first 12 seconds are just your hand reaching for the mouse, trimming lets you remove that dead space. If the final 20 seconds show you walking away from the camera like the star of a low-budget action movie, trimming can clean that up too.
The Best Ways to Trim Video in Windows 10
Windows 10 users usually have three practical choices:
- Microsoft Photos: Best for quick beginning-and-end trims.
- Photos Legacy Video Editor: Useful if you want to split a video into several parts and rearrange clips.
- Microsoft Clipchamp: Best for timeline editing, multiple cuts, text, music, transitions, and exports for social media or presentations.
If you only need a fast trim, start with Photos. If you need more control, use Clipchamp. That is the video-editing version of choosing between a butter knife and a chef’s knife: both cut, but one gives you more precision.
How to Trim Video in Windows 10 Using the Photos App
The Photos app is the simplest built-in way to trim a video in Windows 10. It works well for MP4 and many common video formats. The process is quick and does not require installing extra software.
Step 1: Find the Video File
Open File Explorer and locate the video you want to trim. This could be in your Downloads folder, Videos folder, Desktop, or a folder from your phone or camera.
Before editing, it is smart to make sure the video plays normally. Double-click the file and watch a few seconds. If the video is damaged, silent, or does not open correctly, trimming it will not magically fix the file. Sadly, Photos is not a wizard with a tiny repair wand.
Step 2: Open the Video with Photos
Right-click the video file, choose Open with, and select Photos. If Photos is already your default viewer, you may be able to double-click the video and open it directly.
Depending on your Windows 10 version and Photos app update, the interface may look slightly different. Some users will see a trim icon at the top. Others may see an Edit & Create menu. The wording has changed over time, but the goal is the same: open the trimming tool.
Step 3: Click Trim
In the Photos app, look near the top of the window for Trim, a scissors icon, or an editing button. You may also be able to use the keyboard shortcut Ctrl + E in newer Photos layouts.
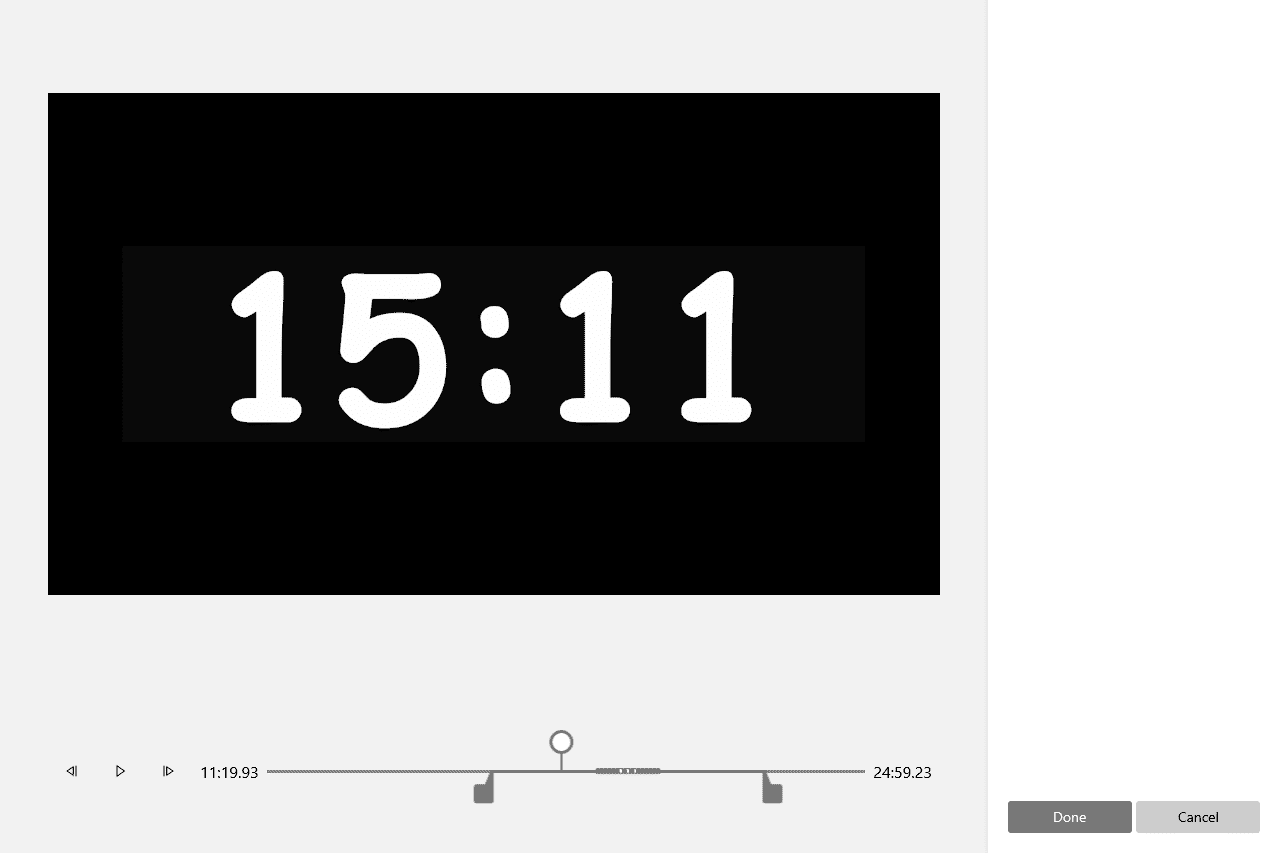
Once the trimming screen opens, you should see a timeline at the bottom of the video. This is where the magic happens. No dramatic soundtrack required.
Step 4: Move the Start and End Handles
On the timeline, drag the left handle to choose where the trimmed video should begin. Drag the right handle to choose where it should end. Everything outside those handles will be removed from the saved copy.
For example, if your original video is 3 minutes long and you only want the section from 0:25 to 2:10, move the left handle to around 25 seconds and the right handle to around 2 minutes and 10 seconds.
Use the play button to preview the trimmed section. This step matters because it is easy to cut too much, especially when you are editing a clip with speech. Nobody wants to send a tutorial that begins mid-sentence with, “…and that is why the toaster is on fire.”
Step 5: Save a Copy
When you are happy with the trimmed section, click Save a copy or the equivalent save option. Photos usually creates a new video file instead of overwriting the original. This is helpful because you can always return to the full video if you change your mind.
Choose a file name that makes sense, such as birthday-party-trimmed.mp4 or presentation-intro-cut.mp4. Clear names save time later, especially if you edit multiple versions of the same video.
How to Trim Multiple Parts of a Video in Windows 10
The basic Photos trim tool is great for removing the beginning and end of a video. However, it is not ideal if you want to remove a middle section, such as a long pause, mistake, cough, doorbell interruption, or your cat walking across the keyboard like a tiny unpaid producer.
To remove sections from the middle, you need a timeline editor. On Windows 10, that usually means Photos Legacy Video Editor or Clipchamp.
Option 1: Use Photos Legacy Video Editor
Some Windows 10 computers still have access to Photos Legacy, which includes the older Video Editor features. If you see a Video Editor tab or can install Photos Legacy from Microsoft, you may be able to use it to split clips and remove sections.
The general workflow is:
- Open Photos Legacy or Video Editor.
- Create a new video project.
- Add your video file to the project library.
- Place the video on the storyboard or timeline.
- Use Split to cut the video into smaller sections.
- Delete the parts you do not want.
- Preview the final result.
- Export or finish the video.
This method is useful when you need more than one trim. For example, you could keep the introduction, remove a mistake in the middle, and keep the ending. It is not as powerful as professional software, but it is enough for basic editing.
Option 2: Use Microsoft Clipchamp
Clipchamp is Microsoft’s newer video editor and works on Windows 10 through the Microsoft Store app or in a supported browser. It gives you a more modern timeline where you can trim, split, delete, add text, include music, record voiceovers, adjust layout, and export finished videos.
To trim video in Clipchamp:
- Open Clipchamp.
- Create a new video project.
- Import your video file.
- Drag the video onto the timeline.
- Click the clip so it is selected.
- Drag the left or right edge inward to trim the beginning or end.
- To remove a middle section, move the playhead to the cut point and use the split tool.
- Delete the unwanted section.
- Preview your video.
- Export the final file, usually as an MP4.
Clipchamp is a better choice if your video needs polish. It is also useful for YouTube clips, social media videos, online course content, school projects, business presentations, and quick marketing videos.
Photos vs. Clipchamp: Which Tool Should You Use?
Use Photos when you only need to trim the start or end of a video. It is fast, lightweight, and already part of Windows. It is perfect for cleaning up simple clips before sharing them.
Use Clipchamp when you need more than a basic trim. If you want to cut out several mistakes, add captions, insert background music, combine videos, change aspect ratio, or prepare a clip for YouTube, TikTok, Instagram, or a presentation, Clipchamp is the stronger choice.
Here is the simplest rule: if the edit takes under one minute, try Photos first. If you catch yourself saying, “I also need to add text, music, and three cuts,” open Clipchamp before your patience quietly leaves the room.
Can You Trim Video in Windows Media Player?
Windows Media Player is mainly a playback tool, not a video editor. By default, it does not include a built-in trim feature like Photos or Clipchamp. Some third-party plugins claim to add trimming features, but for most users, Photos and Clipchamp are safer and easier options.
If you see an online guide saying to trim directly in Windows Media Player, read carefully. It may be referring to a plugin, not the standard Windows Media Player app. Installing random plugins just to cut five seconds from a clip is usually not worth the risk.
Tips for Better Video Trimming in Windows 10
Keep the Original File
Always save your trimmed video as a copy. Even if you are sure you will never need the original, future you may disagree. Original files are like insurance: boring until they save the day.
Trim with Sound On
If your video includes speech, music, or important background audio, trim while listening. A cut that looks fine visually can sound abrupt. Try to begin and end at natural pauses.
Preview Before Saving
Always preview the trimmed section. This catches awkward cuts, missing words, accidental black frames, and endings that stop too suddenly.
Use Short File Names
Long file names can become messy when you create several versions. Use names like interview-short.mp4, demo-final.mp4, or lesson-trimmed-v2.mp4.
Watch the Export Quality
When exporting from Clipchamp or Photos Legacy, choose a quality setting that matches your purpose. A 1080p export is usually good for online video, presentations, and general sharing. Lower resolutions may create smaller files but can look soft or blurry.
Common Problems When Trimming Video in Windows 10
The Trim Button Is Missing
If you cannot find the trim button, your Photos app layout may have changed. Search for the Photos app from the Start menu, open the video from inside Photos, and look for the editing icon, scissors icon, or Ctrl + E shortcut.
If you need the older Video Editor tools, check whether Photos Legacy is available on your device. Microsoft has separated some older Photos features into the Photos Legacy app.
The Video Will Not Save
If Photos cannot save your trimmed clip, check whether the file is stored in a protected folder, external drive, camera card, or cloud-synced location. Try copying the video to your Desktop or Videos folder first, then trim it again.
You can also try restarting Photos, repairing the Photos app in Windows Settings, or updating it through the Microsoft Store.
The Trimmed Video Is Too Large
Trimming removes time, but it does not always compress the video heavily. A short high-resolution video can still be large. If file size matters, export at a lower resolution in Clipchamp or use a dedicated video compressor.
The Cut Is Not Precise Enough
The Photos app is convenient, but it is not always ideal for frame-perfect editing. If you need exact timing, use Clipchamp or a more advanced video editor. Timeline zoom, splitting, and visual audio waveforms can make precise editing easier.
When Should You Use a Third-Party Video Editor?
Photos and Clipchamp are enough for most everyday trimming tasks. However, a third-party editor may be worth considering if you need advanced color correction, multi-camera editing, frame-by-frame precision, professional audio controls, or complex effects.
For casual users, though, do not overcomplicate it. If your goal is simply to remove the boring parts, Windows 10 already gives you enough tools to do the job. You do not need a Hollywood editing suite to cut out the moment where you whispered, “Is this thing on?”
Practical Examples of Trimming Video in Windows 10
Example 1: Trimming a Screen Recording
Suppose you recorded a software tutorial. The first 10 seconds show you opening the right window, and the last 15 seconds show you searching for the stop-recording button. Open the clip in Photos, drag the left handle past the setup time, drag the right handle before the awkward ending, preview, and save a copy.
Example 2: Cutting a Family Video
You recorded a birthday video, but the first part includes someone blocking the camera. Use Photos to start the video at the moment the candles are lit. If you want to combine several shorter clips into one video, use Clipchamp or Photos Legacy.
Example 3: Editing a Social Media Clip
If you are preparing a clip for social media, Clipchamp is usually better than Photos because you can trim, resize, add captions, and export in a format that fits your platform. A short, clean video usually performs better than a long clip that takes 40 seconds to get to the point.
Real-World Experience: What I’ve Learned from Trimming Videos in Windows 10
After trimming many Windows 10 videos, the biggest lesson is simple: the best tool is the one that matches the job. For a quick cut, the Photos app feels wonderfully painless. You open the video, move two handles, save a copy, and get on with your life. It is ideal when you need to remove the first few seconds of camera shake or the end of a recording where everyone is saying, “Okay, are we done?”
But Photos has limits. It is not the tool I would choose for a video with several mistakes in the middle. When a clip needs multiple cuts, Clipchamp is much easier because the timeline makes the whole project visible. You can split a clip, remove a section, slide pieces together, and preview the finished result without guessing. It feels more like proper editing and less like trying to trim a haircut with kitchen scissors.
One practical habit that helps a lot is watching the video once before touching the trim handles. Write down the rough start and end times, then edit. This saves time because you are not dragging back and forth forever trying to remember where the good part begins. For longer clips, I like to create a copy of the original file before editing. Photos usually saves a copy anyway, but having a backup removes all anxiety.
Another important experience is that audio matters more than people expect. A visual cut may look clean, but if a person is speaking, cutting half a second too early can make the sentence sound chopped. When trimming interviews, tutorials, or presentations, listen for natural pauses. A clean audio ending makes a video feel much more professional.
File location also matters. Videos stored on external drives, phones, SD cards, or cloud folders can sometimes behave strangely when saving. Moving the file to the computer first often prevents errors. The Desktop or Videos folder is usually a safe temporary workspace.
Finally, do not chase perfection for every clip. If you are trimming a casual family video, a classroom recording, or a quick message to a coworker, clean and clear is enough. Remove the distracting parts, keep the useful content, and export. The goal is not to create a cinematic masterpiece every time. Sometimes the best edit is simply the one that gets rid of the boring beginning and lets people enjoy the part they actually came to see.
Conclusion
Learning how to trim video in Windows 10 is easier than it looks. For simple cuts, open your video in the Photos app, use the trim tool, adjust the start and end handles, preview the result, and save a copy. For more detailed editing, use Photos Legacy Video Editor if available or Microsoft Clipchamp for a modern timeline-based workflow.
The key is choosing the right tool for the task. Photos is fast and simple. Clipchamp is better for multiple cuts, text, music, and polished exports. Either way, you can clean up your videos without installing complicated software or pretending to be a professional editor named “Max Cutwell.”
Note: Because Windows 10 app layouts and Microsoft editing tools can change over time, menu names may vary slightly. If you do not see the same buttons described here, check for the scissors icon, the Trim command, Photos Legacy, or Clipchamp.