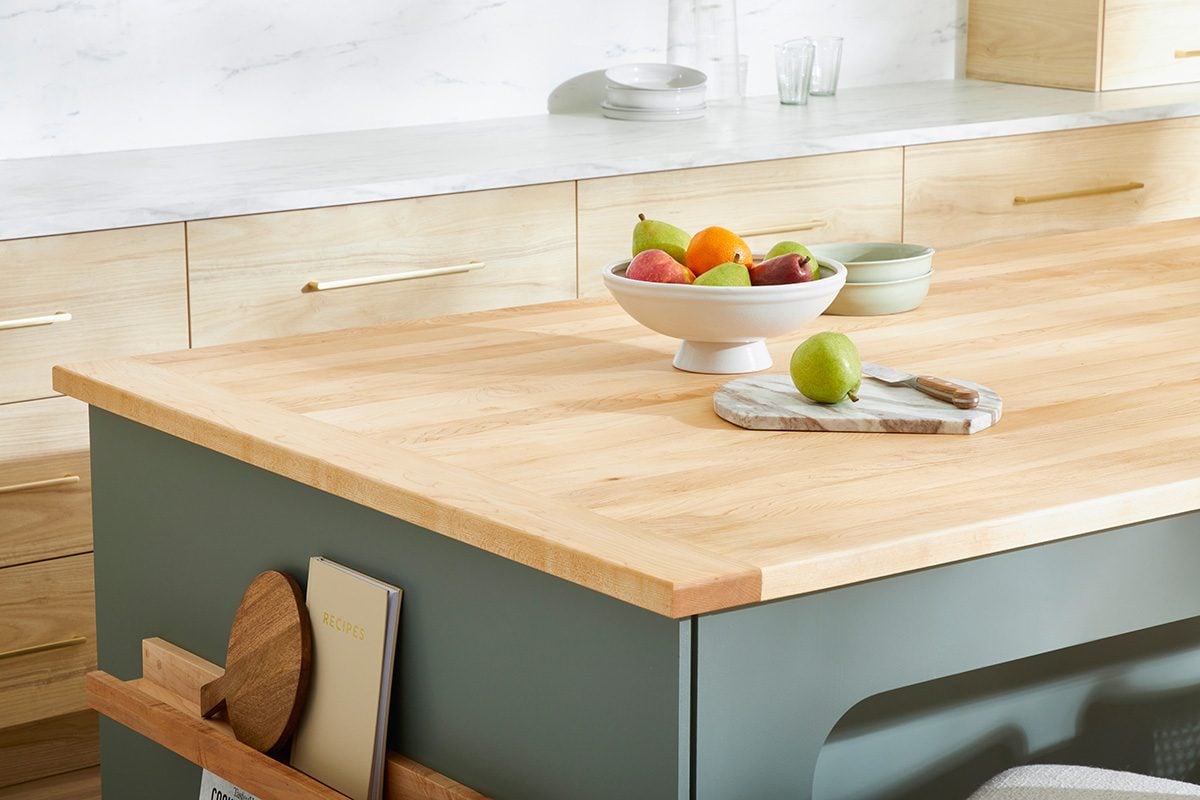
Building a DIY butcher block countertop from scratch is one of those home projects that makes you feel half craftsperson, half kitchen magician. One day you have a pile of boards. A few days later, you have a warm, sturdy, custom wood countertop that makes your kitchen look like it belongs in a magazine instead of a “before” photo. The best part? You do not need to be a master woodworker with a beard full of sawdust and mysterious clamps named after German engineers. You do, however, need patience, accuracy, safe tool habits, and a healthy respect for wood movement.
A butcher block countertop is made by laminating strips of hardwood into a thick slab. The boards are glued edge to edge, clamped tightly, flattened, trimmed, sanded, and finished with a food-safe coating. Unlike stone or quartz, butcher block feels warm, forgiving, and repairable. Scratches can often be sanded out. Dull areas can be refreshed. And every small mark tells a story, usually something like, “Someone chopped onions here while trying not to cry.”
This guide walks through how to build a butcher block countertop from scratch, including choosing lumber, preparing boards, gluing the slab, flattening the surface, cutting it to size, finishing it safely, and caring for it long term.
What Is a Butcher Block Countertop?
A butcher block countertop is a wood work surface made from many pieces of hardwood joined together. The most common style for DIY kitchens is edge grain butcher block, where narrow strips of wood are turned on edge and glued side by side. Edge grain is strong, attractive, and more practical for large countertops than end grain, which is beautiful but much more labor-intensive.
Traditional butcher blocks were designed for heavy chopping, but kitchen countertops live a slightly different life. They hold coffee makers, mixing bowls, lunch boxes, homework, grocery bags, and occasionally a cat who absolutely knows it is not supposed to be there. A DIY butcher block countertop must be strong, sealed properly, and installed in a way that allows the wood to expand and contract with humidity.
Best Wood for a DIY Butcher Block Countertop
The best woods for butcher block countertops are durable hardwoods with tight grain. Maple is a classic choice because it is hard, light in color, and commonly used for cutting boards. Walnut gives a darker, richer look. Cherry warms beautifully over time. Oak, birch, beech, and ash can also work, though open-grain woods may need extra care because large pores can collect moisture and debris if not finished well.
Good Wood Options
Maple: Durable, clean-looking, and traditional for butcher block. It is a great choice if you want a bright kitchen surface.
Walnut: Dark, elegant, and dramatic. It costs more, but it makes a countertop look custom before you even put anything on it.
Cherry: Smooth, warm, and beautiful as it ages. Cherry starts lighter and deepens with time.
Birch: Budget-friendly and widely available. It is not as hard as maple, but it can be a practical option for a DIY kitchen.
White oak: Strong and stylish, though its open grain needs careful sealing for countertop use.
Choose kiln-dried boards that are straight, flat, and free from large knots. Knots may look charming, but they can create weak spots, sanding headaches, and tiny crumb caves. For a countertop, boring boards are often secretly the heroes.
Tools and Materials You Will Need
You can build a butcher block countertop with a modest woodworking setup, but accuracy matters. A table saw, jointer, planer, router, orbital sander, clamps, measuring tools, and a circular saw or track saw will make the job much easier. If you do not own a jointer or planer, many lumberyards can mill boards for you. That service may cost extra, but it can save you from fighting twisted lumber like it owes you money.
Materials
- Kiln-dried hardwood boards
- Waterproof wood glue suitable for indirect food contact after curing
- Bar clamps or pipe clamps
- Cauls to keep the glue-up flat
- Scraper or chisel for glue squeeze-out
- Sandpaper from 80 to 220 grit
- Food-safe mineral oil, butcher block conditioner, beeswax blend, or cured tung oil finish
- Figure-eight fasteners, slotted brackets, or countertop clips for installation
Safety Gear
- Safety glasses
- Hearing protection
- Dust mask or respirator while sanding
- Push sticks for saw work
- Gloves for handling rough lumber, but not near spinning blades
Power tools deserve respect. Read tool manuals, work with sharp blades, keep hands away from cutting paths, and ask an experienced adult or professional for help if you are not confident. The goal is a countertop, not a dramatic story beginning with “So there I was…”
Step 1: Measure Your Countertop Area
Start with careful measurements. Measure the cabinet run from wall to wall, the depth from wall to front edge, and any overhangs. Standard kitchen countertops are often around 25 inches deep, but your space may differ. Include appliance gaps, sink locations, cooktop openings, and wall irregularities.
Walls are rarely perfectly straight. Old houses especially like to express themselves through random angles. Make a cardboard or plywood template if your countertop fits between walls or around corners. Mark the front edge, backsplash side, sink centerline, and any seams. A template may feel like extra work, but it is cheaper than discovering your new countertop is shaped like optimism instead of your actual kitchen.
Step 2: Plan the Butcher Block Layout
For an edge grain butcher block countertop, rip your boards into strips of equal width. Many DIY builders use strips between 1 inch and 2 inches wide, depending on the desired look and available lumber. Wider strips show more grain variation, while narrower strips create a classic butcher block pattern.
Lay the strips out on a workbench before gluing. Flip and rotate pieces until the grain pattern looks balanced. Avoid placing all dark strips on one side unless you want the countertop to look like it is wearing a racing stripe. Mix tones naturally. If you are using multiple boards from the same lumber batch, alternate growth ring direction where practical to help balance wood movement.
Step 3: Mill the Boards Flat and Square
This is the step that separates a countertop from a decorative potato chip. Boards must be straight, square, and consistent in thickness before glue-up. Joint one face and one edge, then plane the opposite face and rip the other edge parallel. If you buy pre-milled lumber, still check each piece with a straightedge.
Dry-fit the strips before applying glue. Push them together and look for gaps. Tiny gaps become very noticeable once glue enters the chat. If two edges do not meet cleanly, re-joint or lightly trim them. A tight glue line is stronger, cleaner, and much easier to finish.
Step 4: Prepare for Glue-Up
Glue-up is the most exciting part of the project, mostly because everything suddenly feels urgent. Wood glue has open time, which means you cannot stop halfway through to look for the clamp you “definitely just saw.” Prepare everything before opening the glue bottle.
Set clamps on a flat work surface. Place some clamps under the slab and some above it to balance pressure. Cover clamp bars with painter’s tape or wax paper so glue does not bond your future countertop to your tools. Arrange cauls across the top and bottom to help keep the slab flat.
Do a full dry run. Lay out every strip, clamp it lightly, check alignment, and make sure you can reach everything. If the dry run feels chaotic, the real glue-up will feel like a game show hosted by a raccoon. Practice first.
Step 5: Glue the Butcher Block Slab
Apply a continuous bead of waterproof wood glue along each mating edge. Spread it evenly with a small roller, brush, or scrap of wood. You want full coverage without turning the surface into a glue swimming pool. Bring the strips together and tighten the clamps gradually.
Alternate clamp pressure from one end to the other. Tighten just enough to close the joints and produce light squeeze-out. Too much pressure can starve the joint by forcing out too much glue. Check that the top stays reasonably flat as you go. Use cauls to reduce cupping and keep the strips aligned.
Let the slab cure according to the glue manufacturer’s instructions. Do not rush this part. A countertop is a hardworking surface, and weak glue joints are not charming rustic details. They are future problems wearing tiny disguises.
Step 6: Scrape, Flatten, and Sand
Once the glue cures, remove clamps and scrape off squeeze-out. A cabinet scraper, sharp chisel, or putty knife can help. Avoid gouging the wood. If dried glue remains on the surface, it can block finish absorption and create pale spots.
Flatten the slab using a planer, router sled, belt sander, or careful hand-plane work. Large countertops can be too wide for many home planers, so a router sled is a popular DIY solution. Work slowly and check with a straightedge. The surface does not need to be NASA-level perfect, but it should be flat enough that a mixing bowl does not slowly migrate toward the floor.
Sand the countertop through progressive grits. Start with 80 grit if the surface needs leveling, then move to 120, 150, 180, and 220. Do not skip too many grits, or sanding scratches may remain visible after finishing. Slightly ease the top edges with a router roundover bit or sanding block. Sharp edges dent easily and feel uncomfortable.
Step 7: Cut the Countertop to Final Size
Trim the slab to its final dimensions using a track saw, circular saw with a straightedge guide, or table saw if the piece is manageable. Support the slab fully so the offcut does not fall and tear the edge. For sink or cooktop cutouts, mark carefully and drill starter holes at the corners before cutting with a jigsaw or router.
Seal cut edges especially well. Sink cutouts are vulnerable because they live near splashes, steam, and the mysterious puddle that appears even when everyone swears they did not make it. Coat all exposed wood: top, bottom, edges, ends, and cutouts.
Step 8: Choose a Food-Safe Finish
The right finish depends on how you plan to use the countertop. If you want to chop food directly on the wood, use a penetrating food-safe finish such as food-grade mineral oil or a mineral oil and beeswax conditioner. This finish is easy to renew, but it needs regular maintenance.
If you want stronger water resistance and do not plan to cut directly on the countertop, consider a cured tung oil blend or countertop-safe film finish. Some finishes are food-safe only after they fully cure, so read the label carefully. Never assume “natural-looking” means food-safe. Poison ivy is natural too, and nobody wants it near the salad.
Mineral Oil and Beeswax
Mineral oil is simple, affordable, and commonly used for butcher block care. Apply a generous coat, let it soak in, and wipe off the excess. Beeswax blends add a little more water resistance and a soft sheen. New butcher block often drinks finish quickly, so multiple early applications may be needed.
Tung Oil or Hardwax Oil
Certain tung oil blends and hardwax oils offer more protection than plain mineral oil once cured. They can be a smart choice near sinks or for homeowners who want a lower-maintenance surface. Always confirm the product is appropriate for countertops and follow cure times before food contact.
Step 9: Install the Countertop Correctly
Wood moves. It expands and contracts across the grain as humidity changes. This is not a flaw; it is wood being wood. When fastening a butcher block countertop to cabinets, use hardware that allows seasonal movement, such as figure-eight fasteners, Z-clips, slotted brackets, or screws through oversized holes with washers.
Do not glue the countertop permanently to the cabinets. That traps movement and can lead to cracks, splits, or warping. Leave small expansion gaps at walls where they will be hidden by backsplash or trim. Support overhangs according to the size of the projection and the thickness of the slab. Larger overhangs may need brackets or corbels.
Step 10: Maintain Your DIY Butcher Block Countertop
A butcher block countertop is not maintenance-free, but the routine is simple. Wipe spills quickly, clean with mild soap and water, dry the surface after cleaning, and refresh the finish as needed. Avoid soaking the wood. Avoid harsh cleaners. Do not place hot pans directly on the surface unless you enjoy creating permanent skillet-shaped memories.
For oil-finished counters, reapply mineral oil or conditioner whenever the wood looks dry or dull. High-use kitchens may need monthly care. Light scratches can be sanded with fine-grit sandpaper and re-oiled. Deeper dents can sometimes be raised with moisture and careful heat, but test first and avoid overdoing it.
Common Mistakes to Avoid
Using Wet or Unstable Lumber
Lumber that has not acclimated to your home can move after glue-up. Let the wood rest in the room where it will be installed before building, especially if it came from a cold garage, humid shed, or lumberyard environment.
Forgetting to Finish the Bottom
Finishing only the top is a classic mistake. Seal the underside, edges, and cutouts too. Uneven moisture absorption can encourage warping.
Over-Clamping the Glue-Up
Clamps are important, but they are not gym equipment. Excessive pressure can bow the slab or weaken glue joints. Use even, moderate pressure.
Skipping Dry Fit
A dry fit reveals problems before glue makes them permanent. It is the woodworking version of reading the recipe before dumping flour everywhere.
Choosing the Wrong Finish
A decorative stain or unknown sealer may not be right for food areas. Choose a finish designed for butcher block, cutting boards, or countertops, and follow all curing instructions.
Real-World Experience: What Building a Butcher Block Countertop Teaches You
The first thing you learn when building a DIY butcher block countertop from scratch is that wood has opinions. You can measure carefully, choose beautiful boards, and lay everything out like a responsible adult, and one board will still decide it wants to twist slightly overnight. That is why milling, acclimation, and dry fitting matter so much. The countertop begins long before glue touches wood.
One helpful experience is to treat the project like several smaller projects instead of one giant one. First, you are selecting wood. Then you are milling. Then you are designing the pattern. Then you are gluing. Then flattening. Then finishing. Breaking the job into stages keeps it from feeling overwhelming. It also makes mistakes easier to catch. If a strip has a bad edge, you want to notice before it becomes part of a 100-pound slab with commitment issues.
Another lesson: clamps are never as plentiful as you think. Before the glue-up, it may look like you own enough clamps to hold together a small bridge. During glue-up, you will suddenly want six more. Borrow extra clamps if needed, and prepare them ahead of time. A calm glue-up is possible, but only if the workspace is ready. Lay out rags, glue spreaders, cauls, mallets, and clamps before starting. Once glue is open, the countdown begins.
Finishing also teaches patience. The countertop may look done after sanding, but unfinished wood in a kitchen is vulnerable. The finish is not just cosmetic; it is protection against water, stains, and daily use. Applying oil is satisfying because the grain comes alive almost instantly. Pale maple turns creamy and rich. Walnut becomes deep and dramatic. Cherry starts glowing like it knows it is the favorite. But the key is wiping off excess finish and allowing proper cure time. Sticky butcher block is not rustic. It is just annoying.
Installation brings another surprise: walls are weird. Even new kitchens can have slight bows or corners that are not perfectly square. Scribing the back edge may be necessary for a tight fit. This is where slow trimming beats heroic cutting. Remove a little at a time. You can always take off more wood, but adding it back requires creativity, filler, and possibly a small emotional support snack.
Living with butcher block is different from living with stone. You become more aware of water rings, hot pans, and knife marks. That sounds like a downside, but many homeowners enjoy the relationship. A butcher block countertop changes with use. It develops character. It invites maintenance instead of demanding replacement. When it looks tired, you sand and refresh it. When it gets a small scratch, you do not panic. You simply think, “Well, now it has a story.”
The best experience-based advice is this: do not rush the boring parts. Straight boards, square edges, even glue coverage, careful sanding, and full sealing are what make the final countertop look professional. The dramatic reveal gets the applause, but the quiet details do the heavy lifting.
Final Thoughts
Building a DIY butcher block countertop from scratch is a rewarding project for anyone who wants a custom kitchen surface with warmth, function, and personality. It takes careful planning, accurate milling, patient glue-up, thorough sanding, and the right food-safe finish. The process is not instant, and yes, you may briefly wonder whether the boards are judging you. But the result is a countertop that feels handmade in the best possible way.
Whether you choose maple for a classic look, walnut for drama, or cherry for warmth, butcher block brings natural beauty into the kitchen. Treat it well, clean it properly, refresh the finish when needed, and it can serve your home for years. A DIY butcher block countertop is more than a work surface. It is a project you can point to and say, “I built that,” preferably while casually leaning on it like a home improvement celebrity.