A paint sprayer is one of those magical tools that can make you feel like a professional contractor in about seven minutes. Then, if you forget to clean it, it can also make you feel like the owner of a very expensive clogged garden ornament. Learning how to clean a paint sprayer properly is not just a tidy-person habit. It protects the pump, hose, spray gun, tip, seals, filters, and your future sanity.
Whether you are using an airless paint sprayer for walls and fences, an HVLP sprayer for cabinets and furniture, or a cup sprayer for weekend projects, the cleaning routine matters as much as the spraying technique. Dried latex paint, oil-based coating, primer, stain, shellac, or lacquer can block tiny passages inside the sprayer. Once that happens, the finish gets spitty, the motor works harder, and the tool starts making noises that sound financially dangerous.
This expert step-by-step guide explains how to clean a paint sprayer after use, what cleaning solution to use, how to flush the hose and gun, how to clean spray tips and filters, and how to store the machine correctly. We will also cover real-world troubleshooting, safety mistakes to avoid, and practical experience from the kind of messy projects where paint somehow ends up on your elbow, your shoes, and the family dog’s suspiciously colorful tail.
Why Cleaning a Paint Sprayer Matters
A paint sprayer works by moving coating through narrow internal pathways at controlled pressure. In an airless sprayer, that pressure can be extremely high. In an HVLP sprayer, the system relies on airflow, a cup, a needle, a nozzle, and careful atomization. In both cases, the tool performs well only when paint moves freely.
When paint dries inside the pump, hose, gun filter, or spray tip, it creates clogs. Even a small dried flake can distort the spray pattern. Instead of a smooth fan, you may see tails, streaks, pulsing, or splatter. That means more sanding, more touch-ups, more wasted paint, and more muttering under your breath while pretending everything is fine.
Proper paint sprayer maintenance also extends the life of seals and packings. Water left inside an airless pump for days can encourage corrosion. Solvent residue can damage parts if the wrong cleaner is used. A quick rinse is better than nothing, but a full cleaning routine is what keeps the sprayer ready for the next project.
Tools and Supplies You Need
Before you begin, gather everything in one place. Cleaning a paint sprayer while hunting for a missing brush is how people accidentally decorate their garage floor.
- Two or three clean buckets
- Warm water for latex or water-based paint
- Mineral spirits or the manufacturer-recommended solvent for oil-based coatings
- Clean rags or shop towels
- Soft cleaning brushes
- Small nylon brush or toothbrush for tight parts
- Spray tip cleaning tool or needle, if supplied by the manufacturer
- Protective gloves
- Safety glasses
- Respirator when working with solvents or strong fumes
- Owner’s manual for your specific sprayer
- Pump storage fluid or pump protector for longer storage
Before You Start: Safety First
Cleaning a paint sprayer is not dangerous when done correctly, but it is not the time to freestyle. Airless sprayers can hold pressure even after the motor is turned off. That pressure can inject paint or solvent through skin, which is a medical emergency. Never point the spray gun at your hand, foot, neighbor, pet, or anything that does not need to become a cautionary tale.
Perform Pressure Relief
Before cleaning an airless paint sprayer, always relieve pressure according to the manufacturer’s instructions. In general, that means locking the trigger, turning the sprayer off, lowering pressure, placing the gun against a grounded metal bucket, triggering safely to release pressure, and switching the prime valve to the drain or prime position. Exact steps vary by brand and model, so your manual wins every argument.
Work in a Ventilated Area
If you used water-based latex paint, warm water is usually enough. If you used oil-based paint, stain, shellac, lacquer, or specialty coatings, you may need mineral spirits, lacquer thinner, or another recommended cleaner. These products can be flammable and can produce strong vapors. Work away from flames, pilot lights, heaters, sparks, and smoking areas. Wear gloves and eye protection. Your lungs are not a replaceable sprayer accessory.
Step 1: Remove Excess Paint
Start by saving usable paint. If your sprayer has a cup, remove it carefully and pour leftover paint back into the original container through a strainer. If you are using an airless sprayer with a suction tube, lift the intake tube out of the paint bucket and let excess coating drain back into the can.
Wipe paint from the outside of the suction tube, cup, lid, and gun body. This simple step prevents sticky drips from getting into clean water or solvent. It also keeps the cleaning process faster because you are not asking your rinse bucket to fight an entire gallon of paint.
Step 2: Choose the Right Cleaning Fluid
The correct cleaning solution depends on what you sprayed. For latex paint, acrylic paint, and most water-based primers, use warm water. A small amount of mild dish soap can help with residue, but avoid harsh cleaners unless the manufacturer allows them.
For oil-based paint, alkyd enamel, varnish, or oil stain, use mineral spirits or the solvent listed on the product label. For shellac, denatured alcohol is often required. For lacquer, lacquer thinner may be necessary. Never guess blindly. The coating label and sprayer manual are the two most reliable voices in the room.
Step 3: Flush the Pump
For an airless sprayer, place the intake tube into a bucket of clean water or approved solvent. Put the drain tube into a separate waste bucket. Turn the sprayer to prime and run it until the liquid coming out of the drain tube begins to clear. This removes paint from the pump section before you flush the hose and gun.
Do not run the pump dry for long periods. A sprayer needs liquid moving through it for cooling and lubrication. If the cleaning bucket turns cloudy or thick, replace it with fresh water or solvent. Cleaning with dirty liquid is like washing dishes in soup. Technically wet, spiritually wrong.
Step 4: Flush the Hose and Spray Gun
After the pump begins running clear, move to the hose and gun. Remove the spray tip and guard first. Hold the gun firmly against the side of a waste bucket. Unlock the trigger and run cleaning fluid through the hose and gun until the stream becomes clear.
Switch between prime and spray settings as recommended for your machine. Continue flushing until you no longer see paint color in the discharge. If you used dark paint, primer, or heavy coating, this may take several bucket changes. Patience here saves you from the classic next-project disaster: spraying white trim and discovering yesterday’s navy blue hiding in the hose like a tiny villain.
Step 5: Clean the Spray Tip and Guard
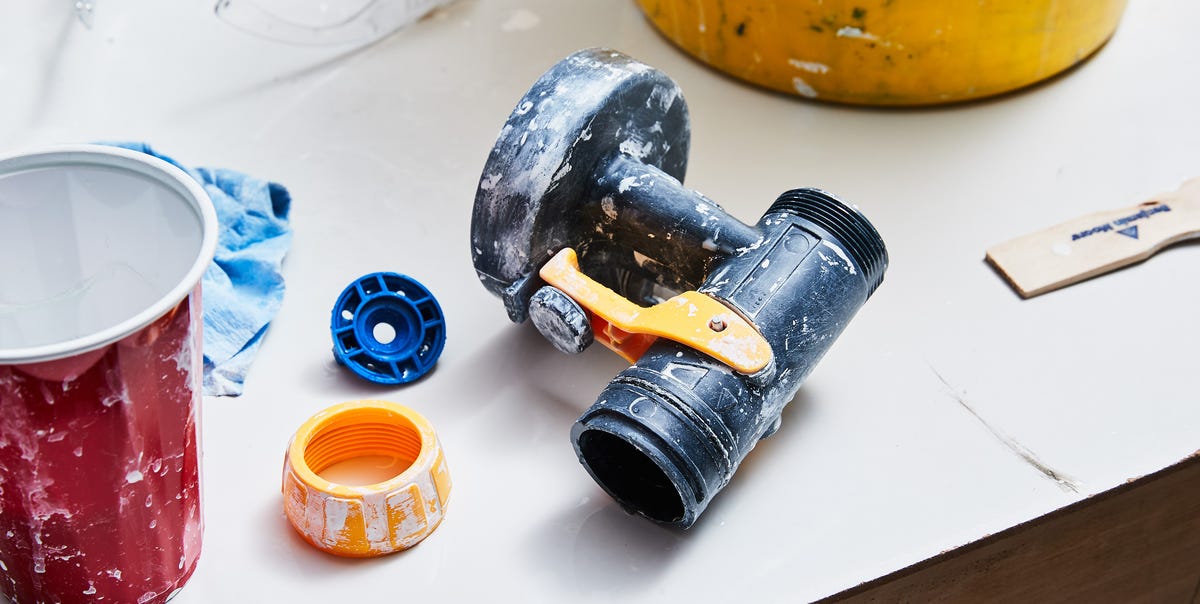
The spray tip is small, precise, and absolutely capable of ruining your day when dirty. Remove the tip and guard, then rinse them under running water for latex paint or soak them briefly in the correct solvent for oil-based materials. Use a soft brush to remove residue from the guard and tip housing.
Do not dig into the spray orifice with nails, knives, screws, wire, or other aggressive tools. You can damage the opening and permanently distort the spray pattern. If your sprayer came with a tip-cleaning tool, use that. If the tip is worn, clogged beyond rescue, or producing a poor fan after cleaning, replace it. Spray tips are consumable parts, not family heirlooms.
Step 6: Remove and Clean Filters
Most sprayers have filters in one or more places: the intake strainer, the gun handle, the manifold, or the pump. Filters catch debris before it reaches the tip. That is wonderful until the filter itself becomes packed with paint.
Remove each filter carefully. Rinse with warm water for water-based coatings or clean with the correct solvent for oil-based products. Brush gently from the inside out when possible. Inspect the mesh for tears, hardened paint, or distortion. A damaged filter should be replaced because it can allow debris to pass through and clog the tip.
Step 7: Clean the Cup, Lid, and Nozzle on HVLP Sprayers
HVLP paint sprayers require extra attention around the cup, needle, air cap, and nozzle. After emptying the cup, rinse it with the correct cleaner. Spray a small amount of clean water or solvent through the gun into a waste container until the spray runs clear.
Disassemble the front end according to the manual. Remove the air cap, nozzle, and needle if your model allows it. Wipe the needle gently and clean small holes in the air cap with a soft brush. Avoid metal picks unless the manufacturer specifically provides or approves them. HVLP parts are designed for precision, and precision does not appreciate being stabbed.
Step 8: Wipe the Exterior
Once the internal cleaning is complete, wipe down the outside of the sprayer. Clean the motor housing, frame, hose exterior, power cord, suction tube, and gun handle. Dried overspray can hide cracks, leaks, loose fittings, and worn parts. A clean machine is easier to inspect and less embarrassing to bring out in front of people who know what they are doing.
Avoid blasting the motor housing with a hose unless the manufacturer specifically says it is safe. Many sprayers contain electrical components that do not enjoy surprise showers. Use damp rags and brushes instead.
Step 9: Inspect for Wear and Leaks
After cleaning, inspect the sprayer before storage. Look for cracked hoses, worn seals, leaking fittings, damaged filters, clogged tips, or paint around the pump packing area. If paint leaks from places where paint should not be leaking, do not ignore it. Small leaks can become expensive repairs.
Check the hose for kinks or abrasion. Examine the spray gun trigger and safety lock. Make sure the tip guard is clean and not damaged. Replace worn parts before the next project, not during it, when the wall is half painted and your confidence is slowly sliding down the drop cloth.
Step 10: Store the Sprayer Correctly
For short breaks during the same day, you may be able to leave the system wet with paint for a limited time if the manufacturer allows it and the coating will not dry quickly. For overnight or longer storage, clean the sprayer thoroughly.
For airless paint sprayer storage, many manufacturers recommend using pump protector or storage fluid after flushing. This helps prevent corrosion, sticking, and freeze damage. Do not leave plain water sitting inside the pump for long-term storage. Store the sprayer indoors, away from freezing temperatures, direct sun, and dusty corners where spiders hold committee meetings.
How to Clean a Paint Sprayer After Latex Paint
Latex paint is the easiest common coating to clean because it is water-based. Move quickly before it dries. Use warm water, flush the pump, flush the hose and gun, remove the tip, clean filters, rinse the cup or suction tube, and wipe everything dry.
If the water keeps turning milky, keep flushing. Latex residue can cling inside hoses and filters. A final rinse with clean water helps confirm the system is clear. If you plan to store the sprayer for more than a couple of days, finish with pump storage fluid if recommended by your machine’s manufacturer.
How to Clean a Paint Sprayer After Oil-Based Paint
Oil-based coatings require more care. Start by reading the coating label. Mineral spirits are commonly used for oil-based paint, but some coatings require specific solvents. Flush the pump, hose, and gun with solvent in a well-ventilated area. Keep solvent away from ignition sources and collect all waste in a proper container.
After solvent flushing, some users run a small amount of clean solvent or manufacturer-approved storage fluid through the machine before storage. Never pour solvent waste down a drain, onto the ground, or into stormwater. Treat used solvent as household hazardous waste unless local rules say otherwise.
Common Paint Sprayer Cleaning Mistakes
Waiting Too Long
The best time to clean a paint sprayer is immediately after spraying. Paint is cooperative when wet and stubborn when dry. Waiting overnight can turn a ten-minute cleanup into a full archaeological excavation.
Forgetting the Filter
A clean hose and dirty gun filter will still produce clogs. Filters are small, easy to overlook, and very good at collecting trouble. Make filter cleaning part of every cleanup.
Using the Wrong Solvent
Water will not properly clean oil-based paint. Mineral spirits will not magically fix every coating. Lacquer thinner can damage some parts if used incorrectly. Match the cleaner to the coating and the sprayer.
Damaging the Spray Tip
The spray tip controls the fan pattern. Scratching or enlarging the orifice can ruin it. Clean it gently and replace it when worn.
Skipping Storage Fluid
If your sprayer manual recommends pump protector, use it. It is cheaper than a corroded pump and far less dramatic than discovering freeze damage on the first warm weekend of spring.
Troubleshooting After Cleaning
If your paint sprayer still will not spray after cleaning, start with the basics. Make sure the intake tube is submerged, the filter is clean, the tip is not clogged, the prime valve is in the correct position, and the pressure is set properly. Check that the hose is fully connected and the gun filter is installed correctly.
If the sprayer primes but will not build pressure, there may be debris in the inlet valve, worn packings, a damaged seal, or trapped air. If the spray pattern has tails, the tip may be clogged, worn, or too small for the coating. If the gun spits, there may be air in the line or residue near the needle or seat.
Do not keep forcing a struggling sprayer. Stop, relieve pressure, inspect, clean again, and consult the manual. If the problem persists, a professional repair shop may save both the machine and your mood.
Expert Tips for Keeping a Paint Sprayer Cleaner During Use
The easiest sprayer to clean is the one you did not clog in the first place. Always strain paint before spraying, especially if the can has been opened before. Dried bits around the lid can fall into the coating and travel straight toward the filter and tip.
Use the correct tip size for the material. Heavy paint through a tiny tip increases strain and clogging. Keep the paint container covered when possible to prevent dust, leaves, insects, and mysterious garage particles from joining the project. If you pause for more than a few minutes, follow the manufacturer’s short-break procedure so paint does not dry at the tip.
Keep a wet rag nearby and wipe the tip guard occasionally while spraying. Paint buildup at the tip can cause uneven patterns. For reversible airless tips, you can often clear a minor clog by reversing the tip and triggering into a waste bucket, then returning it to the spray position. Always follow safety steps and never use your hand to check the spray.
Real-World Experience: What Cleaning a Paint Sprayer Teaches You
The first time many DIYers use a paint sprayer, they focus almost entirely on the exciting part: the spraying. That is understandable. Watching a fence, wall, cabinet door, or shed change color in smooth passes is deeply satisfying. It feels fast, modern, and just dangerous enough to make you stand a little taller. Then the project ends, the sun goes down, and the cleanup begins. That is when the sprayer quietly reveals whether you are a weekend warrior or a person about to learn humility from a clogged filter.
One of the biggest lessons from experience is that cleaning should be planned before the first trigger pull. Set up a cleaning station before you paint. Have clean buckets, water, solvent, brushes, rags, gloves, and waste containers ready. If you wait until after spraying, you will be tired, hungry, and tempted to say, “I’ll clean it later.” Those four words have destroyed more spray tips than bad paint ever could.
Another practical lesson is that dark colors are sneaky. If you spray black, navy, forest green, or deep red, keep flushing longer than you think necessary. The first clear-looking water may not mean the hose is truly clean. A little hidden pigment can surprise you during the next job. Nothing builds character like spraying a white bookcase and seeing a faint blue ghost appear in the finish.
Experience also teaches that the spray tip deserves respect. Beginners sometimes treat it like a random removable piece, but it is the business end of the whole system. A dirty tip causes tails. A worn tip wastes paint. A damaged tip can make even expensive paint look amateur. Clean it gently, store it safely, and replace it when the spray fan loses shape.
Filters are another place where real-world habits matter. Many people clean the pump and hose but forget the gun filter. Then they blame the paint, the weather, the brand, or possibly Mercury in retrograde. In reality, the filter is packed with debris. Make it a rule: if paint passed through it, cleaning fluid should pass through it too, and your eyes should inspect it before reassembly.
For larger projects, it helps to keep two cleaning buckets going: one for the first dirty flush and one for the final clean rinse. The dirty bucket handles the heavy paint load. The clean bucket confirms the system is actually clear. This saves water, reduces mess, and keeps you from endlessly circulating slightly cleaner but still paint-filled liquid through the machine.
Finally, every experienced painter learns that storage is part of cleaning. A sprayer that looks clean on the outside but has water sitting inside the pump may not be ready for next month. Use the recommended storage fluid when needed, coil hoses without sharp bends, store tips and filters where they will not collect dust, and keep the manual nearby. A clean, well-stored paint sprayer starts faster, sprays better, and makes you feel like the kind of person who has their life together, at least in the paint department.
Final Thoughts
Cleaning a paint sprayer is not glamorous, but it is the difference between a tool that lasts for years and a tool that becomes a clogged monument to procrastination. The basic routine is simple: relieve pressure, remove excess paint, use the correct cleaning fluid, flush the pump, flush the hose and gun, clean the tip and filters, wipe the exterior, inspect parts, and store the sprayer properly.
If you remember one thing, remember this: clean the sprayer immediately after use. Wet paint is manageable. Dried paint is a tiny construction project inside your equipment. Treat the cleanup as part of the painting job, not an optional after-party. Your sprayer, your finish, and your future self will all be grateful.
Note: Always follow the owner’s manual for your specific paint sprayer and coating label instructions. Dispose of paint, solvent, and cleaning waste according to local regulations, especially when working with oil-based products or hazardous solvents.