Here is the pro window painting secret most people learn only after taping, dripping, smudging, muttering, and accidentally gluing a sash shut: the paint is not the hard part. The hard part is everything that happens before the brush looks heroic.
A beautifully painted window is a small architectural flex. It frames the view, sharpens the room, protects the trim, and makes old glass look intentional instead of “we might replace this someday.” Whether you are refreshing interior window trim, painting exterior window frames, or rescuing a peeling sill that has seen more weather than a mailbox, the professional result comes from preparation, brush control, timing, and patience.
This guide breaks down the real-world techniques painters use to get crisp lines, smooth coverage, and windows that still open afterward. Because yes, that last part matters.
What Makes Window Painting Different?
Painting a wall is broad and forgiving. Painting a window is more like giving a haircut to a nervous poodle: lots of edges, small surfaces, moving parts, and high visibility. Window trim includes casing, stool, apron, sash, stops, rails, muntins, and sometimes old caulk that appears to have been applied during a family argument.
The goal is not just color. The goal is adhesion, protection, and clean definition. Windows collect condensation, sunlight, dust, fingerprints, humidity, and outdoor weather. That means poor prep will show quickly through peeling, cracking, bubbling, or sticky edges.
The Real Pro Window Painting Secret: Prep Until It Feels Boring
Professional painters do not win because they own magical brushes blessed by the paint gods. They win because they prepare the surface properly. Paint sticks best to a clean, dull, dry, stable surface. If the trim is dusty, glossy, greasy, peeling, damp, or cracked, paint will behave like a guest looking for the nearest exit.
Start With a Careful Inspection
Before opening a paint can, inspect the window. Look for peeling paint, cracked caulk, soft wood, mildew, water stains, rusted fasteners, gaps, and swollen areas. Press gently on suspicious wood with a putty knife. If it feels soft or crumbly, painting alone will not solve the problem. Repair damaged areas first, or the new finish will be a very pretty bandage on a very annoyed window.
Clean Like You Mean It
Wash the trim with a mild cleaner or a degreasing solution suitable for painted surfaces. Kitchen windows often collect cooking film. Bathroom windows may have moisture residue. Exterior windows can carry pollen, dirt, chalky old paint, and mildew. Rinse if needed and let everything dry fully.
Do not paint over dust. Dust is basically tiny confetti celebrating future paint failure.
Scrape Loose Paint
Use a paint scraper or putty knife to remove loose, flaking, or curling paint. You do not need to remove every old layer if it is firmly bonded, but anything loose must go. Feather rough edges with sandpaper so the new paint does not telegraph every ridge like a topographic map.
Important note: If the home was built before 1978, old paint may contain lead. Do not dry-sand or scrape aggressively without proper lead-safe precautions. Testing first is the smart move, especially around windows where friction surfaces can create dust.
Sand for Adhesion, Not Revenge
Sanding is not a punishment ritual. The point is to dull glossy surfaces, smooth patched spots, and create a better grip for primer or paint. Use fine- to medium-grit sandpaper depending on the condition of the trim. For glossy trim, a light scuff-sand can make a major difference.
After sanding, vacuum the dust and wipe with a tack cloth or damp microfiber cloth. Dust left behind becomes texture. Texture becomes regret.
Caulk Is the Quiet Hero
Gaps between window trim and the wall can make even fresh paint look unfinished. A thin, neat bead of paintable caulk creates that seamless professional line. Remove failed old caulk first, clean the joint, apply new caulk, smooth it, and let it cure according to the product directions before painting.
Use paintable acrylic latex caulk for interior gaps and a high-quality exterior-rated paintable caulk outdoors. Avoid caulking areas that need to drain or move freely. Never seal weep holes or ventilation gaps in storm windows. Windows need to breathe a little. They are dramatic that way.
Should You Use Tape, Liquid Mask, or a Steady Hand?
There are three common ways to protect glass and nearby surfaces: painter’s tape, liquid masking products, or careful brushwork followed by glass cleanup.
Painter’s Tape
Painter’s tape is helpful for beginners and for protecting walls around trim. Press the edge firmly with a putty knife to reduce bleed-through. Remove the tape at the right time based on the paint and tape instructions. Pulling tape too late can tear dried paint; pulling too aggressively can cause language your neighbors do not need to hear.
Liquid Mask
Liquid masking products can be brushed onto glass, allowed to dry, and peeled or cut away later. This can save time on windows with many small panes. It is especially handy for divided-light windows where taping every tiny pane feels like preparing for a craft-store marathon.
The Pro “Paint the Glass a Little” Method
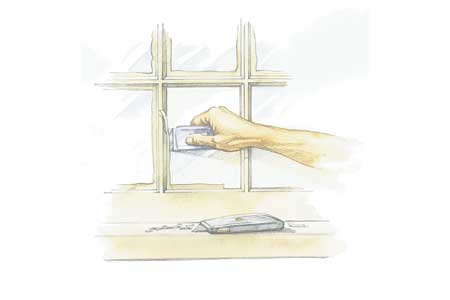
Many experienced painters intentionally let paint overlap slightly onto the glass, then clean the edge later with a sharp razor scraper after the paint has dried enough. This creates a clean seal between glass and sash on older wood windows and avoids fussy tape work. The trick is control: do not flood paint onto the glass, and always use a sharp blade carefully at a low angle.
Choose the Right Paint for Window Trim
Interior window trim usually performs best with a durable trim paint in satin, semi-gloss, or gloss. These finishes are easier to wipe clean than flat paint and help highlight trim details. Exterior window trim needs exterior-rated paint that can handle sunlight, temperature changes, moisture, and repeated expansion and contraction.
For wood trim, high-quality acrylic latex paint is a popular choice because it remains flexible and resists cracking. Oil-based products can create a hard finish, but they may yellow over time and require more ventilation and cleanup care. For vinyl, aluminum, fiberglass, or composite window frames, use a product specifically recommended for that material. Some surfaces need specialty primer for proper adhesion.
Primer: When You Need It and When You Do Not
Primer is not always required, but skipping it when needed is one of the fastest ways to turn a weekend project into a future complaint department.
Use primer when the surface is bare wood, patched, stained, glossy, heavily sanded, previously oil-painted, or changing from dark to light. Primer improves adhesion, blocks stains, evens out porosity, and helps the topcoat look consistent. Spot-prime small repairs or prime the full trim if the surface condition is uneven.
Let primer dry fully before painting. “Dry to the touch” does not always mean “ready for the next coat.” Paint labels exist for a reason, not just to make cans look important.
The Best Brush for Window Painting
For most window trim, a high-quality angled sash brush is the tool of choice. A 1.5-inch to 2.5-inch angled brush gives control along edges, corners, muntins, and narrow trim. Synthetic bristles work well with water-based paints. A cheap brush can shed bristles, leave streaks, and turn your window into a crime scene of tiny hairs.
Load the brush lightly. Dip only part of the bristles into the paint, tap off excess, and avoid dragging a overloaded brush across delicate trim. Thin, even coats beat one thick coat every time.
How to Paint Interior Window Trim Like a Pro
Step 1: Remove Curtains, Blinds, and Hardware
Take down window treatments and remove locks or handles if practical. If hardware stays in place, tape it carefully. Trying to paint around hardware with a loaded brush is how “quick project” becomes “modern art.”
Step 2: Protect the Area
Lay a drop cloth under the window. Tape the wall if needed. Open the window slightly if you are painting moving parts, and make sure you understand which surfaces touch when the window closes.
Step 3: Paint the Inner Areas First
Start with the sash, muntins, and inner frame areas. Work from the most detailed sections outward. This helps you avoid dragging your sleeve through fresh paint later, which is a classic amateur handshake with chaos.
Step 4: Paint the Casing, Stool, and Apron
After the inner pieces, paint the casing around the window, then the stool and apron. Use long, smooth strokes in the direction of the wood grain. Watch for drips under edges and in corners.
Step 5: Keep the Window Moving
If you are painting parts of a working wood window, move the sash before the paint fully cures so it does not seal shut. Do not close freshly painted surfaces tightly and forget about them. That is how windows become decorative wall art.
How to Paint Exterior Window Trim
Exterior window painting adds weather to the equation. Choose a dry day with mild temperatures. Avoid painting in direct hot sun, during high humidity, when rain is expected, or when surfaces are damp. Paint that dries too fast may not level properly; paint that stays wet too long can attract dirt or fail to cure well.
Wash and Dry the Exterior Surface
Clean away dirt, mildew, chalking, and loose paint. Exterior trim must be fully dry before painting. Moisture trapped under paint can lead to peeling and blistering.
Repair and Prime Exposed Areas
Patch damaged wood, replace rotten sections, sand rough transitions, and prime bare spots. Exterior primer is especially important where raw wood or repaired areas are exposed.
Brush Edges Before Faces
Paint edges and narrow details first, then finish wider faces of trim. Keep a wet edge so brush marks blend together. On larger exterior trim, a small roller can speed up flat areas, but back-brushing helps push paint into the surface and even out texture.
The Secret to Crisp Lines Around Glass
The cleanest window paint jobs usually come from one of two approaches: excellent masking or confident brush control. If using tape, do not rely on tape alone to fix sloppy technique. Brush away from the tape edge when possible and avoid heavy paint buildup along the seam.
If painting freehand, anchor your hand, use a small amount of paint, and pull the brush smoothly along the edge. Do not dab repeatedly. Dabbing creates bumps. Bumps create shadows. Shadows create the feeling that something went wrong, because it did.
Common Window Painting Mistakes
Painting Over Failed Caulk
Old cracked caulk will not become flexible again because you covered it with paint. Remove it and replace it.
Using Wall Paint on Trim
Wall paint is usually not durable enough for window trim. Trim gets touched, cleaned, bumped, and exposed to moisture. Use trim paint with a suitable sheen.
Applying Paint Too Thick
Thick coats run, sag, wrinkle, and dry slowly. Two thin coats look better and last longer.
Forgetting Dry Time
Paint may feel dry before it has cured. Reinstalling blinds, closing windows tightly, or cleaning too soon can damage the finish.
Ignoring the Weather
Exterior painting is not a battle of bravery. If the forecast is wet, windy, freezing, blazing hot, or suspiciously dramatic, wait.
Color Tips for Window Trim
White trim remains popular because it looks clean and works with nearly any wall color. But darker trim can create a bold frame around the view, especially in modern, farmhouse, Craftsman, or industrial interiors. Black window trim can look sharp and architectural, while warm off-white softens traditional rooms.
For exterior windows, coordinate trim with siding, shutters, doors, roof color, and permanent materials like brick or stone. A high-contrast trim color makes windows stand out. A low-contrast trim color creates a calmer, more blended look.
Pro Window Painting Secret: The 80/20 Rule
The best window painting results come from spending about 80 percent of your effort on preparation and 20 percent on painting. That may sound unfair, but windows are honest. They reveal every shortcut.
Clean thoroughly. Sand enough. Prime where needed. Caulk neatly. Use the right brush. Apply thin coats. Respect drying times. Keep moving parts from sticking. Those steps are not glamorous, but they are the difference between “I painted this myself” and “Wait, did you hire someone?”
Extra Experience: Lessons Learned From Real Window Painting Projects
After painting a lot of windows, one lesson rises above the rest: the window always tells you what it needs if you slow down long enough to look. A peeling exterior sill usually is not just “old paint.” It may be water sitting on a flat surface, failed caulk above the trim, missing primer on bare wood, or paint applied during bad weather. If you simply scrape the loose flakes and repaint, the problem often returns like a raccoon with a calendar reminder.
On interior windows, the biggest surprise is how much grime hides on trim that looks clean. I have seen fresh paint bead up slightly on kitchen window casing because a thin film of grease was still there. The fix was not fancy. Clean, rinse, dry, scuff-sand, wipe, then paint. Suddenly the same paint behaved beautifully. Sometimes the “secret product” is just patience wearing a tool belt.
Another practical lesson: do not overload the brush. Beginners often think more paint means better coverage. On window trim, more paint usually means more problems. It collects in corners, bridges tiny gaps, runs down vertical edges, and increases the chance of sticking. A lightly loaded angled brush gives better control. You can always add a second coat, but removing a sag from a muntin while it is half-dry is a tiny emotional journey.
Lighting matters too. A window may look perfect in afternoon shade and then reveal brush marks the next morning when sunlight rakes across the trim. When possible, inspect your work from different angles before calling it finished. Keep a small artist brush nearby for tiny corrections, but avoid obsessive touching once the paint starts to set. Overworking drying paint is like trying to smooth cake frosting after it has formed a crust. It rarely ends with dignity.
For older wood windows, keeping the sash functional is a project within the project. Paint only where paint belongs. Avoid piling paint into seams. After painting, move the window carefully before the finish cures hard. Some pros use wax or a careful touch of dry lubricant on channels after paint has cured, but the main trick is prevention: thin coats and awareness of contact points.
Exterior window painting teaches humility. Sun, wind, and moisture can ruin good intentions fast. I have seen paint dry too quickly on hot trim, leaving ropey brush marks. I have also seen damp morning surfaces cause adhesion issues even though the afternoon weather was beautiful. The better habit is simple: paint on a mild, dry day, follow the sun around the house instead of fighting it, and stop early enough that evening dew does not settle on fresh paint.
One more experience worth sharing: keep your cleanup tools ready before you start. Have rags, a small bucket, a putty knife, extra tape, a razor scraper for glass, and a trash bag nearby. Window painting involves lots of small decisions. When you have to leave the ladder or windowsill every five minutes to hunt for a tool, the paint gets tacky, your rhythm disappears, and the project starts negotiating for overtime.
The most satisfying window painting projects are not the fastest ones. They are the ones where the trim looks crisp, the glass is clean, the sash still moves, and the whole room feels brighter without anyone immediately knowing why. That is the quiet magic of well-painted windows. They do not shout. They frame everything else beautifully.
Conclusion
The pro window painting secret is not a single trick. It is a system: inspect, clean, scrape, sand, caulk, prime, paint carefully, and protect the moving parts. Use the right materials for the surface, choose a durable trim finish, and treat dry time like a rule rather than a suggestion. Do that, and your windows will look sharper, last longer, and continue opening like civilized members of the household.
Note: For homes built before 1978, test for lead-based paint or follow lead-safe practices before sanding, scraping, or disturbing old painted surfaces.