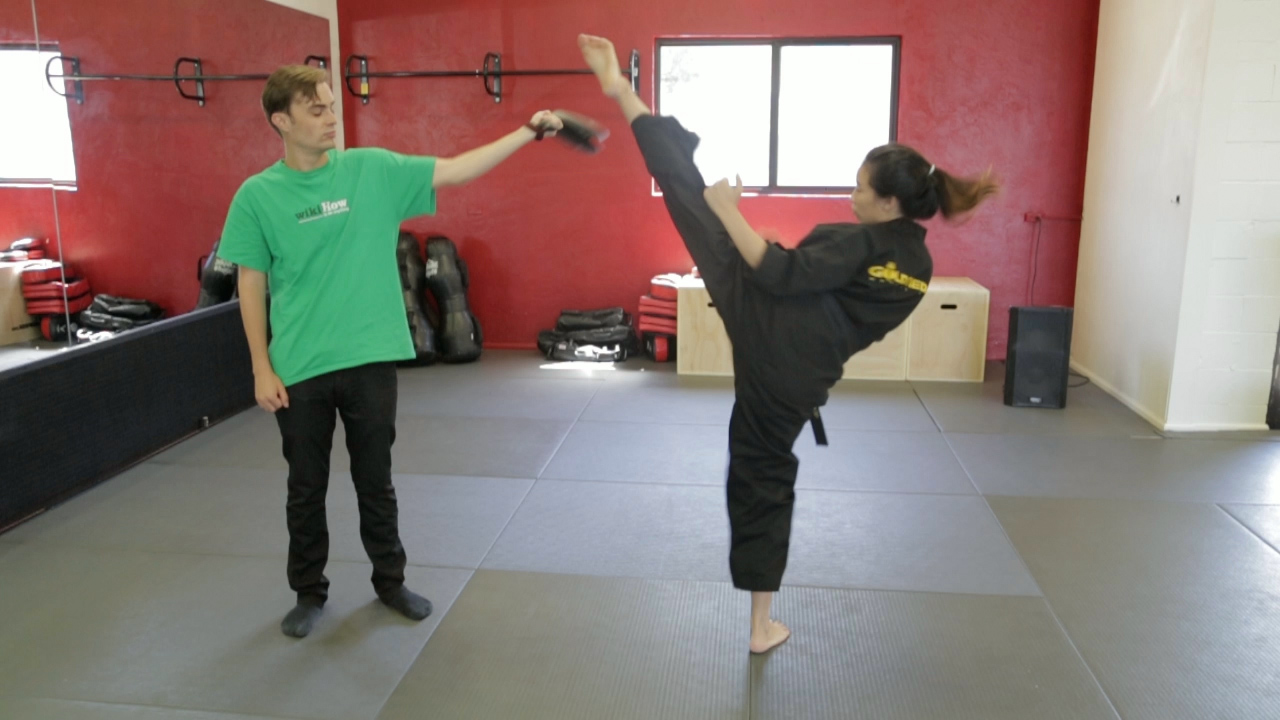
Note: This guide is for educational training and web publishing purposes. Practice taekwondo kicks with a qualified instructor, proper warm-up, safe space, and appropriate protective gear. Your living room lamp did not sign a sparring waiver.
Taekwondo is famous for fast, clean, and spectacular kicking techniques. While many martial arts use the legs, taekwondo gives kicks the spotlight, the microphone, and probably a dramatic entrance song. From the sharp front kick to the spinning power of the back kick, the major taekwondo kicks build balance, timing, flexibility, hip control, and confidence.
But here is the secret beginners learn quickly: a great kick is not just “throwing your leg up and hoping gravity is impressed.” A proper taekwondo kick has structure. It starts with stance, continues through chambering, pivoting, hip rotation, extension, impact, retraction, and recovery. Miss one piece, and the kick may feel awkward, weak, or about as graceful as stepping on a toy in the dark.
In this guide, we will break down five major taekwondo kicks: the front kick, roundhouse kick, side kick, back kick, and axe kick. These kicks appear in basic training, forms, pad drills, sparring practice, and self-discipline work. Whether you are a beginner learning your first chamber or an intermediate student trying to clean up your technique, these five methods will help you kick smarter, safer, and stronger.
Why Taekwondo Kicks Matter
The word taekwondo is often translated as the “art of kicking and punching,” and that description fits beautifully. Kicking techniques are central because they allow a practitioner to use the body’s longest and strongest limbs with speed, reach, and precision. In training, kicks develop coordination from head to toe. Your standing foot, hips, core, shoulders, hands, eyes, and breathing all have jobs to do.
Good taekwondo kicking also teaches control. A student must learn how to strike a pad without falling over, how to stop a kick at the right height, and how to return safely to stance. That last part is important. A kick that lands beautifully but leaves you wobbling like a shopping cart with one bad wheel still needs work.
Before You Kick: The Foundation
Warm Up First
Before practicing major taekwondo kicks, start with a dynamic warm-up. Use light jogging, knee lifts, hip circles, leg swings, ankle rolls, and gentle kicking motions at low height. The goal is to increase blood flow, wake up the joints, and prepare the muscles for faster movement. Save long static stretches for after training or after your body is already warm.
Use the Three-Part Kick Formula
Most taekwondo kicks become easier when you understand this simple formula: chamber, kick, rechamber. The chamber loads the leg and sets the direction. The kick extends toward the target. The rechamber pulls the leg back so you can return to balance. Skipping the rechamber is like sending an email with no subject line: technically something happened, but it was not your best work.
Keep Your Guard Up
Even when practicing slowly, keep your hands near your body and your chin protected. Many beginners drop both arms when they kick because the brain is busy yelling, “Leg! Leg! Leg!” Train your upper body to stay disciplined while your lower body works.
1. Execute the Front Kick: Ap Chagi
The front kick, or ap chagi, is one of the first kicks many taekwondo students learn. It looks simple, but do not let that fool you. The front kick teaches chambering, balance, straight-line power, and fast recovery. It is the “hello world” of taekwondo kicking, except with more hip flexors.
How to Perform the Front Kick
Start in a fighting stance or ready stance. Keep your hands up and your weight balanced. Lift the knee of your kicking leg straight up toward the target. This chamber should be tight, with the knee pointing forward. From there, extend the lower leg forward in a snapping motion. Depending on your school and target, the striking surface may be the ball of the foot, instep, or sole. After the kick reaches full extension, quickly pull the foot back to the chamber position, then place it down with control.
Key Details
The knee should rise before the foot shoots out. If the foot leads too early, the kick becomes weak and easy to read. Keep your posture tall, but do not lean backward like you are dodging an invisible sneeze. A slight lean may happen naturally, but your core should remain active and your eyes should stay on the target.
Common Mistakes
Beginners often flick the foot without raising the knee enough. Others kick high before they can kick well. Focus on clean technique at waist height before chasing head height. Another common mistake is dropping the kicking foot heavily after impact. Rechamber first, then step down. Control is part of the kick, not a decoration added later.
2. Execute the Roundhouse Kick: Dollyeo Chagi
The roundhouse kick, or dollyeo chagi, may be the most recognizable taekwondo kick. It is fast, versatile, and widely used in pad work and sparring. If taekwondo kicks had a popularity contest, the roundhouse would show up wearing sunglasses.
How to Perform the Roundhouse Kick
Begin in a fighting stance. Lift the kicking knee diagonally across the body, not straight up like a front kick. At the same time, pivot on the supporting foot so the heel turns away from the target. This pivot opens the hips and allows the kicking leg to travel horizontally. Extend the leg toward the target, striking with the instep or ball of the foot depending on the style, drill, and target. Rechamber the leg along the same path and return to stance.
Why the Pivot Matters
The pivot is the engine room of the roundhouse kick. Without it, your hip gets trapped, your knee may feel stressed, and the kick loses power. Turn the supporting foot enough that your hip can rotate freely. The kicking leg should feel like it is being carried by the hip, not dragged by the knee.
Common Mistakes
One common mistake is kicking with a flat, lazy chamber. The knee should point toward the target before the lower leg snaps out. Another mistake is leaving the kick hanging after impact. In sparring or combination practice, that slow return can make you vulnerable. Think “snap out, snap back,” not “kick and admire the scenery.”
3. Execute the Side Kick: Yeop Chagi
The side kick, or yeop chagi, is one of the most powerful linear kicks in taekwondo. It uses hip drive, body alignment, and the heel or blade of the foot to deliver force in a straight line. Done correctly, it feels less like swinging the leg and more like launching the whole body through a narrow doorway.
How to Perform the Side Kick
From a fighting stance, lift the knee high and across the body into a chamber. Turn the supporting foot so the heel points toward the target or slightly past it. Rotate your hips so your kicking hip lines up with the target. Extend the leg straight out, driving through the heel. Keep the toes pulled back and the foot shaped firmly. Rechamber the leg by pulling the knee back toward the body, then set the foot down with balance.
Body Alignment
A strong side kick depends on alignment. Your heel, hip, and shoulder should work along the same line. If your upper body collapses or twists too far, the kick loses structure. Imagine pushing a heavy door open with your heel. You would not slap the door sideways; you would drive through it with your body behind the movement.
Common Mistakes
Many students turn the side kick into a sideways front kick by pointing the knee poorly or failing to rotate the hip. Others lean too much and lose balance. Practice slowly against a pad or in the air at low height. Hold the extension for one second, then rechamber. This builds strength, control, and the kind of balance that makes instructors nod instead of reaching for emergency patience.
4. Execute the Back Kick: Dwit Chagi
The back kick, or dwit chagi, is a major taekwondo kick that combines surprise, power, and timing. It travels backward in a straight line, usually with the heel as the striking surface. Although it looks dramatic, the best back kick is actually compact and direct. Spin less, aim better.
How to Perform the Back Kick
Start in a fighting stance. Turn your head first and look over your shoulder toward the target. This is not optional. Your foot should not go on a mystery vacation. As you rotate, lift the kicking knee under the body and point your heel toward the target. Drive the heel straight back while keeping the body compact. Rechamber immediately and return to stance.
Look Before You Kick
The most important rule of the back kick is simple: see the target. Turning the head first improves aim and helps prevent wild spinning. The kick should travel like a mule kick in a straight line, not a wide swinging arc. Keep the kicking leg close to the centerline before extension.
Common Mistakes
A common error is over-spinning. Students sometimes turn so much that the back kick becomes a spinning side kick with extra confusion. Another mistake is bending forward too deeply, which makes balance harder. Keep the torso controlled, the eyes on the target, and the heel driving straight back.
5. Execute the Axe Kick: Naeryeo Chagi
The axe kick, often called naeryeo chagi, is a dramatic downward kick. The leg rises high and drops down like an axe. It requires flexibility, control, and careful training. Beginners should practice low and slow before raising the height. Your hamstrings deserve respect, not surprise attacks.
How to Perform the Axe Kick
Begin in a stable stance. Lift the kicking leg upward in front of the body, keeping the leg reasonably straight but not locked. Raise it only as high as you can control comfortably. Once the leg reaches the top of its path, bring it downward with control, using the heel or sole as the striking surface depending on the drill. Rechamber or place the foot down safely and return to stance.
Control Over Height
The axe kick is tempting because it looks impressive at head height. However, height without control is not good technique. Start by practicing to a low target. Keep your standing leg stable and avoid forcing the range of motion. Over time, flexibility, strength, and timing can improve naturally.
Common Mistakes
The biggest mistake is throwing the leg upward with no control and hoping it comes down somewhere useful. Another is leaning backward too far, which can strain the body and ruin balance. Train the axe kick as a smooth lift and controlled drop, not a circus audition.
How to Improve All Five Major Taekwondo Kicks
Practice Slowly Before Practicing Fast
Slow practice builds the details that speed often hides. If you can chamber, extend, rechamber, and land smoothly at half speed, your full-speed kick will be cleaner. Slow kicking also strengthens the supporting muscles around the hips, knees, ankles, and core.
Use Pads, Not People
For safe training, practice impact on kicking paddles, shields, or heavy bags under supervision. Pads provide feedback without turning your training partner into a complaint department. When working with a partner, communicate clearly and use controlled contact.
Train Both Legs
Your dominant leg may feel like a superhero, while the other feels like it just joined the class by accident. Train both anyway. Balanced practice improves coordination, footwork, and confidence. It also prevents your style from becoming predictable.
Record Your Technique
Video can reveal details you may not feel: a dropped hand, weak pivot, low chamber, or unstable landing. Record a few kicks from the side and front. Review them with an instructor when possible. The camera is honest, occasionally rude, but extremely useful.
Experience-Based Training Tips for Taekwondo Kicks
After spending time around taekwondo training, one lesson becomes clear: students usually do not improve because they discover a magical secret kick. They improve because they repeat simple details until those details become automatic. The major kicks in taekwondo reward patience. They also have a funny way of exposing whatever you tried to skip.
For example, the front kick teaches honesty. If your chamber is weak, the kick looks weak immediately. A student can often improve the front kick in one session by lifting the knee higher, keeping the toes pulled correctly, and rechambering before stepping down. It is not glamorous, but it works. The front kick is like a strict teacher who says, “Nice try, now do the basics again.”
The roundhouse kick teaches the value of the supporting foot. Many beginners focus only on the kicking leg, but the standing foot controls the hip. When the pivot improves, the kick suddenly feels smoother and more powerful. A good drill is to practice the pivot without kicking: lift the knee, rotate the support foot, turn the hip, then reset. It looks boring from across the room. It feels like a breakthrough when the kick finally snaps correctly.
The side kick teaches patience and strength. It is common for beginners to rush it because holding the chamber is tiring. But that chamber is where the kick is built. Practicing slow side kicks against the air can feel humbling. The leg shakes, the core complains, and the standing foot starts negotiating for better working conditions. Still, this drill develops excellent control. Over time, the side kick becomes less of a shove and more of a clean, focused drive.
The back kick teaches awareness. Students often want to spin fast because spinning feels advanced. In reality, the best back kick starts with the eyes. Look first, then kick. A slow back kick with good aim is more useful than a fast one pointed at a random corner of the room. Instructors often remind students that a back kick is not a tornado. It is a straight kick delivered from a turn.
The axe kick teaches respect for flexibility. Some students try to force the leg high too soon, which is a terrible idea dressed as ambition. Better progress comes from gradual mobility work, controlled leg raises, and low targets. A clean waist-height axe kick is better than a dramatic head-height kick that makes your hamstring write a resignation letter.
One practical experience tip is to build short combinations. Try front kick, land, roundhouse kick. Or side kick, step down, back kick. Or roundhouse kick followed by axe kick to a paddle. Combinations teach recovery, rhythm, and distance. They also reveal whether your stance after each kick is ready for the next movement.
Another helpful habit is ending every kick in balance. Do not just ask, “Did I hit the pad?” Ask, “Could I move again after hitting the pad?” Taekwondo is full of beautiful kicks, but the best practitioners can kick and recover smoothly. Balance is the receipt that proves the technique was purchased correctly.
Finally, remember that progress is not always loud. Some days your kicks feel faster. Other days the victory is smaller: a cleaner pivot, a better rechamber, a calmer landing, or hands that stay up without being reminded. Those details matter. In taekwondo, major kicks are built one small correction at a time, and every good repetition quietly adds up.
Conclusion
Learning the five major taekwondo kicks gives you a strong foundation for forms, pad work, sparring drills, and overall martial arts development. The front kick builds straight-line snapping power. The roundhouse kick develops hip rotation and speed. The side kick teaches structure and drive. The back kick sharpens awareness and direct power. The axe kick improves flexibility and controlled downward force.
The best way to execute taekwondo kicks is not to chase height or speed first. Focus on balance, chambering, pivoting, clean extension, fast rechambering, and safe recovery. Practice slowly, train both sides, warm up properly, use pads, and listen to your instructor. Do that consistently, and your kicks will become sharper, safer, and much more impressive than random leg-flinging with a black belt dream.