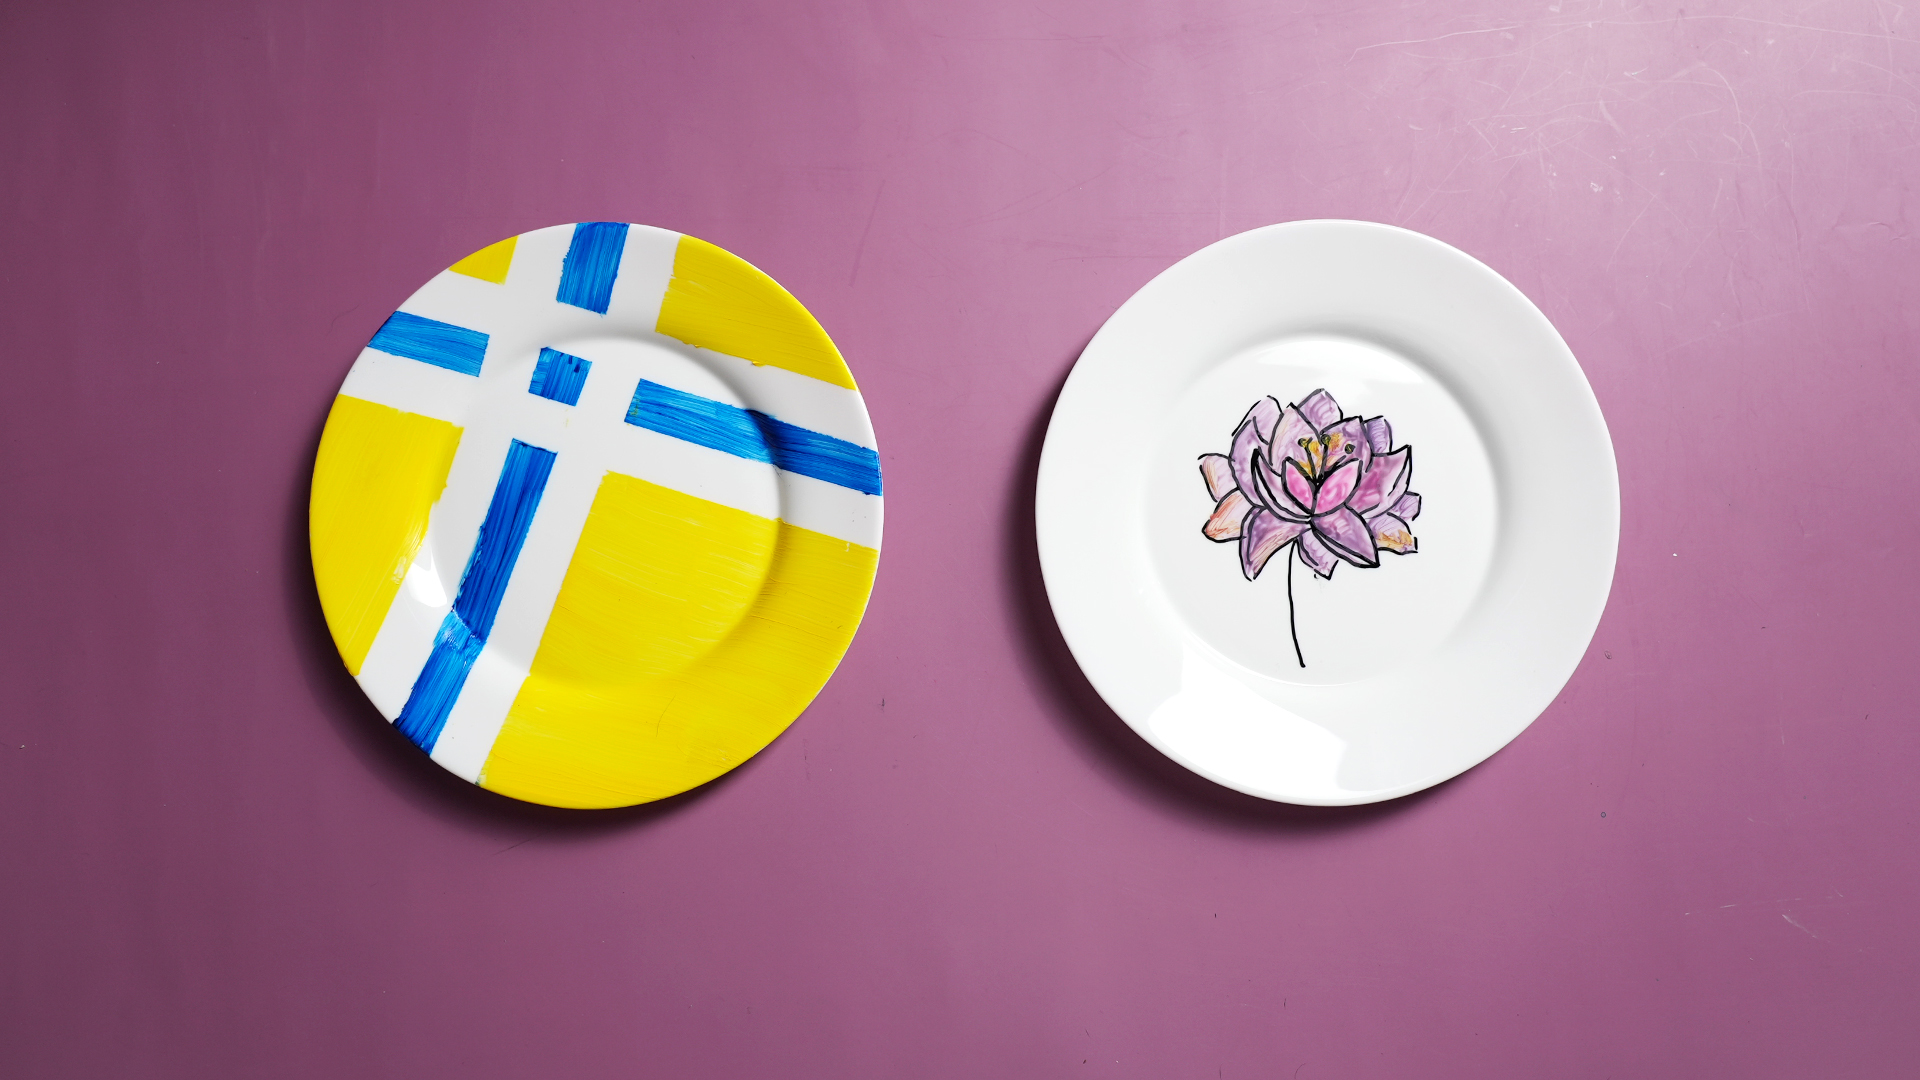
Painting ceramic plates is one of those crafts that feels fancy, looks expensive, and costs roughly the same as a fancy coffee (depending on how many paint pens you “accidentally” add to cart).
The best part? You can go from “plain white plate” to “wow, did you buy that at a boutique?” in an afternoonno kiln required.
This guide walks you through exactly how to paint ceramic plates, which paints and markers actually hold up, how to cure them, and how to create designs that look intentional
(instead of “I sneezed while holding a brush”). You’ll also get design formulas you can reuse foreverbecause once you paint one plate, you’ll suddenly want to paint twelve.
First, Decide: Display Plate or Dinner Plate?
Before you uncap a marker, decide what this plate is going to do in its career:
- Decor-only: hangs on a wall, sits on a shelf, holds keys, collects compliments.
- Serving-only: holds wrapped treats, bread in a basket liner, or food on parchmentmore “presentation” than “plate contact.”
- Everyday eating: touches food directly and gets washed a lot (this is the hardest category to do safely and durably at home).
Why it matters: most craft paints are labeled “non-toxic,” but that isn’t the same thing as “made for repeated food contact.” If you want a plate for everyday meals, the safest route is
traditional ceramic processes (underglaze + food-safe glaze fired properly in a kiln). For at-home projects, a smart rule is: keep paint off the eating surface and focus on
rims, borders, and the underside.
Choose the Right Plate (So It Doesn’t Crack, Peel, or Get Weird)
- Look for “oven-safe” or “ovenproof” plates if your paint/pen requires baking to cure.
- Glazed ceramic or porcelain is ideal for porcelain paint pens and enamel paints (the smooth surface helps clean lines).
- Avoid cracked, crazed, or heavily scratched platespaint loves to fail right where the plate is already struggling.
- Start with light colors (white or cream) to make your design pop and your life easier.
Supplies Checklist
Here’s what you’ll want on your table (and not on your sandwich):
- Oven-safe ceramic plates (or decorative plates if you’re not curing in the oven)
- Rubbing alcohol and lint-free cloth (or glass cleaner for prep)
- Ceramic/porcelain paint pens OR enamel paint made for glass/ceramic
- Soft brushes (liner brush for details; flat brush for borders)
- Pencil (for light sketching on the plate’s underside or on tape)
- Painter’s tape or masking tape (for crisp geometric designs)
- Stencils (optional) and a sponge dauber (optional but wildly satisfying)
- Paper towels + cotton swabs (for fast cleanups)
Step-by-Step: How to Paint Ceramic Plates
1) Wash, Degrease, and Don’t Touch the Clean Surface
Oils from hands are sneaky. They don’t look like anything… until your paint beads up like it’s avoiding commitment.
Wash your plate with dish soap and warm water, dry it completely, then wipe the painting area with rubbing alcohol.
After that, handle the plate by the edges.
2) Plan Your Design (Two Minutes Now Saves Two Hours Later)
If you’re freehanding, do a quick sketch on paper first. Then choose a layout that naturally fits a circle. Three easy wins:
- Border design: paint around the rim (easy, elegant, low risk).
- Center motif: small icon or monogram in the middle (clean and modern).
- All-over pattern: repeating dots, leaves, stripes (for the “I totally meant to do that” vibe).
3) Mask for Crisp Lines (Optional, but Highly Recommended)
Painter’s tape is the craft equivalent of a good haircut: it makes everything look more expensive.
Use it for stripes, scallops, geometric sections, or a perfect rim border. Press the edges down firmly so paint can’t seep under.
4) Paint Your Plate (Slow Layers Beat One Thick Panic Layer)
Whether you’re using pens or paint, thin and even is the goal. Thick paint can wrinkle, chip, or cure unevenly.
For most designs, two light coats look better than one heavy coat.
- Using paint pens: test on paper first. Keep your hand steady and let the pen do the work. If you need to pause, lift straight up to avoid blobs.
- Using brush-on enamel paint: use a soft brush, don’t overwork the same area, and let the first coat dry before the second.
- Fixing mistakes: while paint is wet, wipe with a damp cotton swab or a little alcohol on a swab (test first so you don’t smear everything).
5) Dry Time Matters (Yes, Even If You’re “Pretty Sure”)
Let the design dry exactly as the product recommends. Some systems want a short dry before curing; others want days.
Moving too fast is how you get fingerprints permanently embedded in your masterpiece. (Ask me how I know. Actually don’t.)
6) Cure the Paint (This Is What Makes It Durable)
Many ceramic and porcelain paints become more durable after curingoften by baking in a household oven.
Always follow the instructions on your specific paint/pen, but these are common curing patterns you’ll see:
| Paint / Pen Type | Typical Dry Time Before Curing | Typical Cure Method | Typical Goal |
|---|---|---|---|
| Enamel paint for glass/ceramic (brush-on) | From 1 hour to several days (varies by brand) | Place in a cool oven, heat to the set temperature, bake about 30 minutes, cool in oven | Harder finish; better wash resistance |
| Porcelain paint systems (marker or paint) | Often 24 hours | Place in a cool oven, heat to a lower temp (often around 300°F range), bake 30–40 minutes, cool in oven | “Enamel-like” durable finish |
| Porcelain brush pens (water-based ink) | Often minutes to an hour | Heat-fix in oven at moderate temp, then cool in oven | Dishwasher resistance (per product claims) |
| Traditional ceramics (underglaze + glaze) | Dry thoroughly between layers | Kiln-fired to the correct cone rating | Best option for true functional dinnerware |
Pro safety tip: put the plate in a cool oven, then let it heat up gradually. After baking, turn the oven off and let the plate cool down inside.
Sudden temperature changes are how plates crack and hearts break.
How to Create Designs That Look Like You Had a Plan
Design Formula #1: The “Fancy Rim”
Paint a border around the rim: dots, dashes, scallops, or a thin metallic line. It frames the plate and looks intentional even if you were watching a show while painting.
- Dot border: use the end of a brush handle or a dotting tool for perfectly round dots.
- Scallop border: tape a guide line, then paint half-circles along it.
- Double-line border: two thin rings with a tiny gap between them = instant “designer dish” energy.
Design Formula #2: The “Centerpiece Moment”
Keep the center small and clean: a monogram, a simple fruit icon, a tiny bouquet, a star, or a geometric shape.
This is ideal if you want to avoid painting a big area that might touch food.
Example: A holiday set where each plate has a single icon: a tree, a snowflake, a bell, a starsame style, different symbol.
Design Formula #3: The “Repeat Pattern”
Pick one tiny shape and repeat it. Polka dots are the easiest. Leaves and little dashes are the next easiest.
If spacing makes you nervous, lightly pencil dots as placement guides, then paint over them.
Technique Toolkit (Pick One and Commit)
- Stencil + sponge: stipple paint through a stencil with a sponge dauber for clean edges.
- Tape resist: mask off sections to create modern color-blocking or crisp stripes.
- Mandala dots: start with a center dot, then build outward in rings. Symmetry does half the work for you.
- Speckle effect: load a stiff brush, then flick lightly for fine speckles (protect your workspace unless you want a matching countertop).
- Handwriting or recipe plate: write a family recipe, quote, or message (great gift idea). Keep it away from direct food contact areas if the pen isn’t rated for that.
Make It Last: Care, Sealing, and the “Dishwasher-Safe-ish” Truth
If your paint system claims dishwasher resistance after curing, treat it like “stronger than average,” not “invincible.”
The dishwasher is basically a steamy, high-pressure obstacle course.
- Wait before washing: even after curing, many finishes continue hardening for a while.
- Top rack only if the product recommends it.
- Avoid soaking and abrasive scrubbers.
- Microwave caution: only microwave if your plate and your paint system both allow it. Metallic paints are a hard no.
- Skip spray sealers on eating surfaces: many clear sprays are not designed for repeated food contact.
Food-Safety Reality Check (Important, Not Dramatic)
Here’s the honest deal: it’s easy to make a plate that looks great. It’s harder to guarantee a plate is safe for repeated, direct food contact without the right materials and testing.
Some ceramics and decorative glazes can leach harmful substances (like lead) under certain conditions, and regulations focus on what can migrate into food.
Practical guidance for home projects:
- Keep paint off the food surface whenever possible (decorate rims and undersides).
- Use products specifically labeled for ceramic/glass and follow the manufacturer’s curing instructions.
- If you need truly functional dinnerware, use underglazes and a properly fired food-safe glaze (kiln-fired to the correct cone rating).
- If kids will use it, be extra conservative: no questionable coatings, no flaking finishes, no DIY shortcuts.
Troubleshooting: Common Problems (and the Fix)
Paint is beading up
Cause: surface oils or residue. Fix: clean again with alcohol; avoid touching the painting area.
Edges are bleeding under tape
Cause: tape not pressed down or paint too wet. Fix: burnish tape edges; use less paint; stipple near tape lines.
Design smudged while drying
Cause: impatience (the universal crafting villain). Fix: allow full dry time; handle by edges; consider doing one color per session.
Paint chipped after curing
Cause: thick paint, poor adhesion, or harsh washing. Fix: thinner coats; correct curing; gentler washing; keep paint off high-wear zones.
Plate cracked in the oven
Cause: thermal shock or plate not oven-safe. Fix: use ovenproof plates; start in a cool oven; cool down in the oven.
Quick Painted Plate Ideas You Can Finish in One Afternoon
- Monogram + border: initial in the center, dot border on the rim.
- Modern minimal: one bold stripe and a tiny icon (lemon, olive branch, star).
- Seasonal set: same border, different holiday icon on each plate.
- Kids’ “signature plate”: handprint on the underside and the date (keeps the eating surface clear).
- Brunch plates: scalloped rim in one color + gold accent line (if used for display/serving with a liner).
Final Thoughts
Learning how to paint ceramic plates is mostly about doing the boring steps (cleaning and curing) so the fun steps (designing and painting) actually last.
Start with a simple border plate, cure it properly, and see how it holds up in real life. Once you find a paint system you like, you can build a whole set with the same design language:
matching, intentional, and suspiciously professional.
Extra: Real-World Experiences Painting Ceramic Plates (So You Can Skip My Mistakes)
The first time I tried painting ceramic plates, I learned a humbling truth: a plate is basically a shiny mirror that reflects every bad decision.
I cleaned it quickly (not thoroughly), sketched a design with confidence I had not earned, and started painting like I was racing a timer.
Ten minutes later, the paint started beading up in certain areaslike the plate was politely rejecting my artistic vision. That’s when I realized the problem wasn’t “bad paint,”
it was “oily fingerprints.” Ceramic doesn’t forgive. It remembers. Forever. The fix was simple: wash, dry, wipe with alcohol, and handle by the edges.
The lesson was not simple: prep is the unglamorous hero of durability.
Experience #2 was the Great Tape Betrayal. I had a crisp stripe design in mindvery modern, very “I shop in minimalist stores.”
I slapped on painter’s tape, painted a bold color, and peeled the tape immediately because I wanted that satisfying reveal.
The reveal was satisfying… in the same way a plot twist is satisfying when the plot twist is “your paint bled under the tape.”
Here’s what helped on later plates: press tape edges down firmly (especially on curved rims), use less paint near the edge,
and apply paint in light dabs instead of wet swipes along the tape line. Also: waiting a little before peeling helps, but waiting too long can cause the edge to lift.
So yes, there is a Goldilocks zone. Crafts are always like that.
The third experience was oven-curing anxiety. I put a plate in a preheated oven once (because I was hungry and impatient and thought, “Heat is heat, right?”).
Wrong. That plate made a sad little cracking sound that I can still hear in my soul. After that, I respected the “cool oven” rule:
put the plate in while the oven is off, let it heat gradually, then let it cool inside the oven. Not only did plates survive,
the finished designs looked smoother and more consistent. The slow temperature change also made the whole process feel more like “curing” and less like “stress testing.”
Experience #4 was the Dishwasher Reality Check. I made a gorgeous plateclean lines, perfect dots, the kind of thing you want to photograph next to a latte.
I cured it, admired it, and then tossed it in the dishwasher like a champion. When it came out, the design had faded just enough to look… tired.
Not destroyed, but definitely not thriving. That’s when I adjusted how I used painted plates: if it’s a decorative plate, it stays decorative.
If it’s a serving plate, food sits on a liner or parchment. If it’s going to be washed often, I keep the paint on low-wear zones like the rim or underside,
and I hand-wash like the plate is a tiny piece of art (because it is).
Finally, the best surprise: design consistency is easier than you think. The most “professional” set I made wasn’t the most complexit was the most consistent.
Same border style on every plate, same color palette, and just one small variation per plate (a different tiny icon in the center, or a different dot pattern).
If you’re making gifts, that strategy wins. People don’t notice that the design is simple; they notice it looks cohesive.
And cohesive is basically the secret handshake of “I totally know what I’m doing.”
If you’re new, here’s the simplest way to start: choose one color, paint a rim border, cure it exactly as directed, and use it as a display plate for a week.
If it still looks great, scale up. If it looks rough, you learned on one plate instead of a whole setwhich is the crafting version of wearing a helmet.