A galley kitchen may be narrow, but it does not have to feel like a culinary hallway where cabinet doors, elbows, and dishwasher racks compete for survival. With two parallel runs of cabinetry and a central aisle, this classic layout can be one of the most efficient kitchen configurations available. The secret is not adding more stuff. It is arranging every inch with purpose.
The following galley kitchen design tips focus on comfortable movement, practical storage, useful counter space, layered lighting, and visual balance. Whether you are planning a full remodel or simply trying to stop your toaster from occupying half the prep zone, these ideas can help your small kitchen work harder and look better.
Why Galley Kitchens Can Work So Well
A traditional galley kitchen has cabinets, counters, or appliances positioned along two facing walls. Because the sink, refrigerator, cooking surface, and storage can be placed close together, the cook does not have to cross a large room every time a spoon or onion is needed.
This compact arrangement is especially useful in apartments, historic homes, townhouses, and other properties where square footage is limited. It can provide generous storage and countertop space relative to its footprint. However, a poorly planned galley can feel dark, congested, and frustrating. Good design makes the difference between an efficient workspace and a daily obstacle course.
1. Measure the Aisle Before Choosing Anything Else
Begin with the central aisle because it determines how comfortably people can move, open appliances, and work at opposite counters. Kitchen planning guidance from the National Kitchen and Bath Association commonly recommends a work aisle of at least 42 inches for one cook and 48 inches for multiple cooks. Existing homes do not always offer that much room, but these measurements provide useful targets during a remodel.
Measure the distance between counter edges rather than between walls. Then check what happens when the oven, refrigerator, dishwasher, and cabinet doors are open. A 40-inch aisle may appear adequate on paper, but not when a dishwasher rack turns the room into a stainless-steel roadblock.
Test the Layout With Tape
Before ordering cabinets, mark their proposed depth and appliance locations on the floor with painter’s tape. Walk through typical routines such as unloading groceries, preparing breakfast, or moving a hot pan from the range. This inexpensive exercise can reveal collisions that a floor plan may hide.
Avoid oversized counter overhangs, bulky decorative trim, and deep handles that project into the walkway. In a narrow kitchen, even a few unnecessary inches can affect circulation.
2. Design Work Zones Around Your Actual Routine
The traditional kitchen work triangle connects the sink, refrigerator, and range. That concept remains helpful, but modern kitchens often function better when planned as zones. A galley layout might include a food-storage zone near the entrance, a preparation zone beside the sink, a cooking zone around the range, and a cleanup zone containing the dishwasher and trash pullout.
Store tools and ingredients where they are used. Knives, cutting boards, mixing bowls, and spices should be near the main prep surface. Pots and heat-safe utensils belong close to the range. Dishes and glasses should be within easy reach of the dishwasher so unloading does not require a kitchen-wide parade.
Keep Household Traffic Out of the Cooking Zone
When possible, place the refrigerator, snack drawer, or beverage station near the entrance. Family members can grab a drink without walking through the busiest work area. This is particularly valuable in a pass-through galley connecting two rooms.
For households with two regular cooks, consider assigning one wall to preparation and cooking while the opposite wall supports storage and cleanup. The goal is to reduce unnecessary crossing and prevent the famous kitchen dance known as “Sorrybehind you.”
3. Protect a Generous Stretch of Counter Space
Continuous counter space is more useful than several narrow sections separated by appliances. During planning, identify the longest possible uninterrupted surface and treat it as the primary preparation zone. Ideally, it should be close to both the sink and cooking surface.
Avoid automatically centering every appliance for visual symmetry. Moving the range slightly to one side may create a much more practical chopping area. Symmetry is lovely, but it has never diced a carrot.
Remove Countertop Clutter
Small appliances can quickly consume a narrow kitchen. Consider an appliance garage, pullout shelf, microwave drawer, wall-mounted rail, or pantry station for equipment that does not need permanent countertop residency.
A fitted board over part of the sink can create temporary prep space. A pullout work surface hidden beneath the countertop can provide another useful landing area. Renters can use a sturdy rolling cart, provided it does not reduce the aisle to an uncomfortable width.
4. Use Vertical Storage Without Creating a Tunnel
Floor-to-ceiling cabinetry can dramatically increase galley kitchen storage, particularly for pantry goods, baking equipment, and infrequently used serving pieces. Slim pullout pantries also make productive use of narrow gaps that might otherwise be filled with decorative panels.
However, installing tall, heavy cabinets on both sides of an already narrow room can create a boxed-in effect. A better strategy is to concentrate full-height storage on one wall or at one end of the kitchen. Use lighter upper cabinets, glass-front doors, or open shelves elsewhere to balance the visual weight.
Make Deep Cabinets Easier to Use
Drawers and pullout trays are generally more accessible than deep fixed shelves. Full-extension drawers allow users to see items at the back without kneeling down and conducting an archaeological expedition through forgotten cookware.
Useful cabinet additions include vertical tray dividers, narrow spice pullouts, corner mechanisms, drawer organizers, and rollouts for pots or pantry goods. Use the highest shelves for seasonal or rarely needed items, and keep everyday supplies between knee and shoulder height.
5. Choose Appliances That Fit the Room and Your Lifestyle
Large appliances can dominate a compact kitchen. Before selecting the widest refrigerator or a professional-style range, evaluate how much capacity your household genuinely uses. Counter-depth refrigerators, 24-inch dishwashers, compact ranges, and combination microwave ovens can preserve valuable floor and counter space.
Smaller does not automatically mean less functional. A properly selected appliance can offer the features a household needs without overwhelming the room. Built-in or integrated models also create cleaner sightlines, especially when appliance fronts align with surrounding cabinetry.
Check Every Door Swing
Make sure the refrigerator can open fully without striking a wall, handle, or opposite counter. Position the dishwasher so its open door does not trap the person standing at the sink. Whenever possible, avoid placing the range directly across from another major appliance that will frequently be open.
Also consider ventilation early in the design. A correctly sized, properly ducted range hood helps remove heat, moisture, grease, and cooking odorsimportant in a compact room where last night’s fish can otherwise become today’s unofficial air freshener.
6. Layer the Lighting From Ceiling to Counter
A single ceiling fixture rarely provides enough illumination for a galley kitchen. Upper cabinets can block overhead light and cast shadows directly onto work surfaces. A complete kitchen lighting plan should combine ambient, task, and accent lighting.
Use ceiling-mounted or recessed fixtures for general illumination. Add under-cabinet lighting above primary work areas, particularly near the sink, range, and prep counter. Accent lighting inside glass cabinets or above open shelves can add depth and warmth.
Maximize Natural Light
Keep windows as unobstructed as possible. If the kitchen has a glazed exterior door, choosing a design with a larger glass area can bring more daylight into the corridor. A partial wall opening, interior window, or glazed partition may also connect the kitchen visually to an adjacent room without eliminating all separation.
Reflective surfaces can distribute available light. Consider satin or semigloss paint, pale tile, stainless steel, glossy accents, or a carefully placed mirror. The goal is gentle reflection, not turning the kitchen into a carnival funhouse.
7. Reduce Visual Weight With a Balanced Material Palette
Light colors can make a galley kitchen feel more open, but white is not the only option. Warm cream, pale gray, muted blue, soft green, natural oak, and other restrained shades can create an airy appearance while adding character.
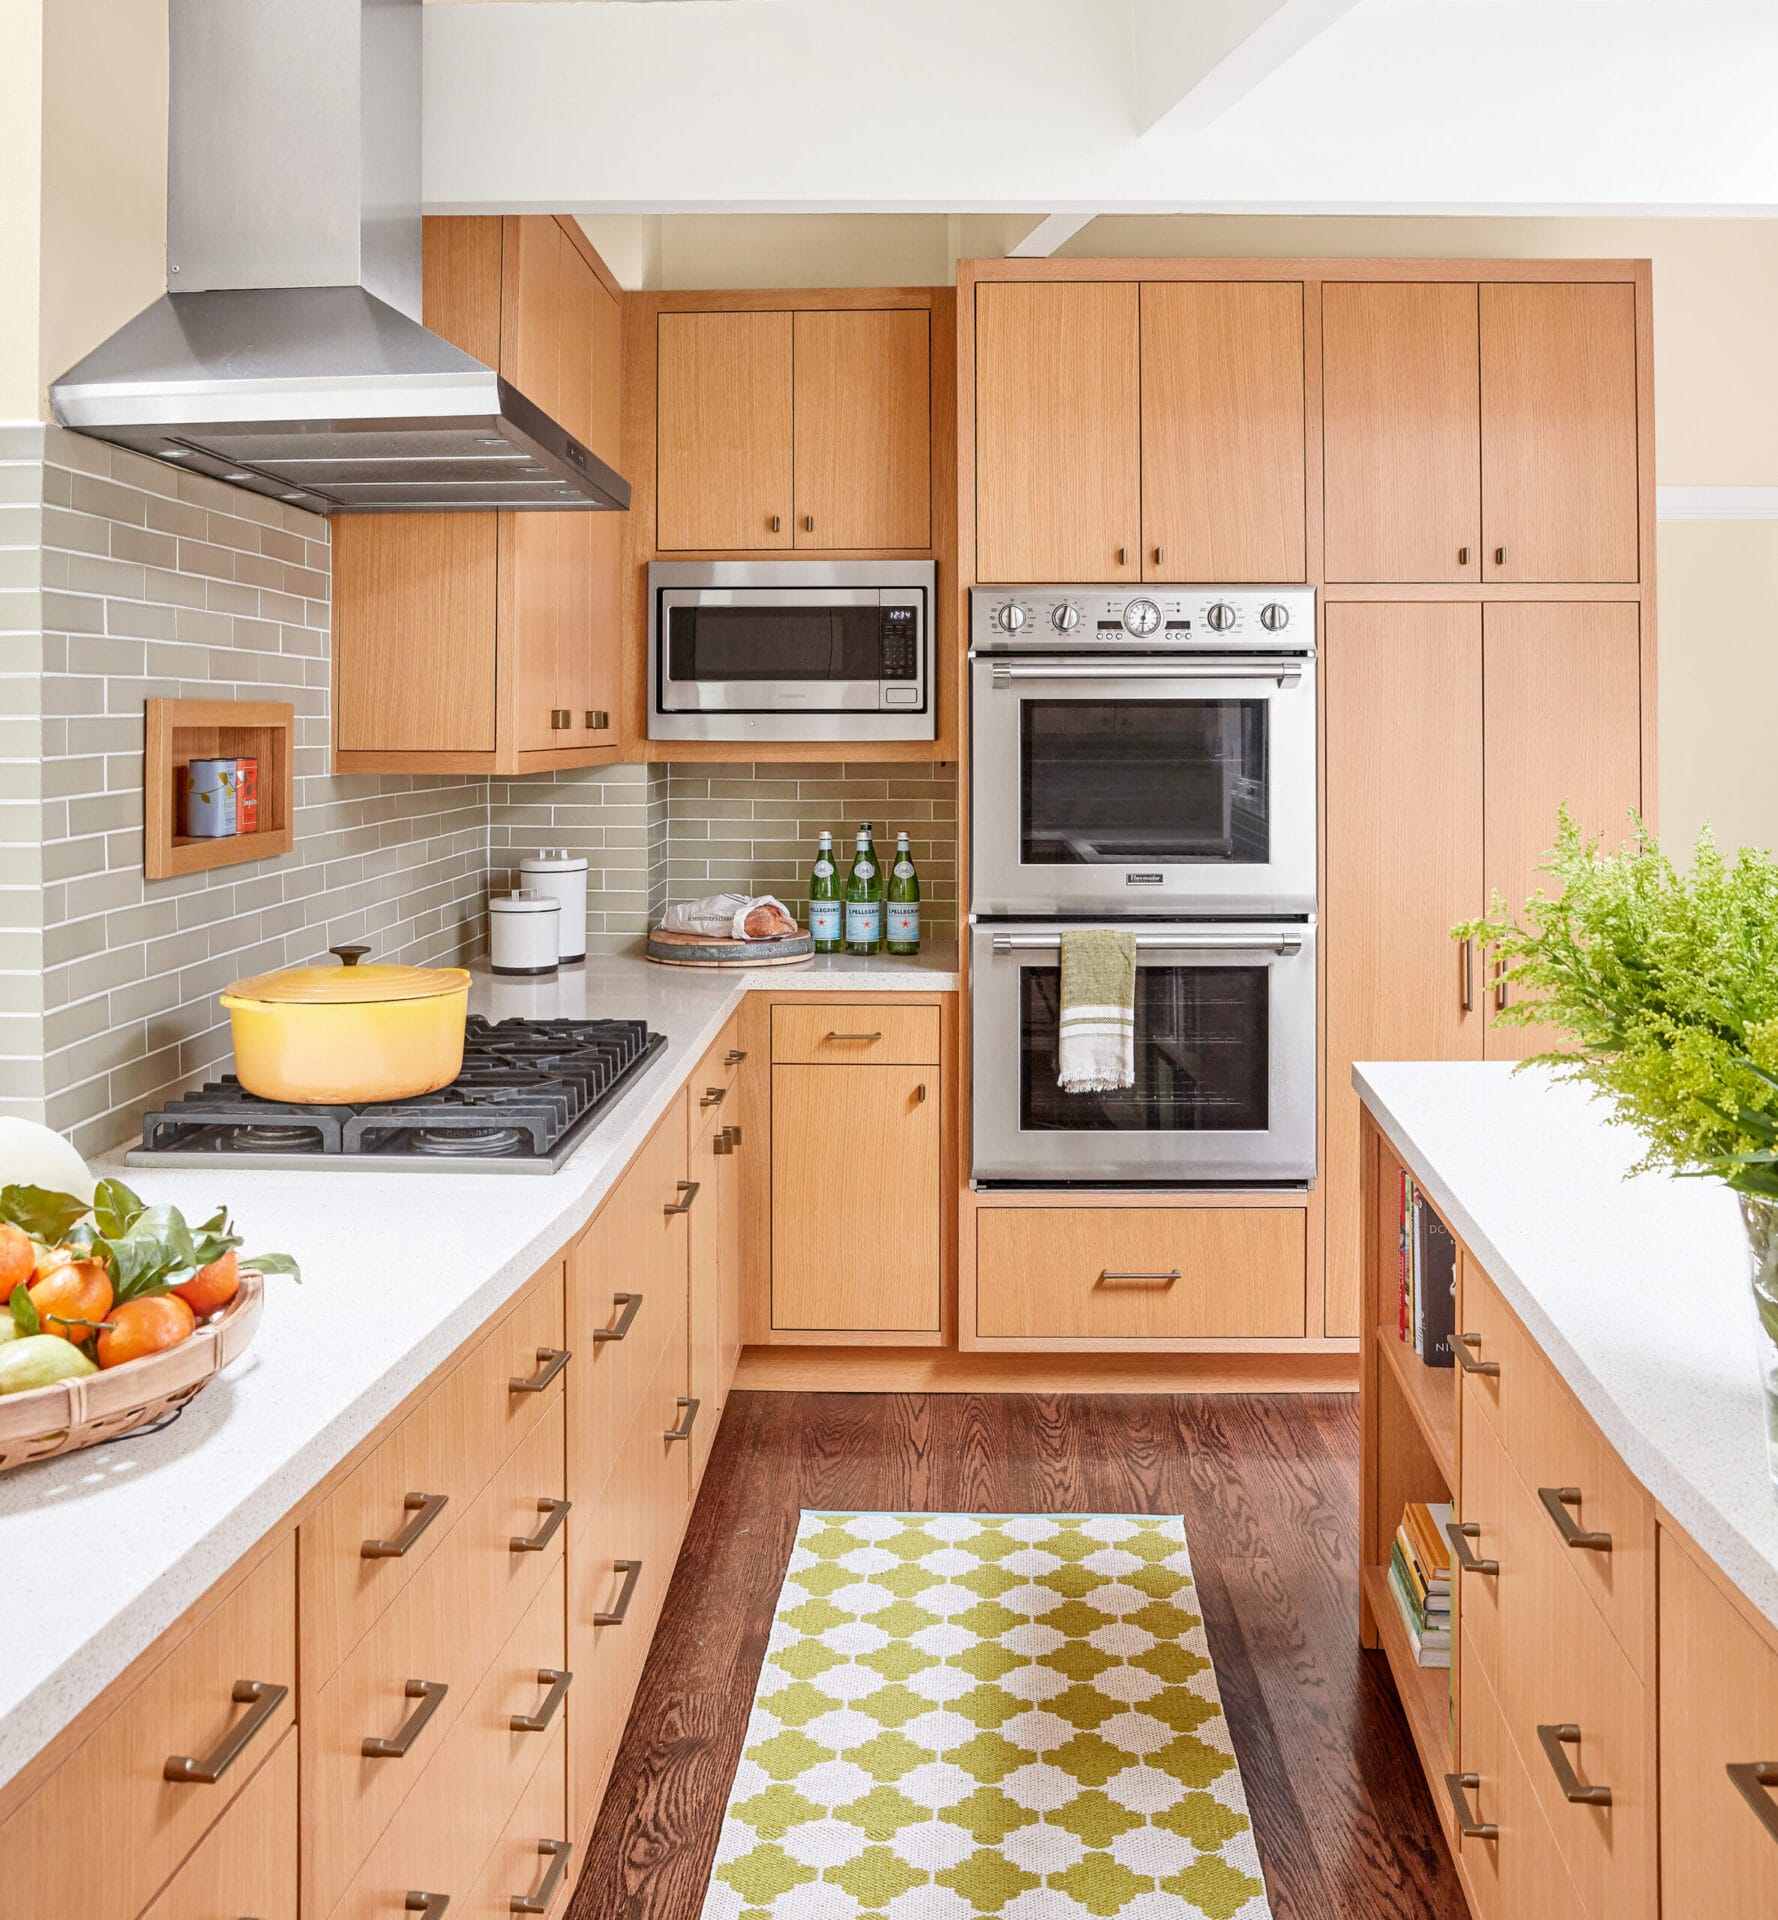
A useful technique is to place darker or visually heavier finishes on lower cabinets and lighter finishes above. This grounds the room without making the upper half feel crowded. Painting cabinets, walls, and trim in closely related tones can also reduce visual interruptions and make the space appear longer and calmer.
Use Repetition to Create Continuity
Repeating a limited group of materials helps narrow kitchens feel intentional. Continue the backsplash along both walls, use consistent cabinet hardware, or carry the flooring into the adjoining room. Long flooring lines can emphasize the kitchen’s length, while a patterned floor can add energy when the cabinetry is simple.
Avoid combining too many competing finishes. A dramatic backsplash, heavily veined countertop, patterned floor, ornate cabinet doors, and three metal finishes may each be attractive individually, but together they can make a small room feel restless.
8. Prevent Doors, Drawers, and Hardware From Fighting
Every moving component matters in a narrow kitchen. Adjacent drawers should not block one another, cabinet pulls should not collide at corners, and handles should not catch clothing as people pass. Use a detailed cabinet plan to check each door and drawer in its open position.
Low-profile pulls, recessed handles, edge pulls, or handleless cabinet fronts can reduce projections into the aisle. Pocket doors are useful for pantry cabinets or appliance stations because they disappear into the cabinet instead of remaining open in the workspace.
Keep the Ends of the Galley Clear
Do not place a tall obstruction where it will block daylight or interrupt the view through the kitchen. If the galley ends at a window, dining area, or attractive architectural feature, preserve that sightline. It will visually pull the eye beyond the cabinetry and make the room feel less confined.
When possible, position tall refrigerators and pantry units near the entrance or group them into a single storage wall. This approach can create a cleaner, less fragmented appearance.
9. Add One Strong Design Moment
Functional does not have to mean forgettable. Because a galley kitchen has a limited footprint, one focused design feature can make a large impact without creating clutter. Consider a colorful backsplash, sculptural ceiling fixture, patterned floor, distinctive range hood, framed artwork, or painted window trim.
The end wall is often the ideal location for a focal point because it is visible from the entrance. Wallpaper, tile, open shelves, or a bold piece of art can draw attention through the room and reduce the emphasis on its narrow proportions.
Let Useful Objects Provide Personality
Attractive cutting boards, ceramic containers, glassware, and cookware can double as decoration. Display only objects that are useful or genuinely meaningful. Open shelves look spacious when they contain a controlled collection; they look considerably less spacious when supporting twelve travel mugs, three unopened gadgets, and a lonely stack of takeout menus.
Plants can soften hard kitchen surfaces, provided they do not occupy essential prep space. A small herb pot near a sunny window, trailing plant on a high shelf, or narrow planter can add life without interfering with daily tasks.
Common Galley Kitchen Design Mistakes
Even expensive finishes cannot rescue an inconvenient layout. Before finalizing the design, watch for these common problems:
- Installing appliances that cannot open comfortably within the available aisle
- Dividing the countertop into several sections too small for food preparation
- Using upper cabinets on every available inch of both walls
- Relying on one central ceiling light and ignoring task lighting
- Placing the refrigerator where household traffic interrupts the cook
- Adding an island or cart that permanently obstructs circulation
- Choosing decorative storage without planning where everyday items will go
- Moving plumbing and gas lines without considering the effect on the budget
Planning should begin with daily behavior rather than a showroom photograph. A beautiful kitchen that does not support the way its owners cook, clean, shop, and socialize will soon become a very attractive source of irritation.
Experiences and Lessons From Improving Galley Kitchens
One of the most consistent lessons from galley kitchen projects is that small layout changes often matter more than dramatic cosmetic upgrades. Homeowners may initially focus on cabinet color or countertop material, but daily satisfaction is usually shaped by simpler questions: Is there enough room beside the range? Can two people pass each other? Where does the trash go while vegetables are being prepared?
In one typical older-kitchen scenario, the refrigerator sits deep inside the galley while the main prep counter is located near the entrance. Every family member who wants milk, fruit, or cold water must walk through the cook’s work zone. Moving the refrigerator toward the entrance can improve circulation even when the rest of the layout remains unchanged. It is not the glamorous part of a remodel, but neither is repeatedly being bumped while carrying a hot skillet.
Another common experience involves homeowners removing upper cabinets to make the room feel open, only to discover that the lost storage migrates onto the counters. Open shelving works best when it is part of a complete storage plan. Frequently used glasses, plates, and bowls can look attractive on shelves, while food packages, mismatched containers, and small appliances generally benefit from closed cabinetry. The most successful designs often combine open space on one side with concentrated full-height storage on the other.
Lighting improvements can also feel disproportionately effective. Under-cabinet lights do not increase the kitchen’s physical size, yet they make counters easier to use and reduce dark horizontal bands beneath wall cabinets. A brighter backsplash and a better ceiling fixture can further improve the sense of openness. In many modest updates, these changes produce more noticeable daily benefits than replacing a serviceable countertop.
Countertop clutter is another recurring challenge. During planning, homeowners often imagine clean surfaces but forget to assign homes to the coffee maker, toaster, blender, paper towels, fruit bowl, and charging cables. A realistic inventory prevents this problem. An appliance garage may suit a homeowner who uses several small appliances each morning, while a pullout shelf or nearby pantry station may work better for someone who uses them occasionally.
Real-world use also demonstrates the value of creating landing areas. A refrigerator needs nearby counter space for grocery bags and ingredients. The oven benefits from a heat-resistant surface beside it. The sink requires room for washed produce and dirty dishes. Without these small landing zones, users end up balancing items wherever they fit, which is how a bag of tomatoes eventually meets the floor.
Budget-conscious renovations provide another valuable lesson: keeping major utilities in approximately the same locations can preserve funds for storage hardware, lighting, ventilation, and durable surfaces. Moving a sink or gas line may be worthwhile when it solves a serious functional problem, but moving everything merely to make the plan look different can consume a large portion of the budget.
Finally, successful galley kitchens tend to reflect restraint rather than deprivation. Owners do not have to remove every decorative object or select an all-white palette. They simply need to choose priorities. A patterned floor can coexist with simple cabinetry. Dark cabinets can work with strong lighting and pale counters. Open shelves can display a curated collection while closed drawers handle the less photogenic necessities of real life.
The best experience comes from treating the galley layout as an advantage. Its compact dimensions can shorten walking distances, keep tools close at hand, and create a focused environment for cooking. When storage, circulation, lighting, and personality are carefully balanced, a narrow kitchen can be more comfortable and efficient than a much larger room.
Conclusion
The smartest galley kitchen design tips do not attempt to disguise the layout or force it to behave like a sprawling open kitchen. They make the most of its natural efficiency. A well-measured aisle, logical work zones, uninterrupted prep space, right-sized appliances, accessible storage, and layered lighting can transform a cramped corridor into a practical cooking space.
Start by studying how the kitchen is used now. Identify the places where people collide, counters become crowded, or supplies are difficult to reach. Solve those problems before selecting decorative finishes. Once the functional foundation is right, color, hardware, tile, artwork, and lighting can give the kitchen a distinctive personality.
Note: This article synthesizes established planning and design guidance from the National Kitchen and Bath Association and reputable U.S. home publications, including This Old House, Better Homes & Gardens, HGTV, Architectural Digest, Houzz, The Spruce, Apartment Therapy, Martha Stewart, Southern Living, Dwell, and Bob Vila. Measurements, ventilation, electrical work, accessibility requirements, and construction details should be verified with qualified local professionals and applicable building codes.